Oracle SOA Suite - BPEL - Creating and configuring Database Adapter
Applies for (validated scenarios)::
Oracle SOA Suite 11g - Version 11.1x and higher
The information in this document applies to any platform
Purpose
Friends, We are going to do something very simple: create / configure a database adapter that will be used in our orchestration, and then you can take this example to manipulate message response, structures, etc.
no more we start:
We prepare the database objects
Here we create the objects that will host the information that will be consumed by our integration service. For example in our case, we do the following:
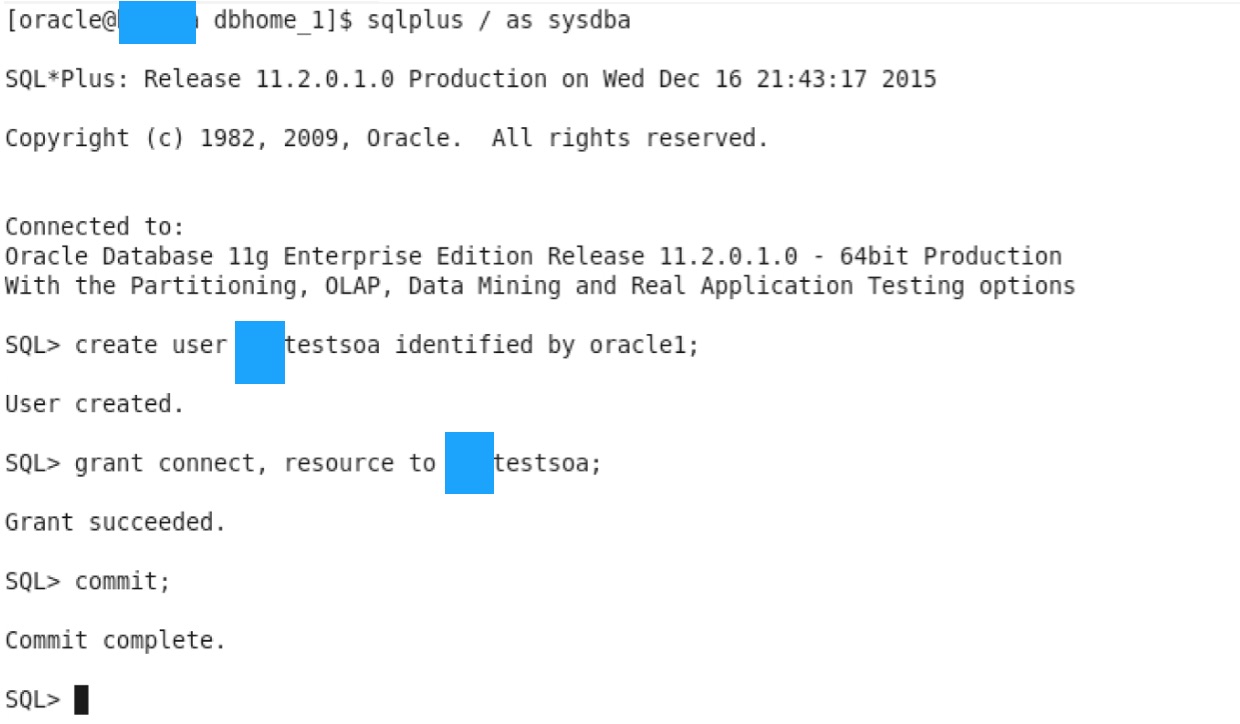
We create the user who will host the necessary objects for our task
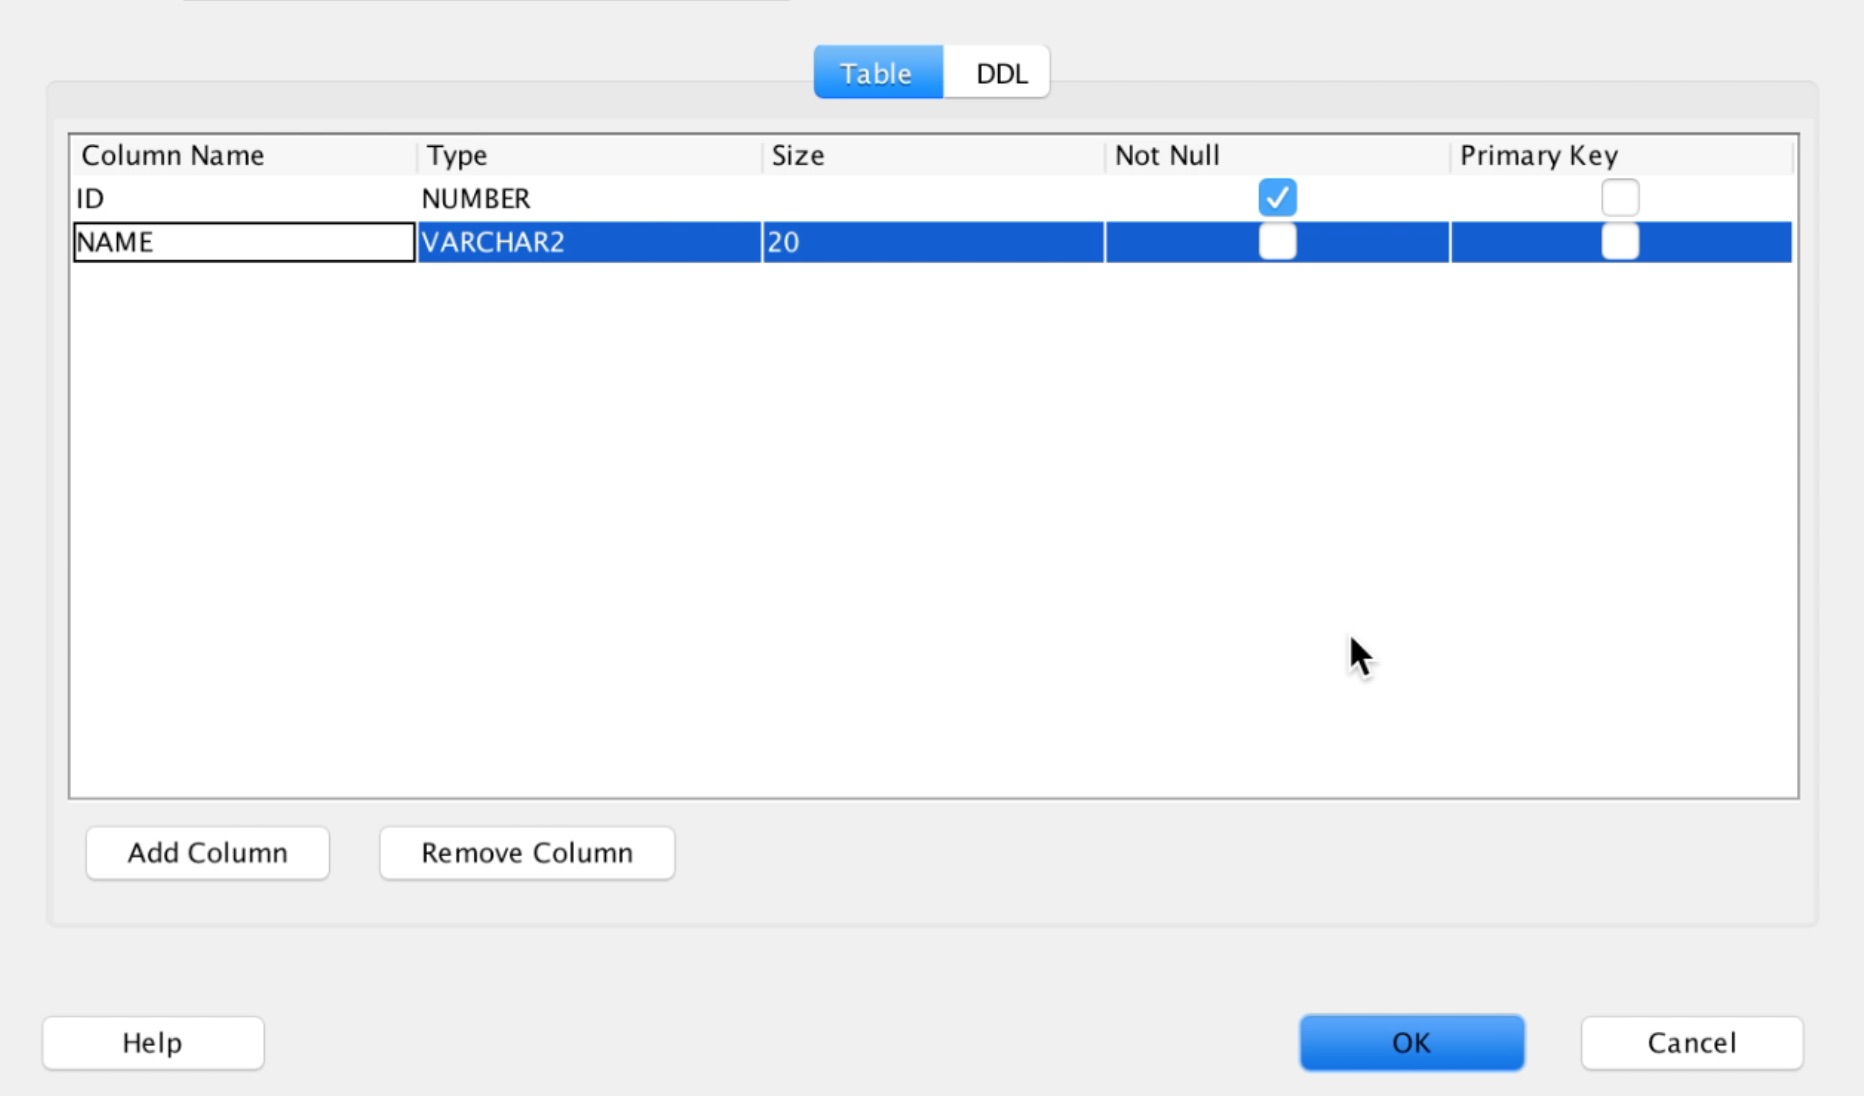
We create the basic structure of a table that will host information (from any manager or command line):
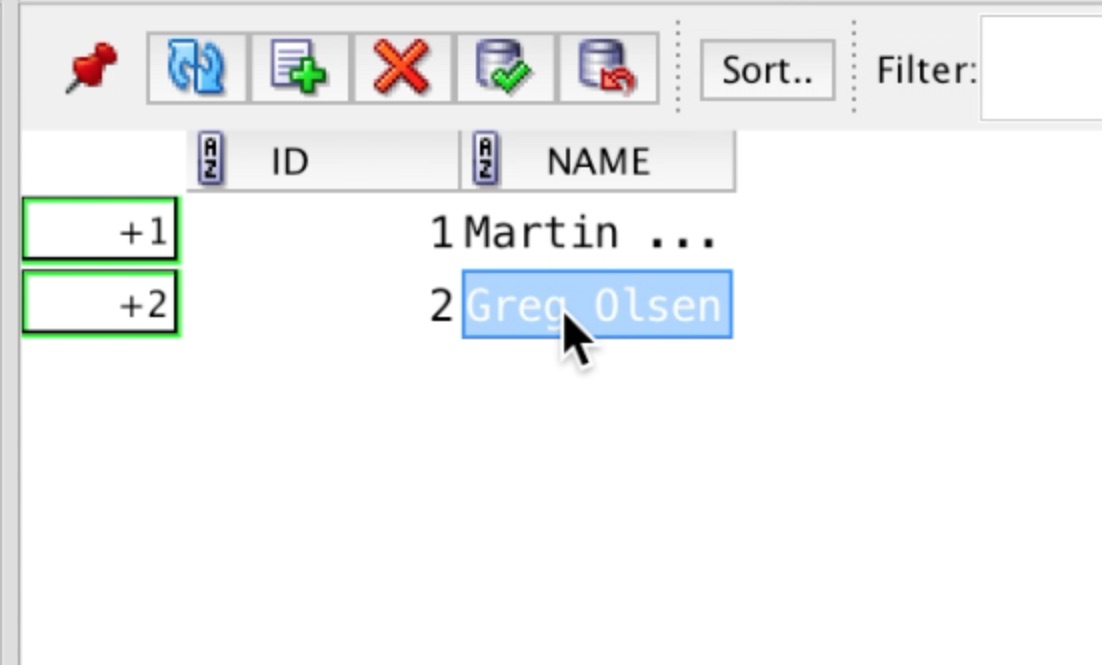
We add a few records:
Creating SOA project in JDeveloper
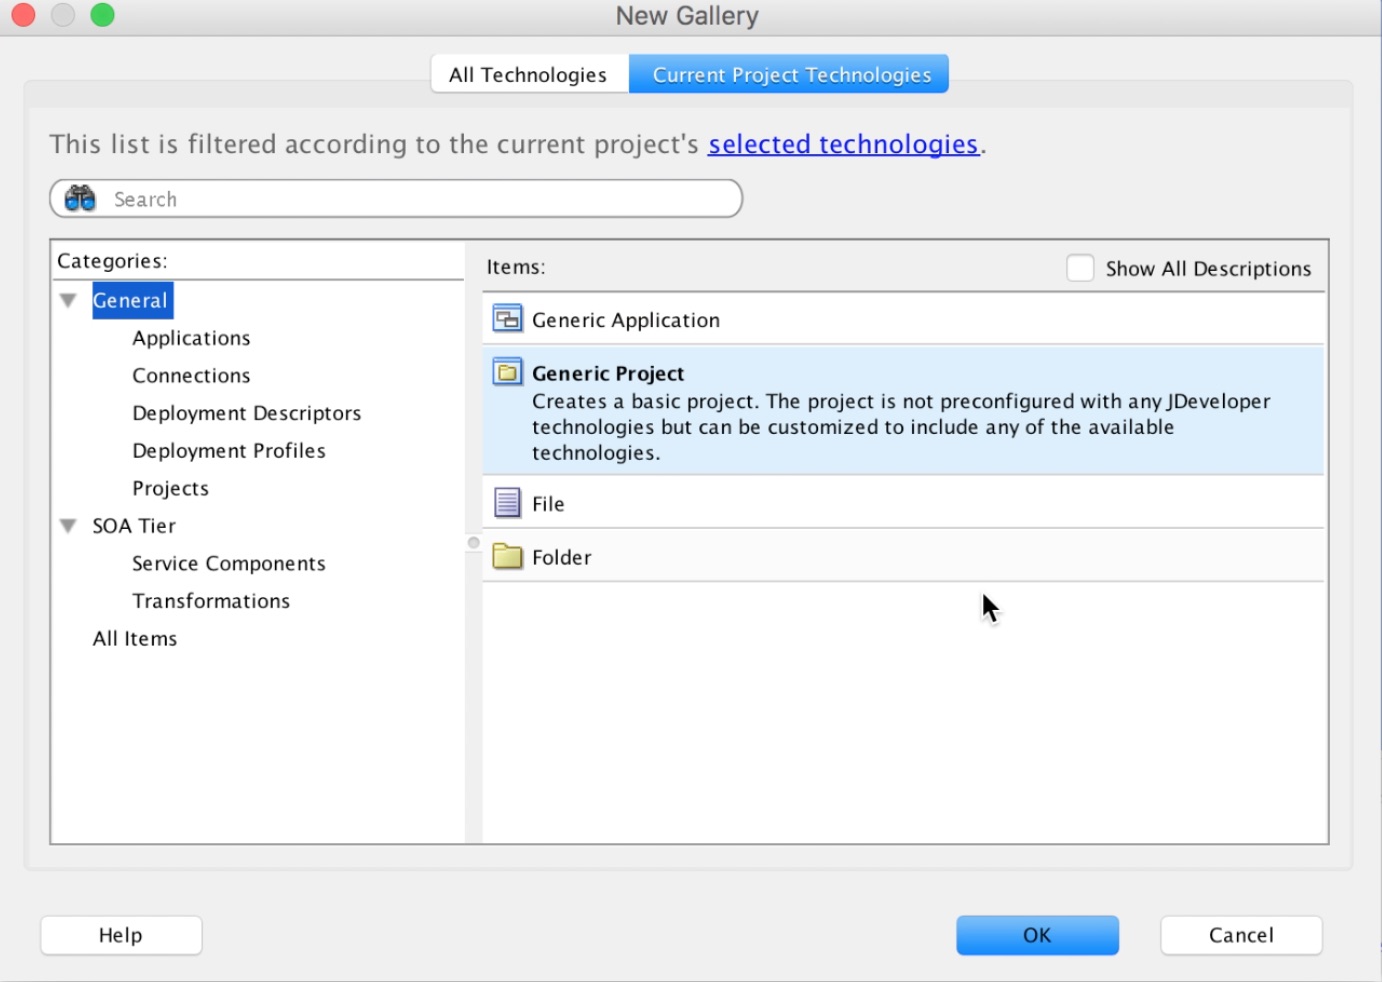
ANow, we proceed with the creation of our integration project (a compound with an orchestration). Right click on the projects> New section

we select the option-> Generic Project-> Ok
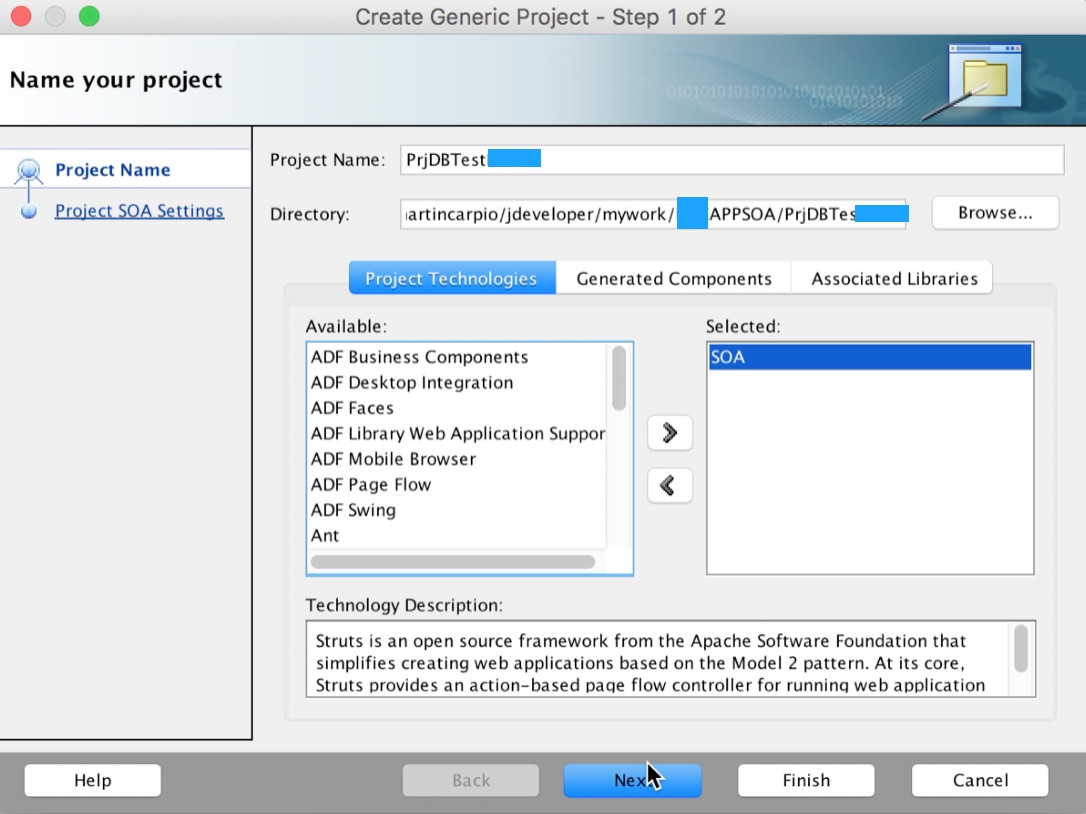
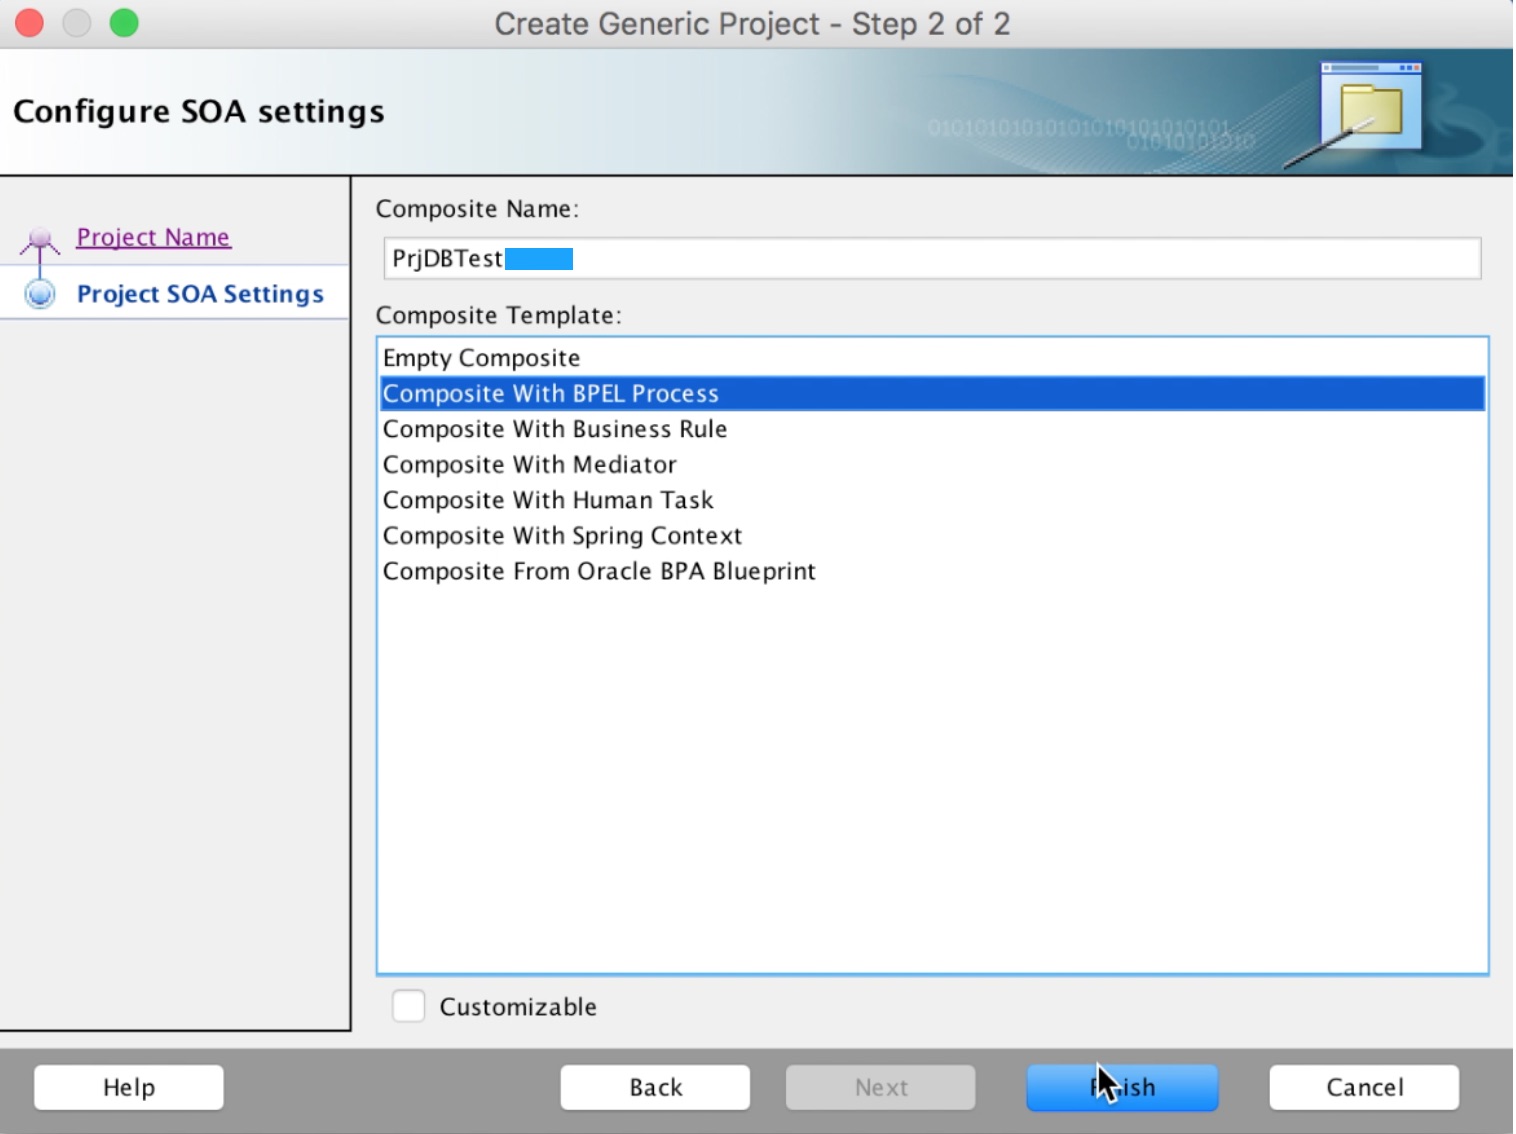
We establish a name for our project, select the SOA technology and click on-> Next
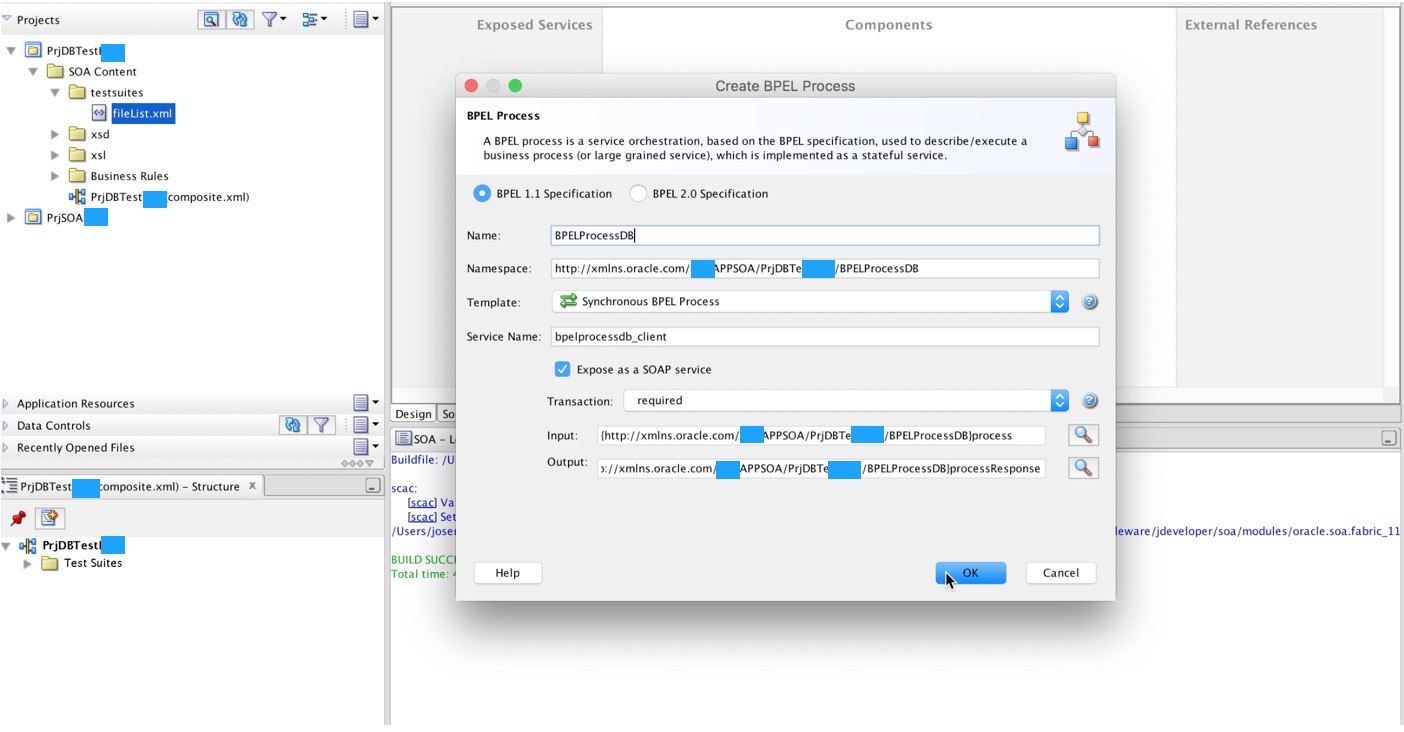
Immediately the details for creating our BPEL process appear, we establish a name and indicate a synchronous (immediate) response, as shown in the image, click OK
A compound like the following appears (We save all our settings):
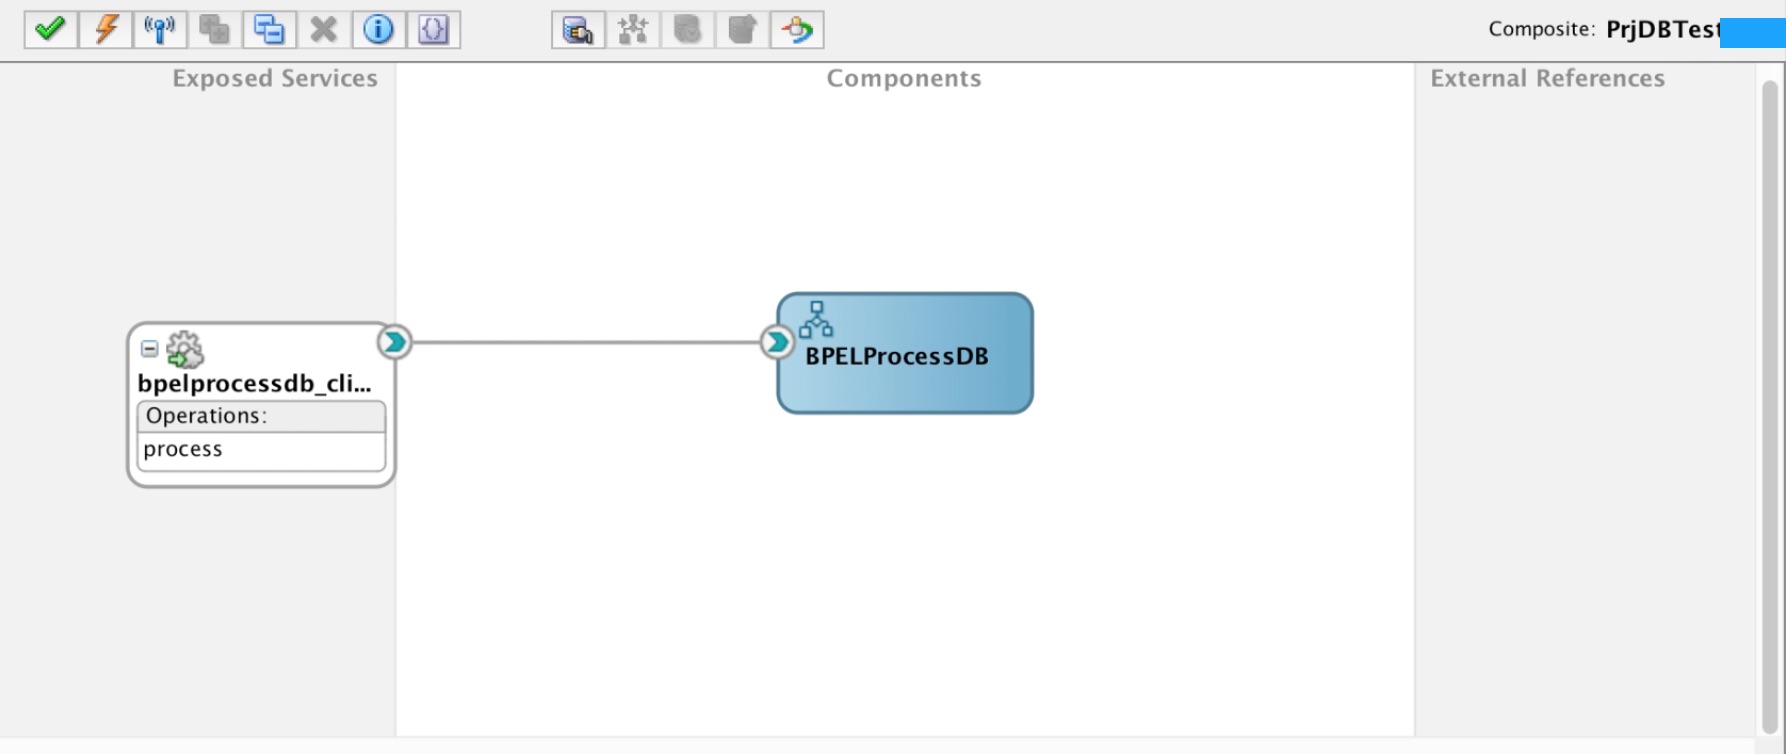
We double click on our BPEL process (BPELProcessDB), something like this appears:
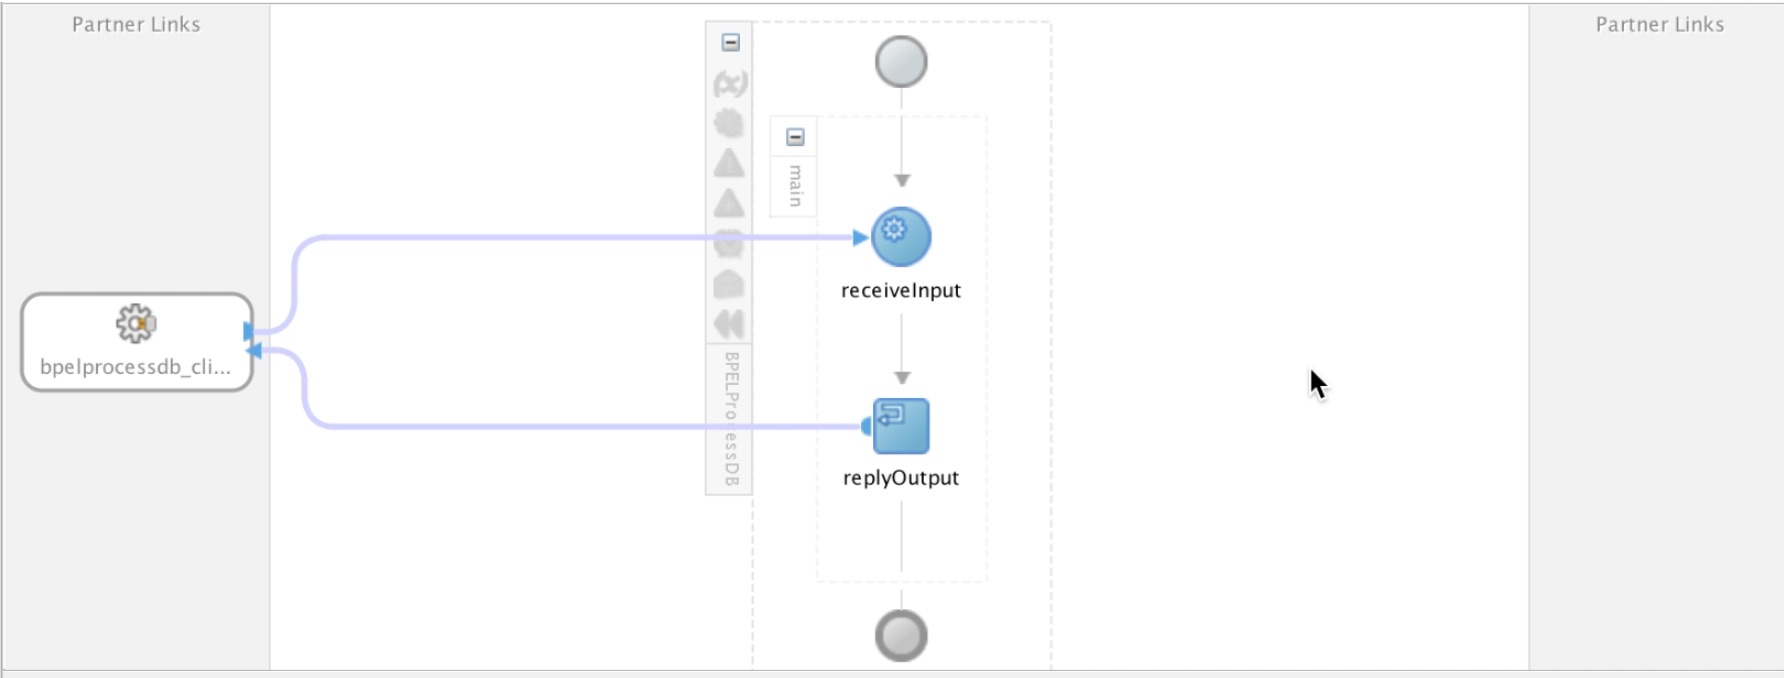
We select and drag a partner link to the indicated section (the Partner Link creation wizard appears automatically:
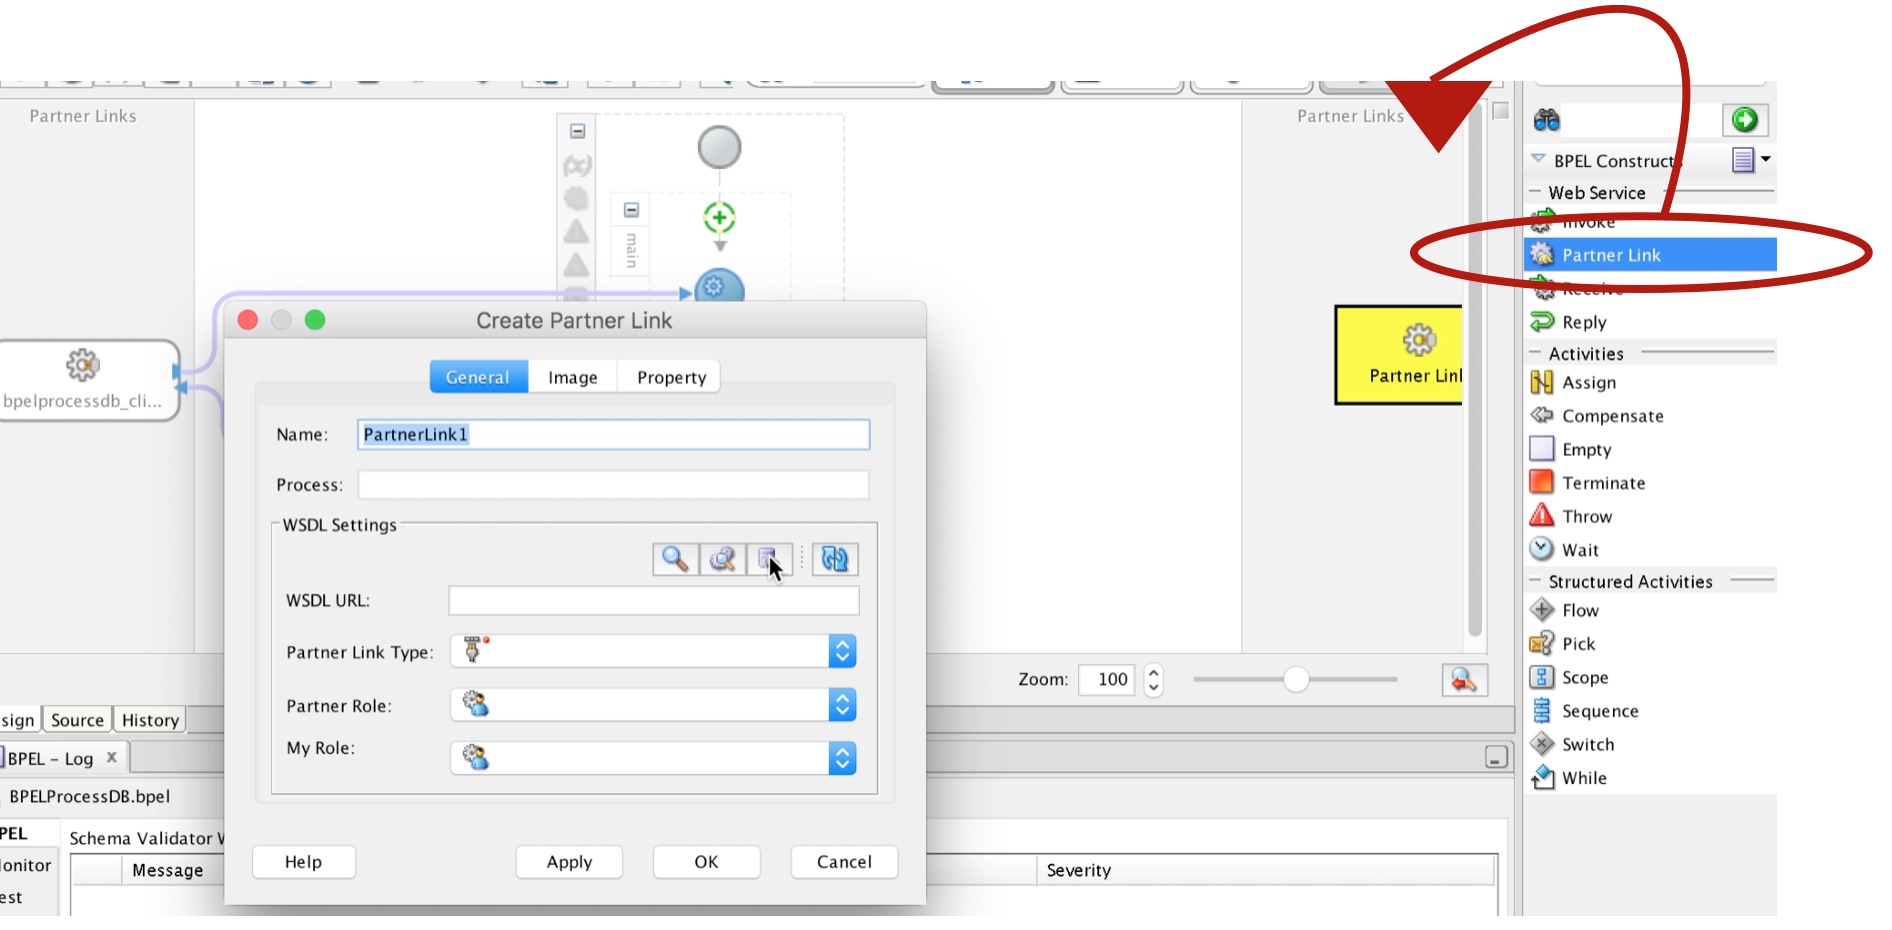
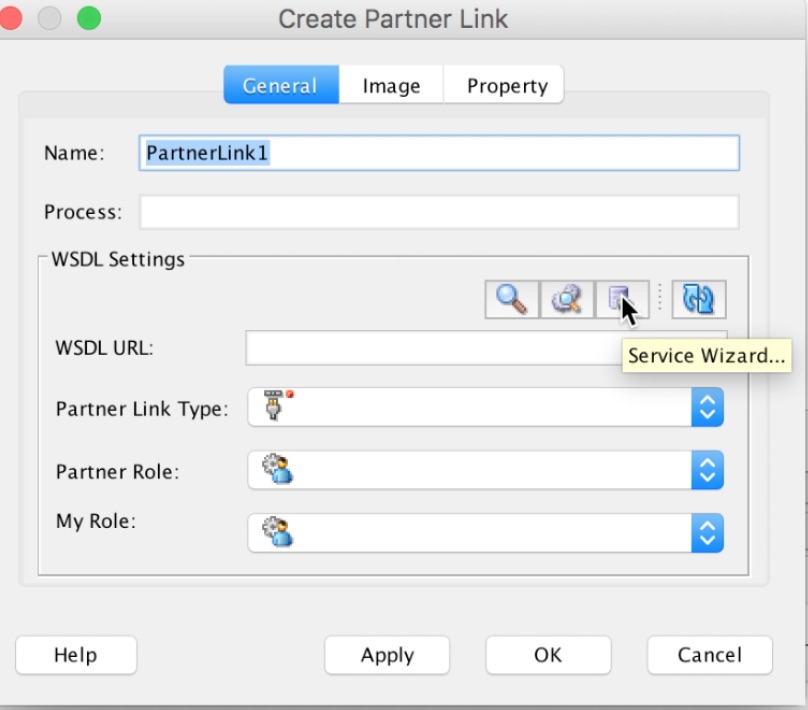
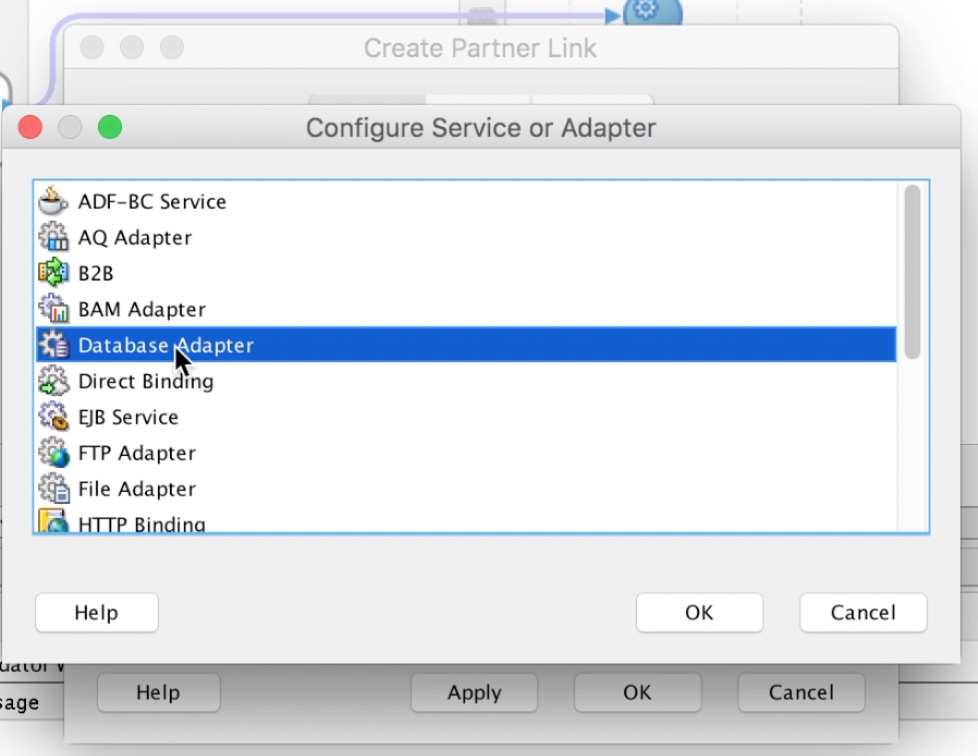
We click on the "Service Wizard" icon, as the image shows:
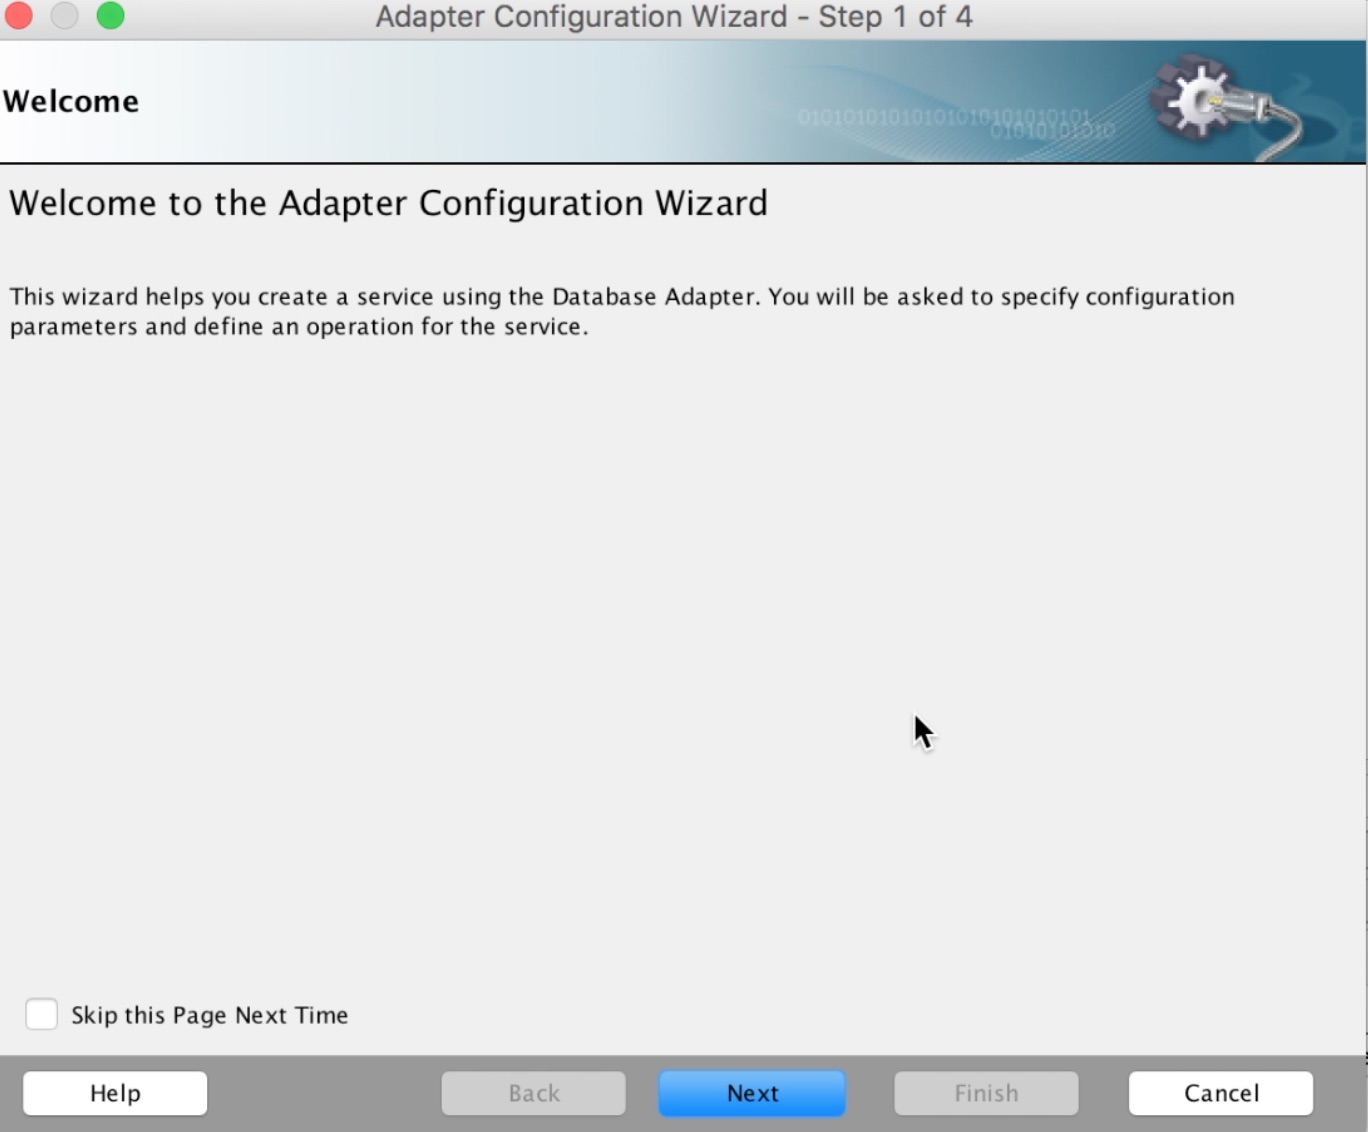
We select the Database adapter:
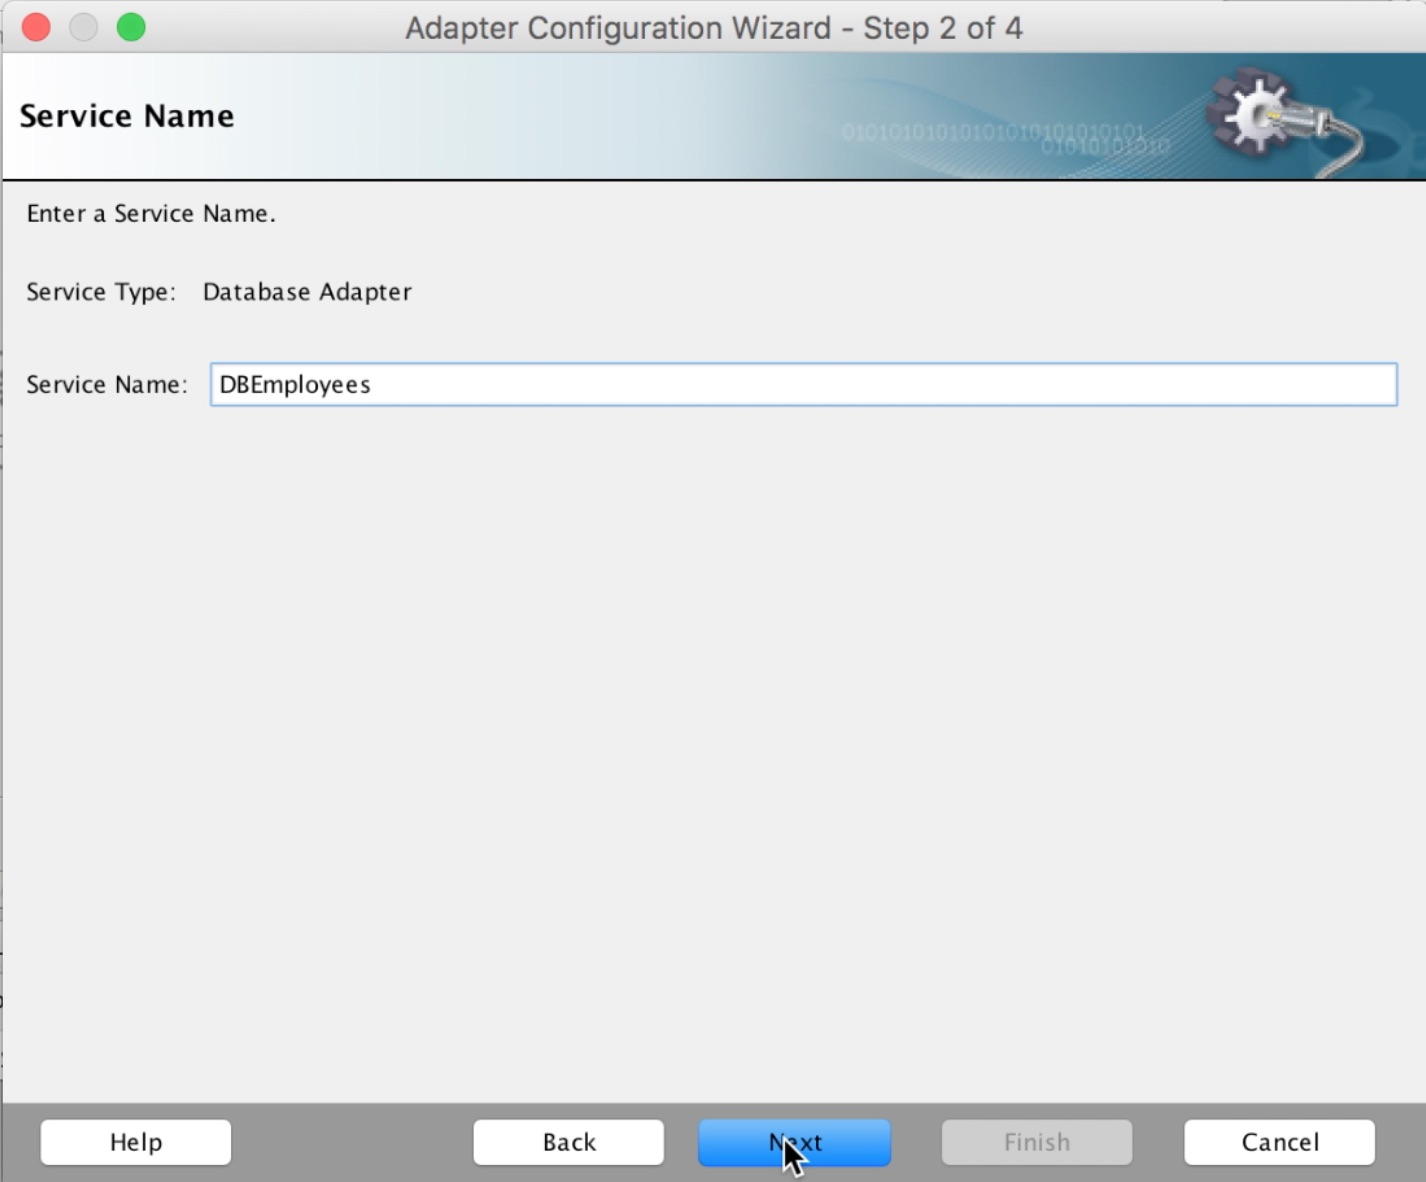
We establish a name for our adapter, click on -> Next
We establish a name for our adapter, click on -> Next
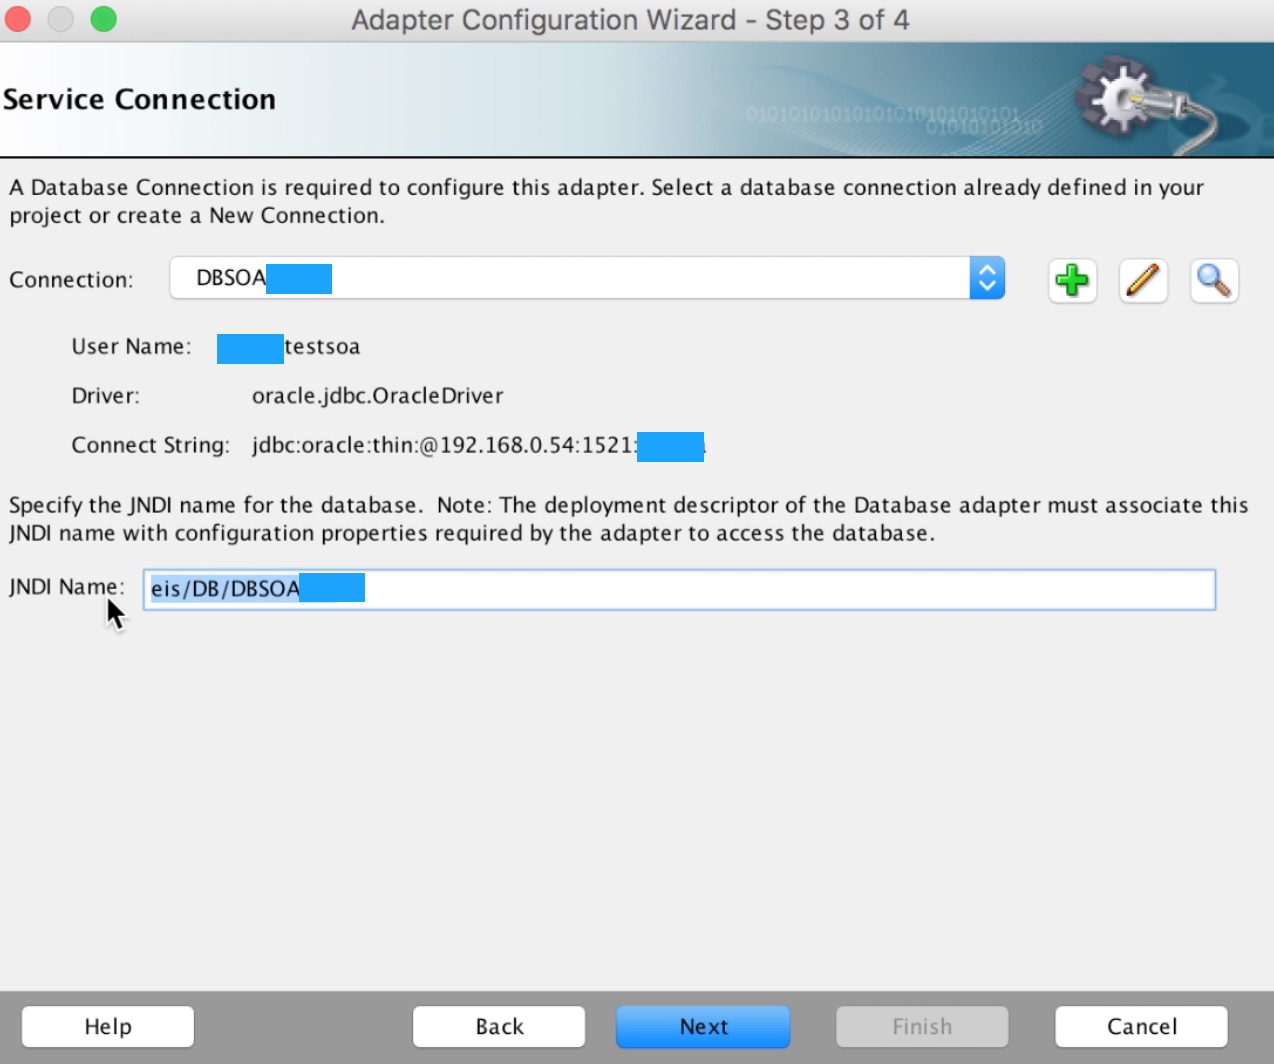
We establish the connection details of our service (you must pay special attention to the JNDI Name (eis / DB / DBSOA), since this must be configured on the application server as part of the outgoing connections for the DBAdapter.. Click >Next
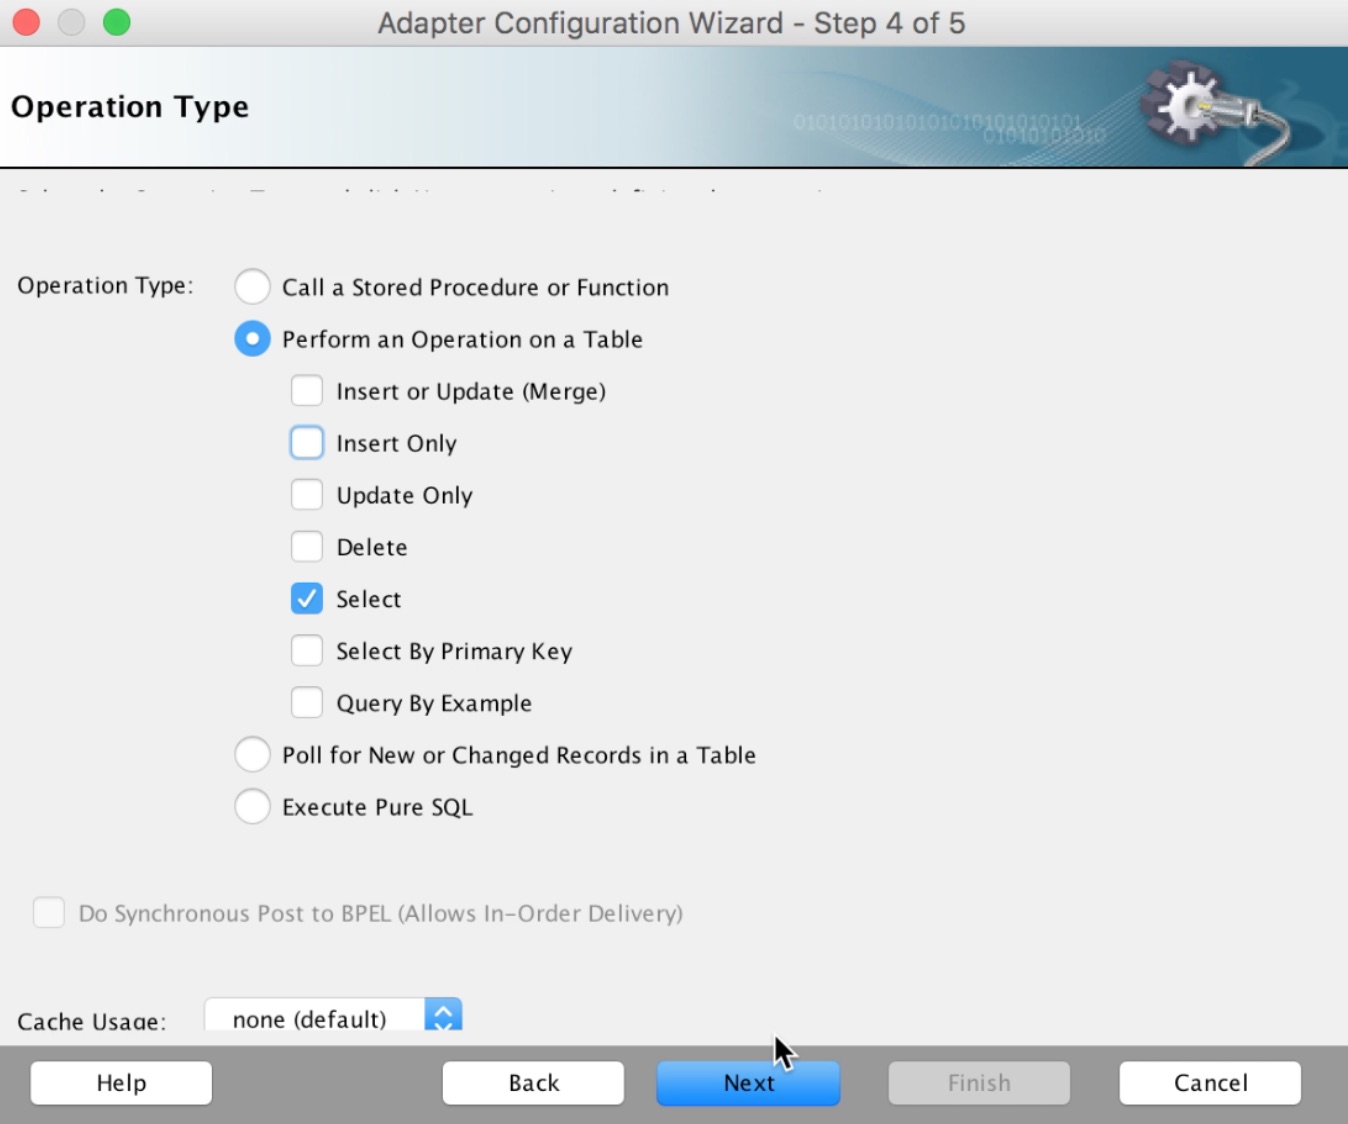
Now we set the type of operation, > Next
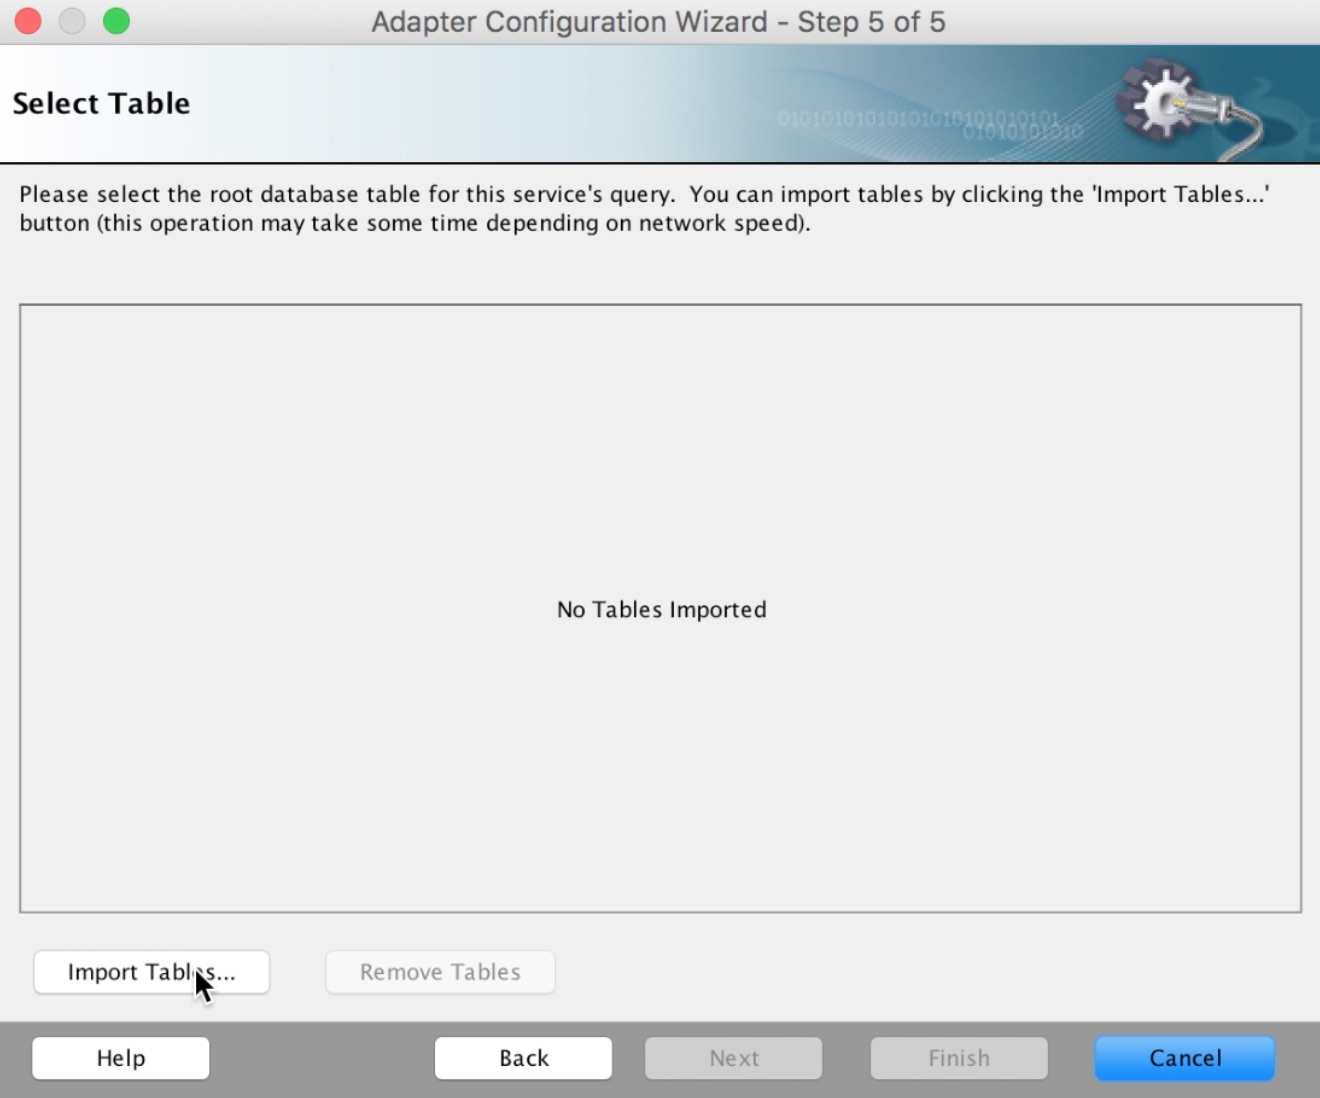
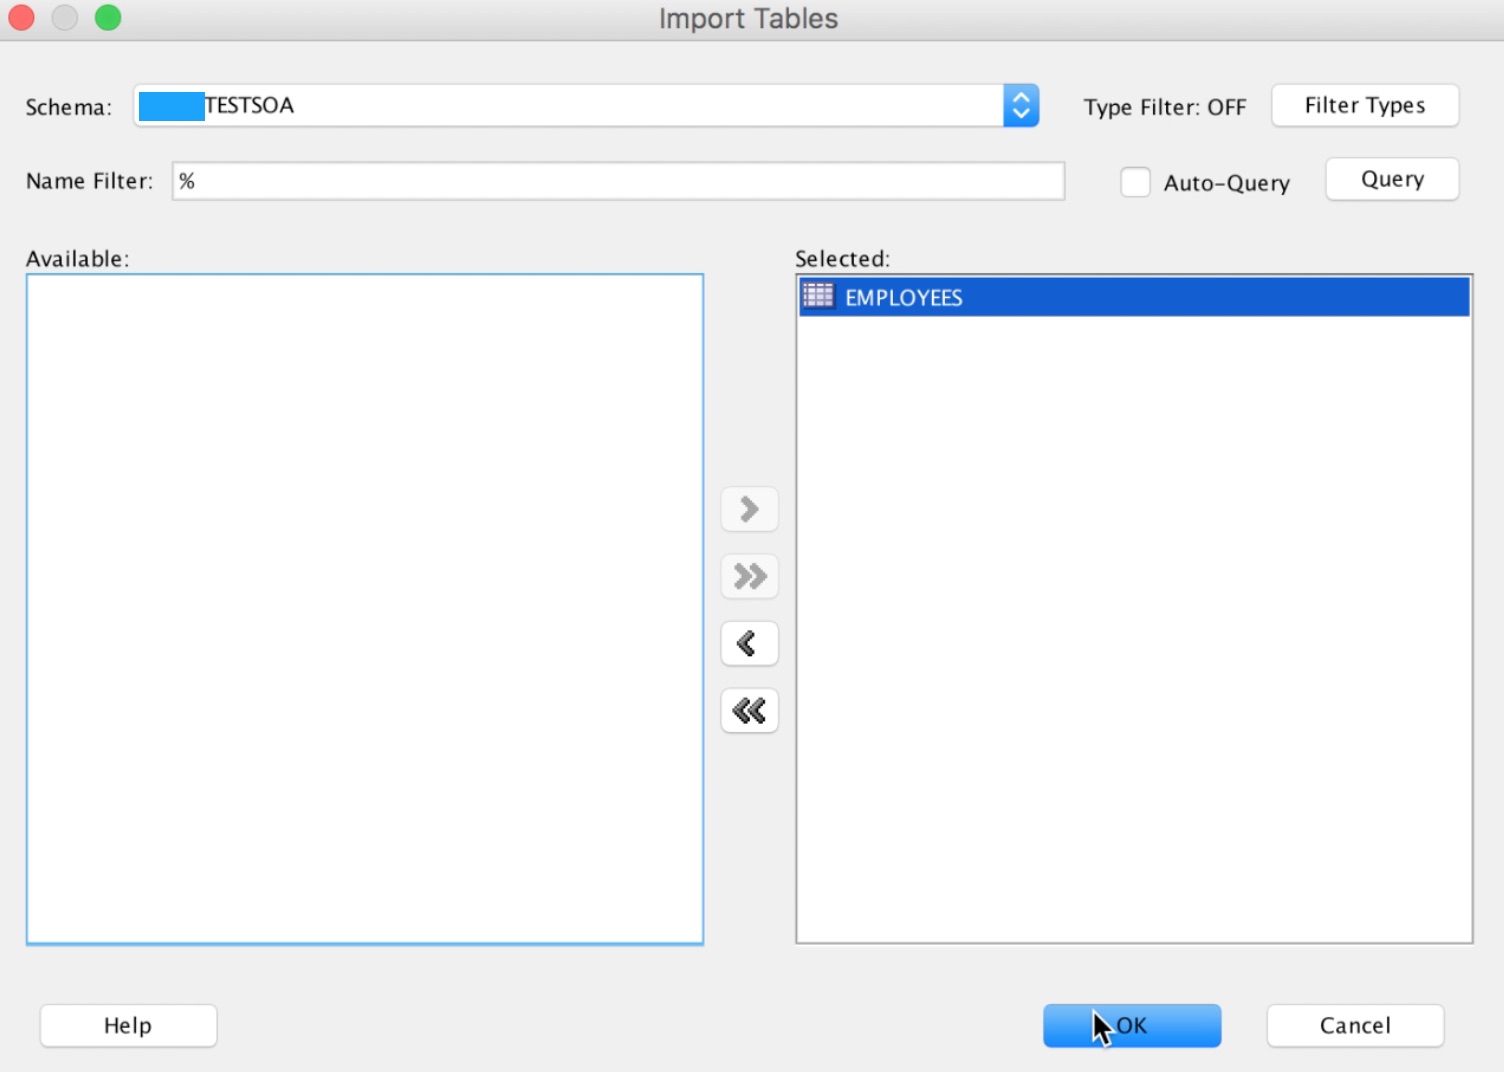
Click on Import tables
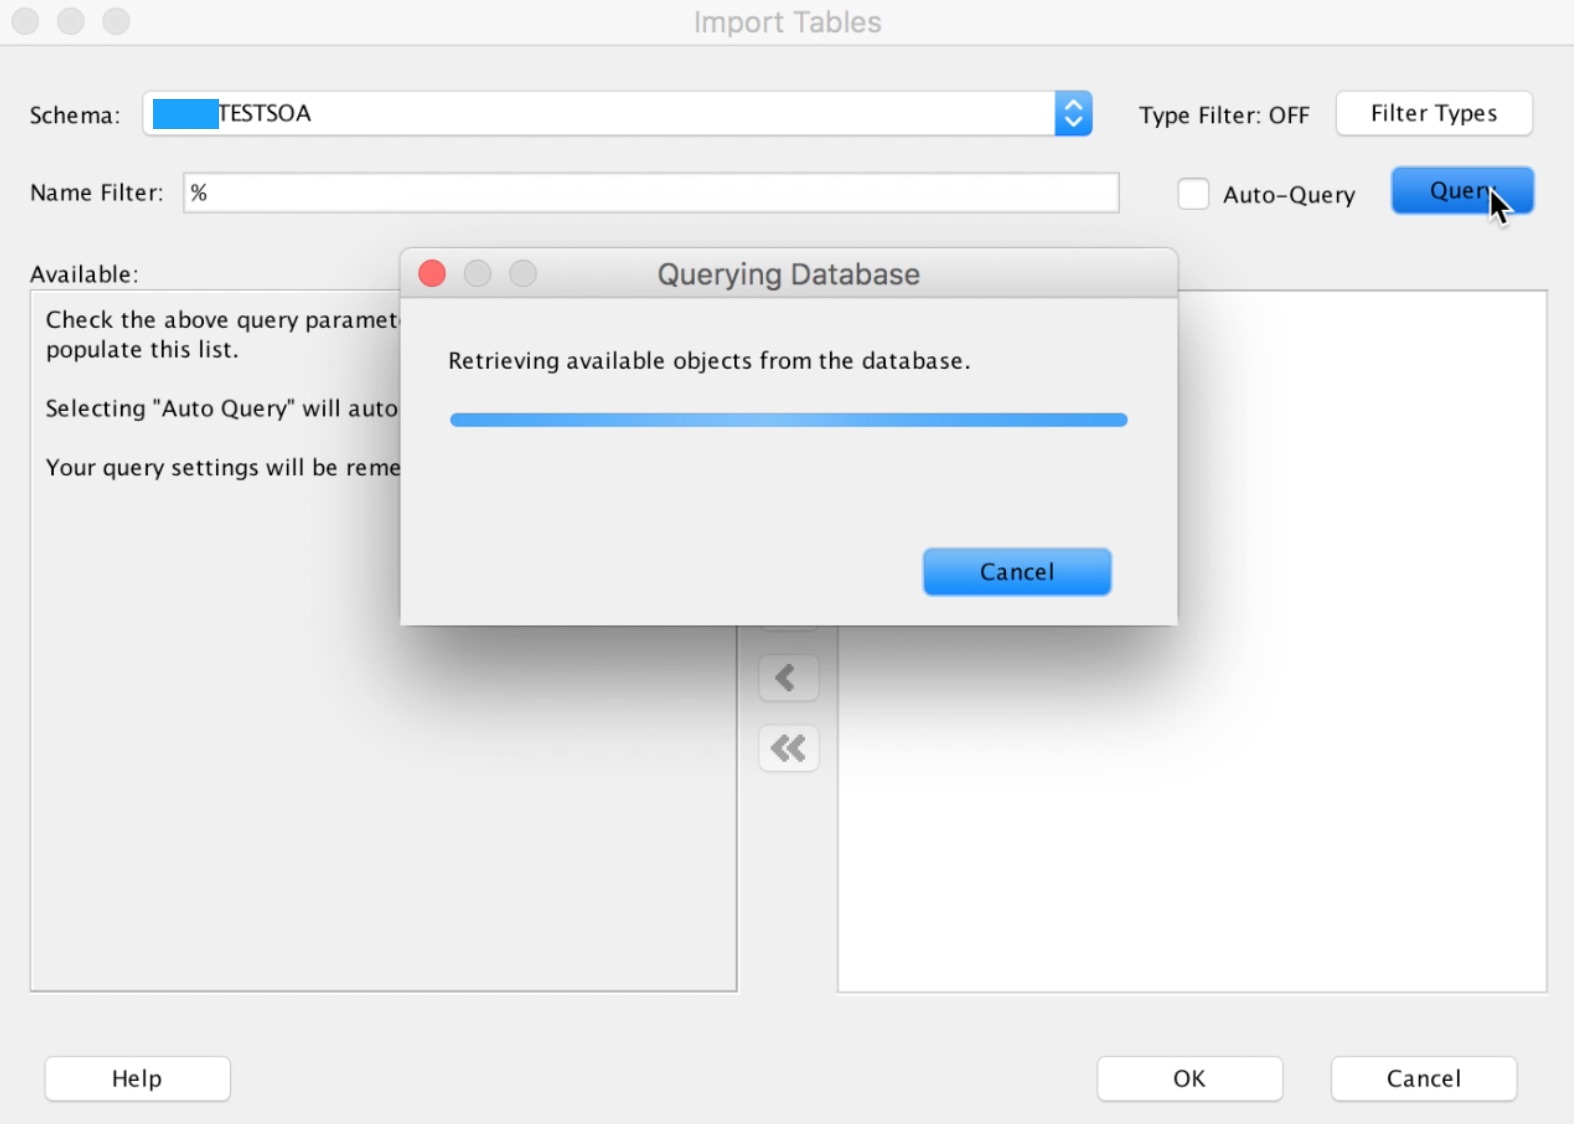
Select the scheme,click -> Query
We see that the previously created object is recovered:
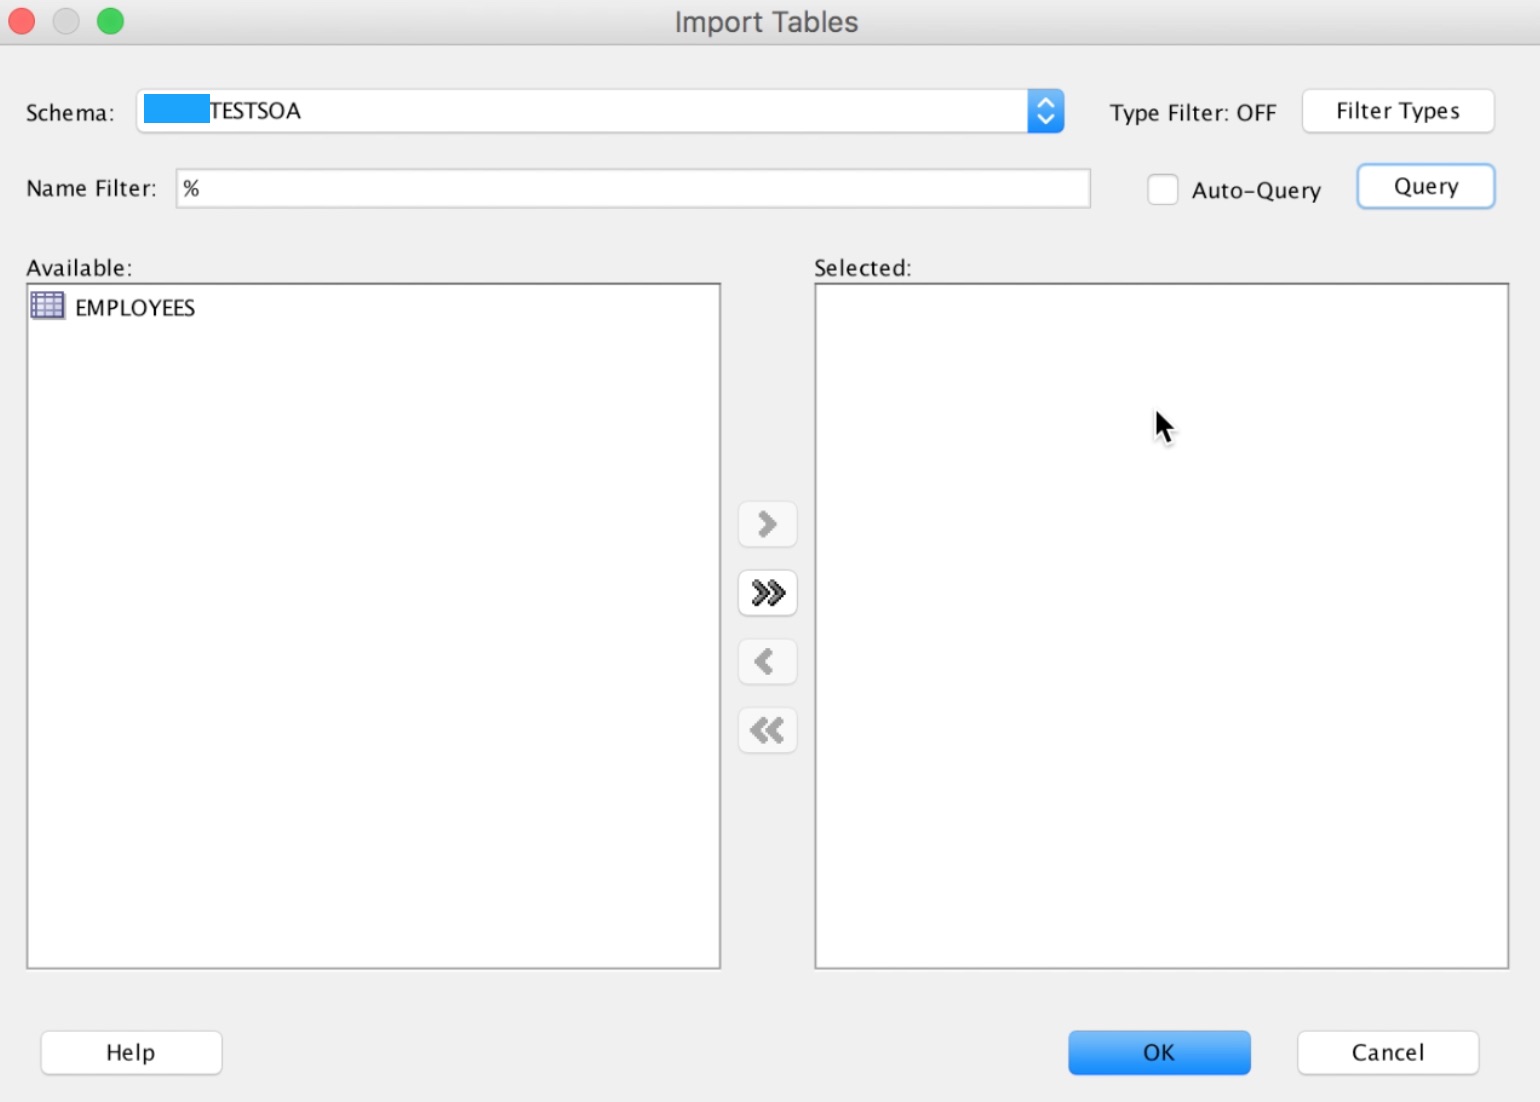
Select the Employees table-> OK
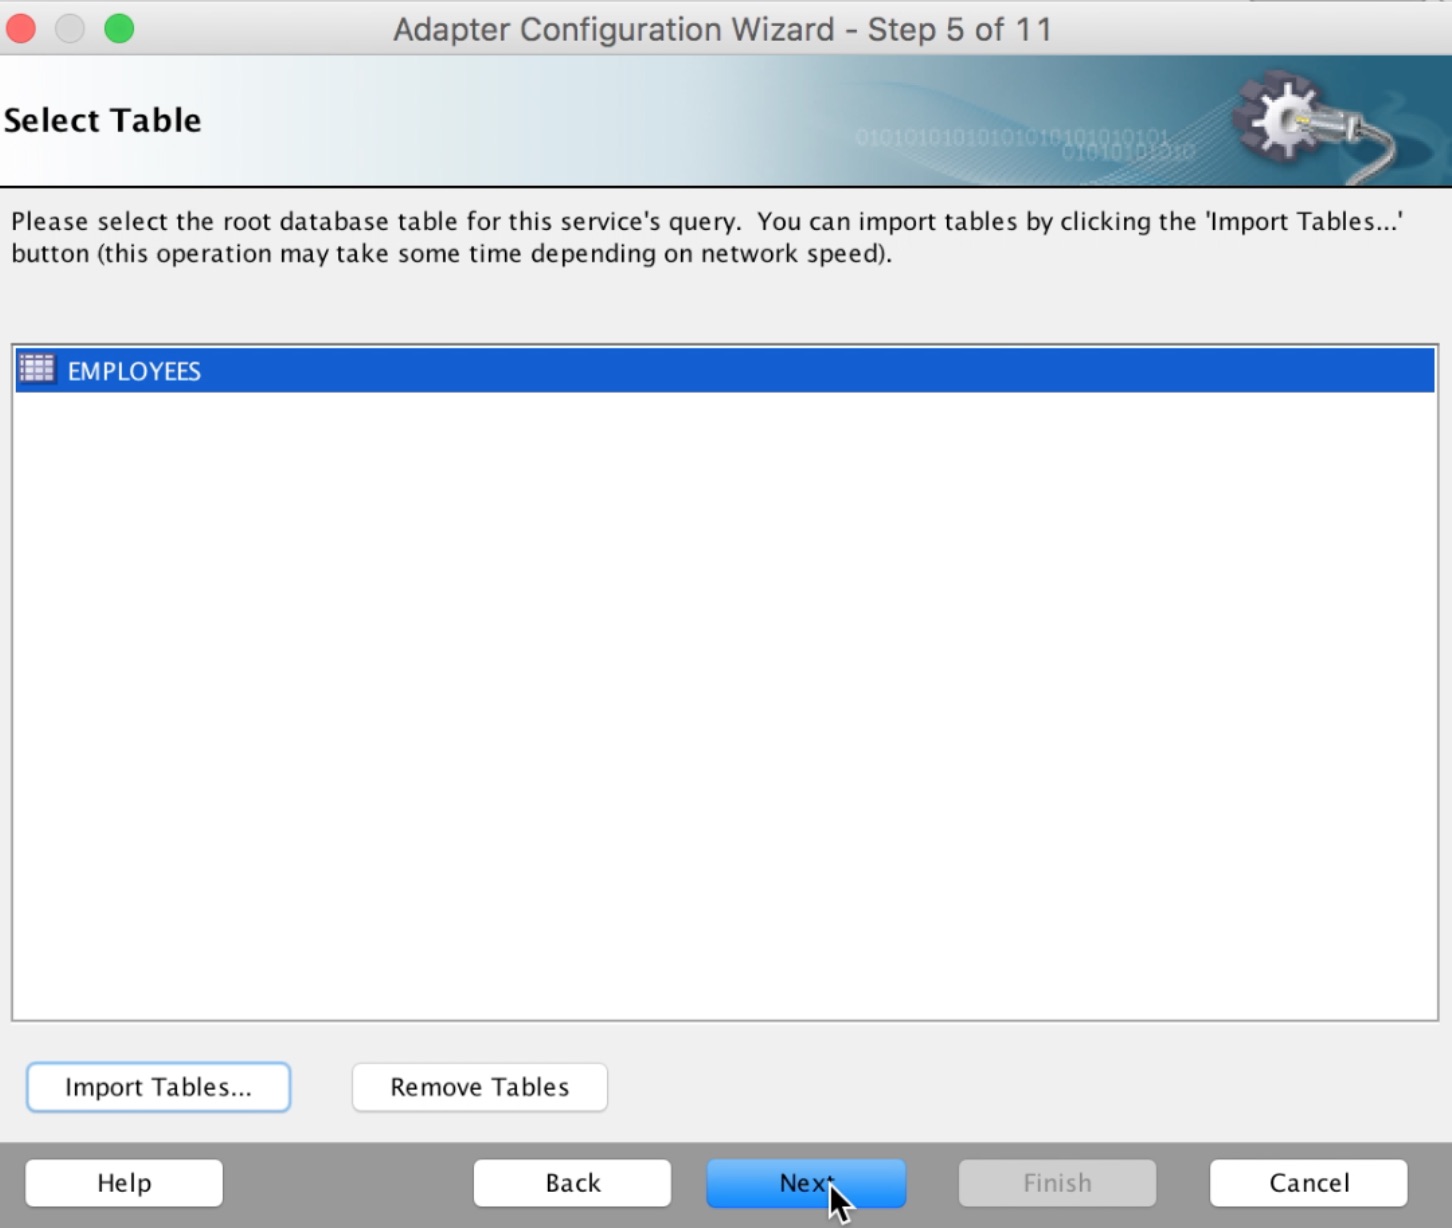
We select the main table for this query:
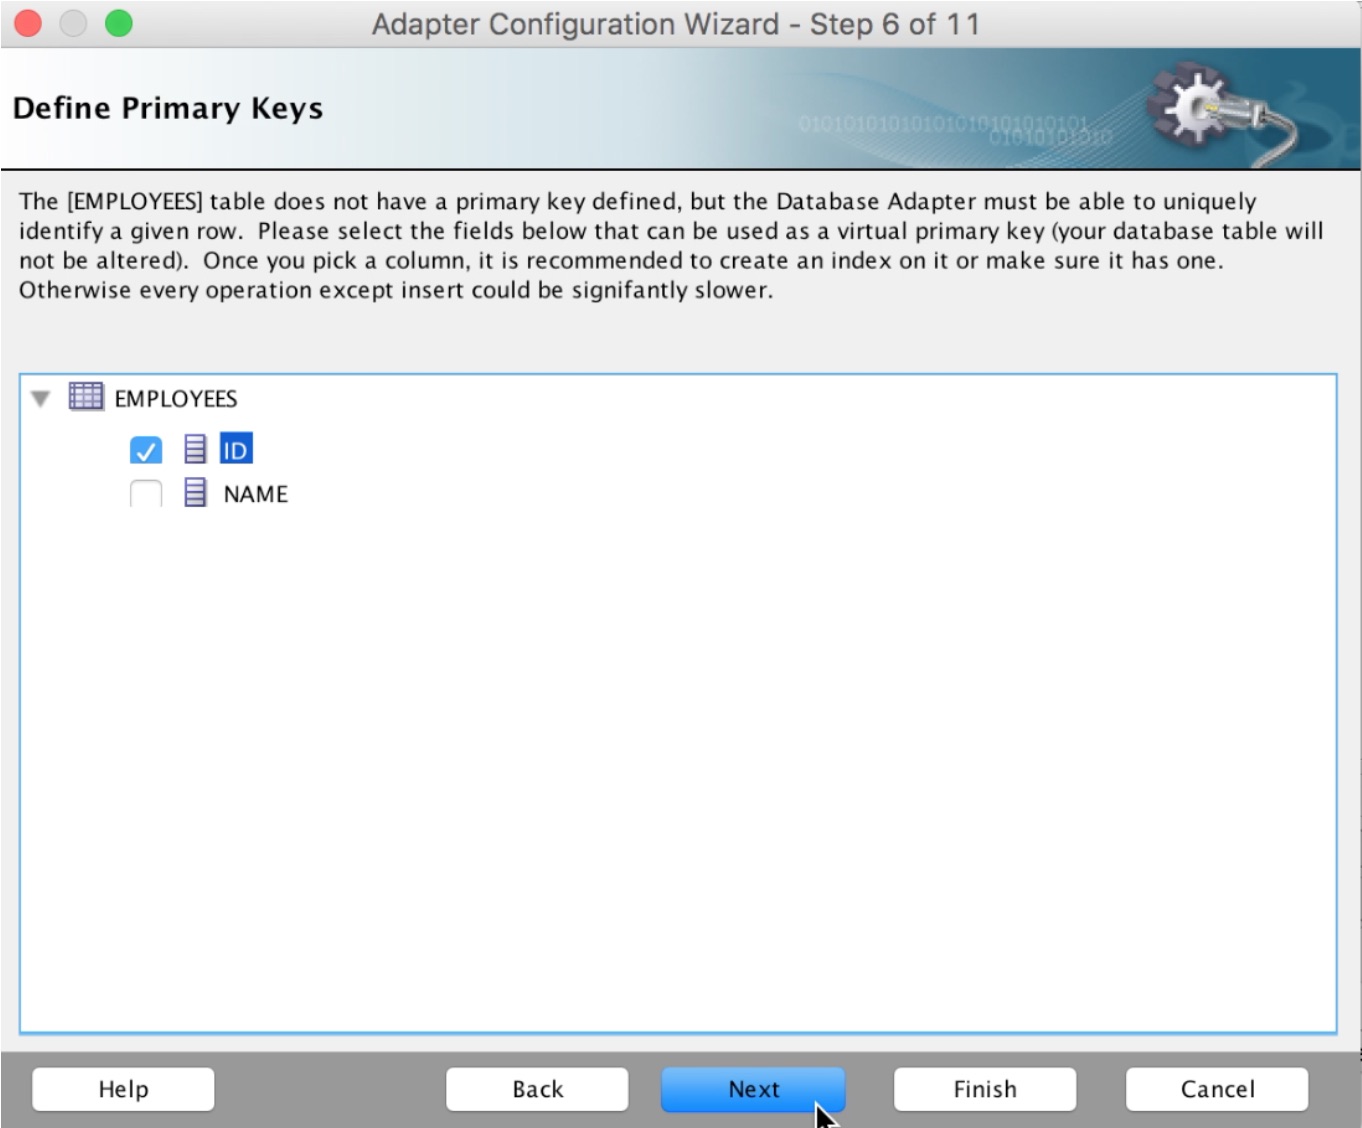
We set the primary key, click > Next
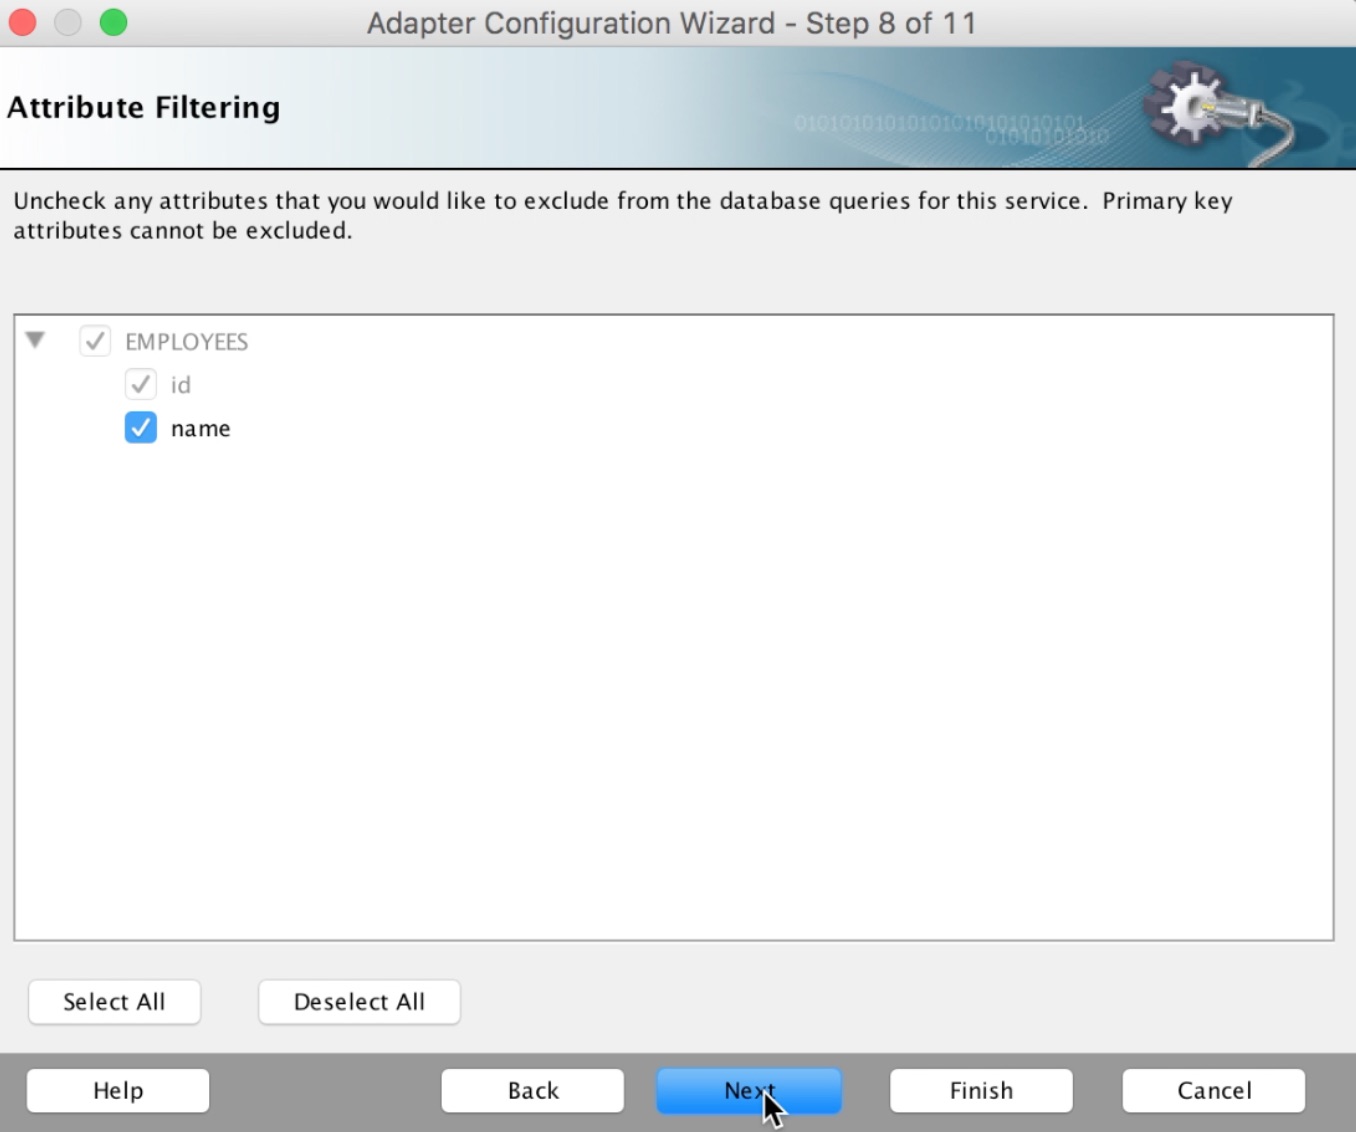
We click (next) in step 7, at this time we will not establish relationships. The attribute filter should read as follows:
In the definition of the selection criteria, we create a parameter (IdEmployee) which we then refer to in our query:

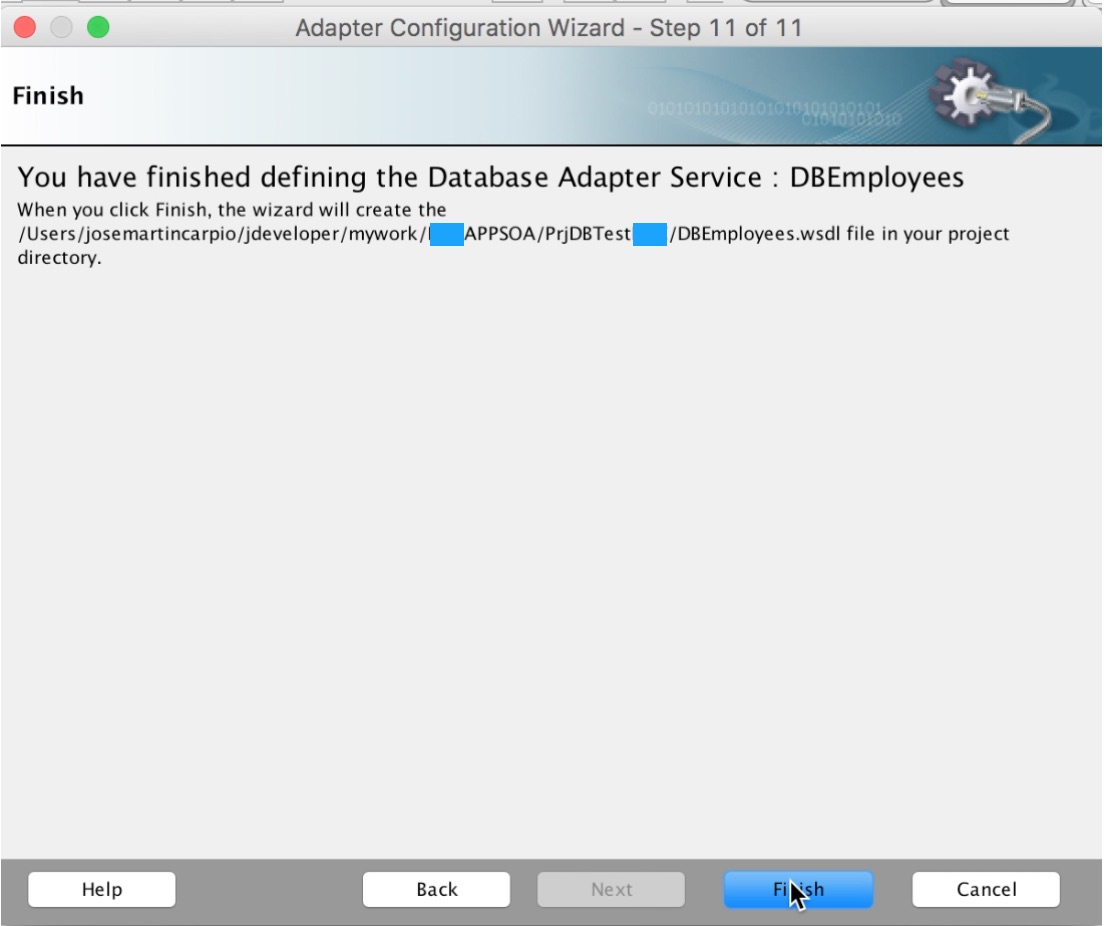
We finish with the configuration of our adapter:
Our partner Link is configured as shown below,them we click (OK)

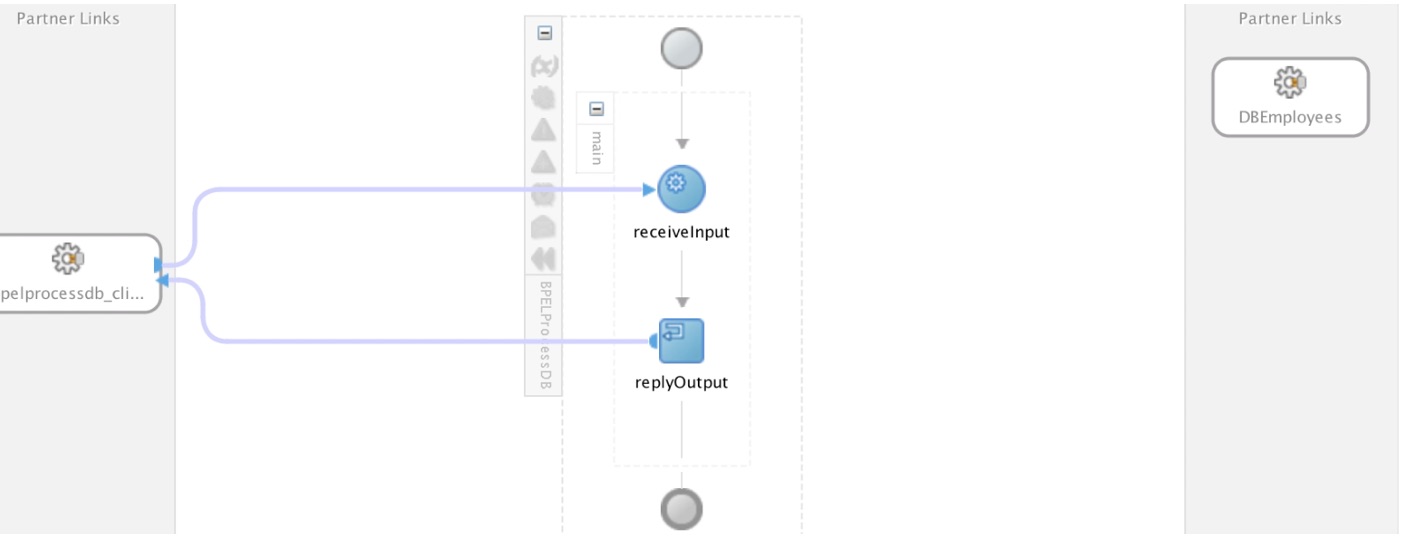
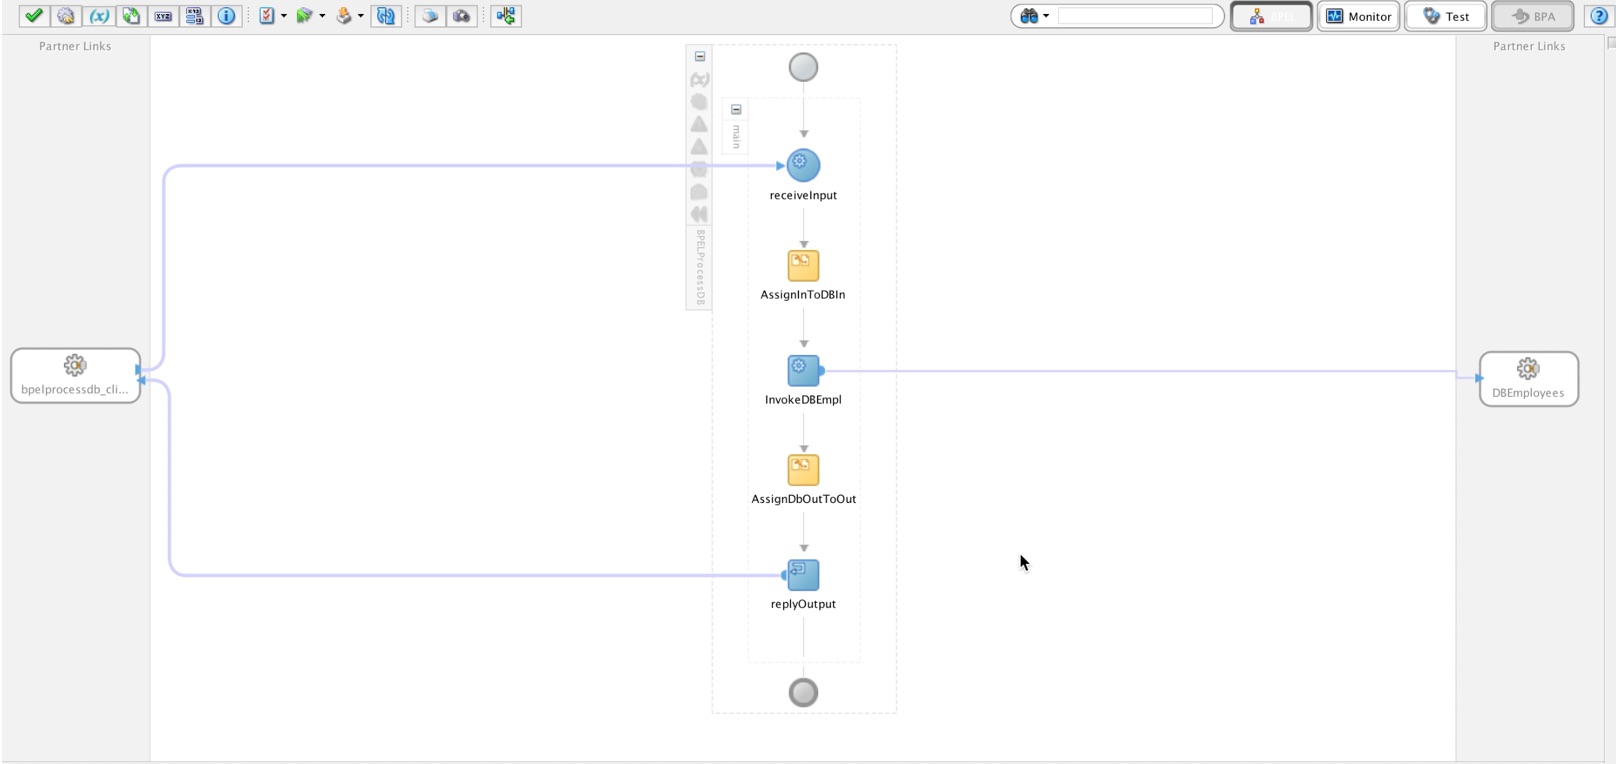
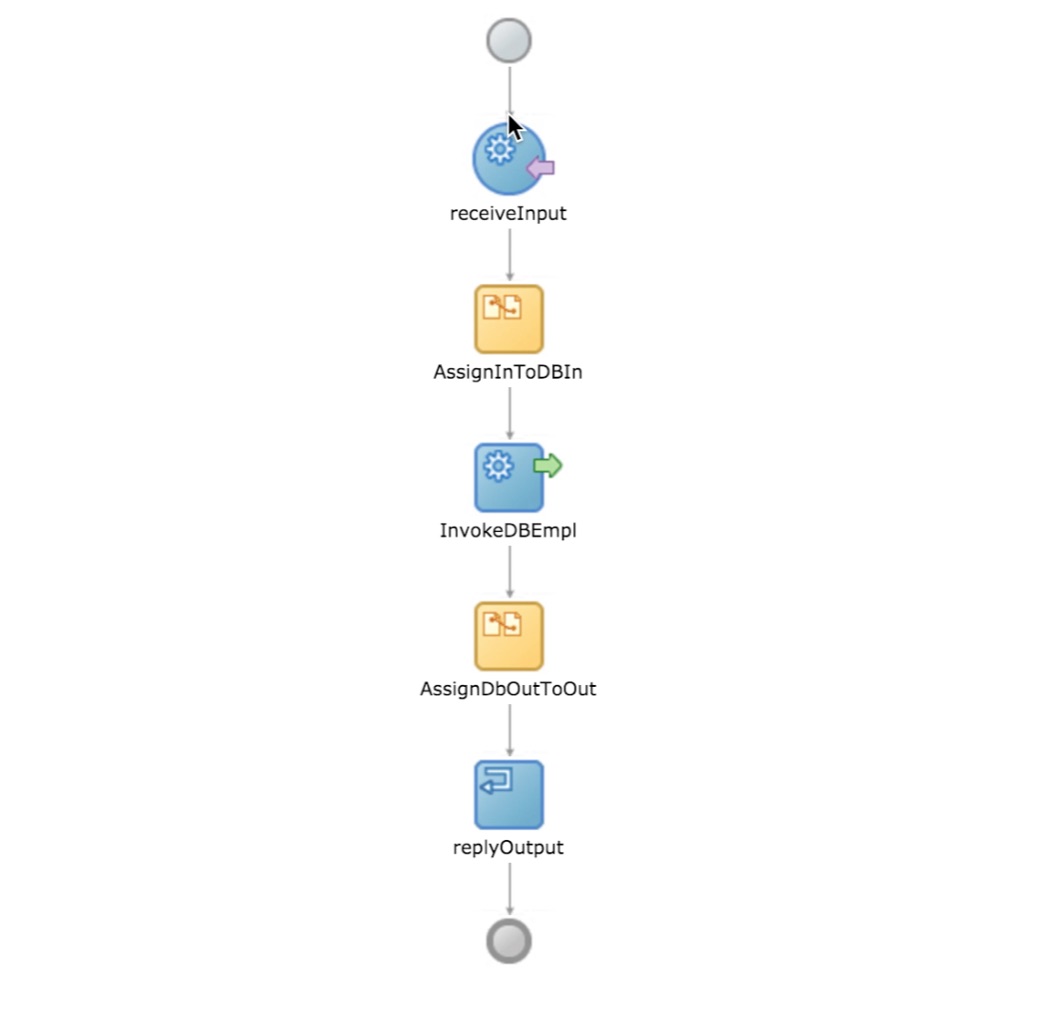
Now our orchestration looks like this:
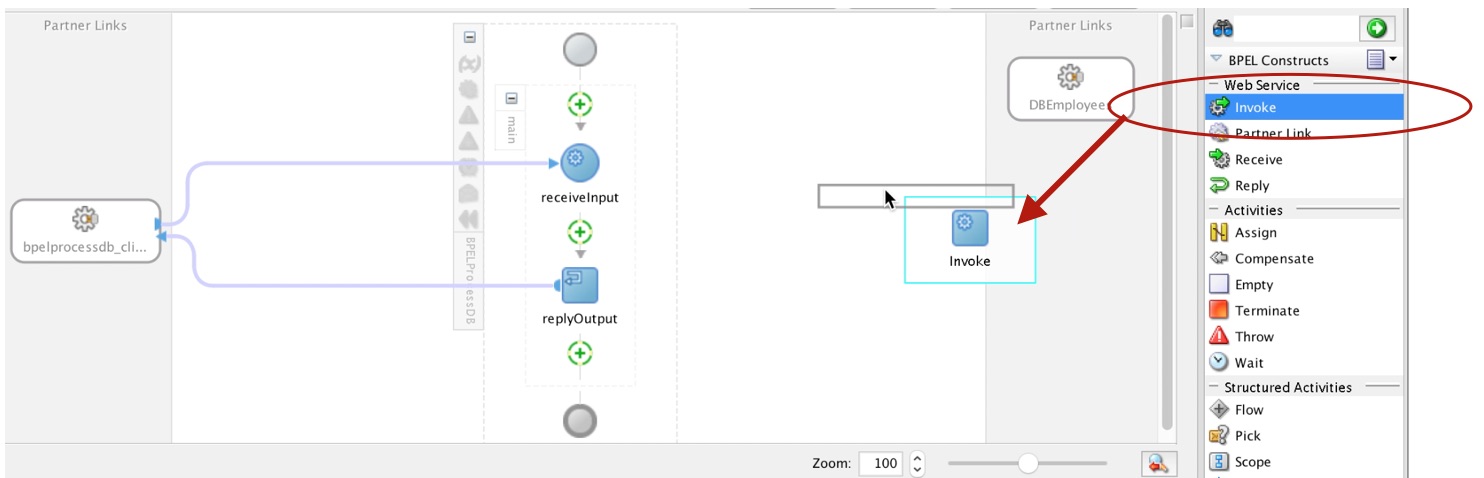
From the component palette, we add an invocation to our BPEL and create the respective input and output variables as follows:
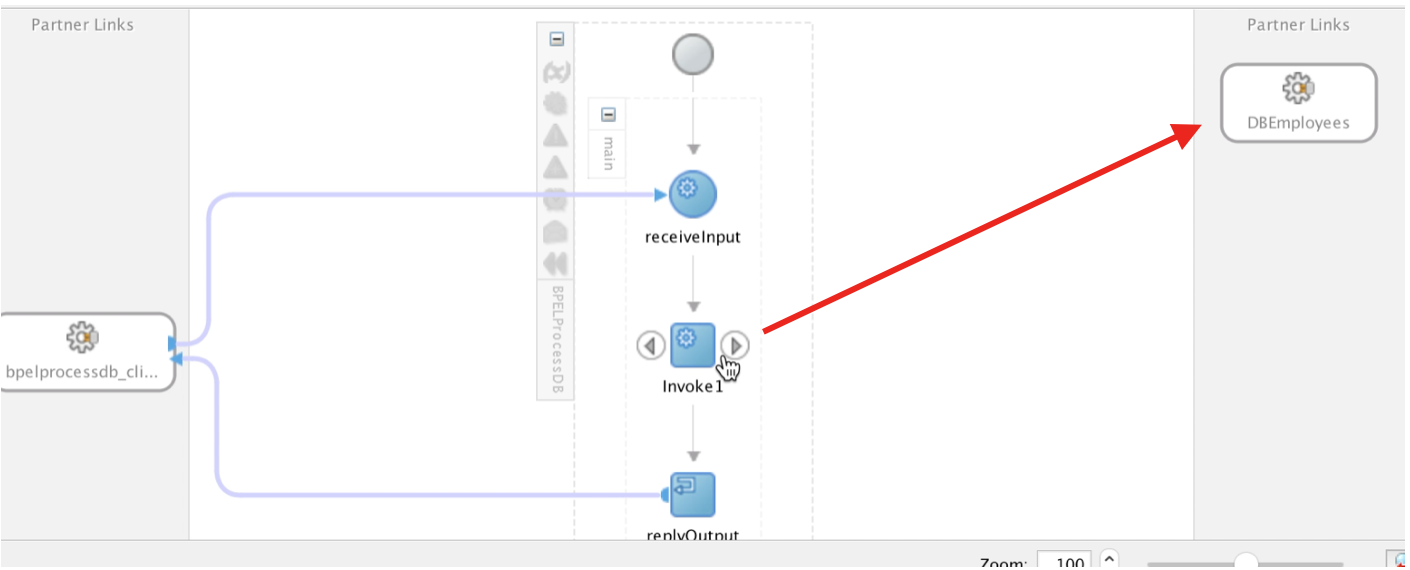
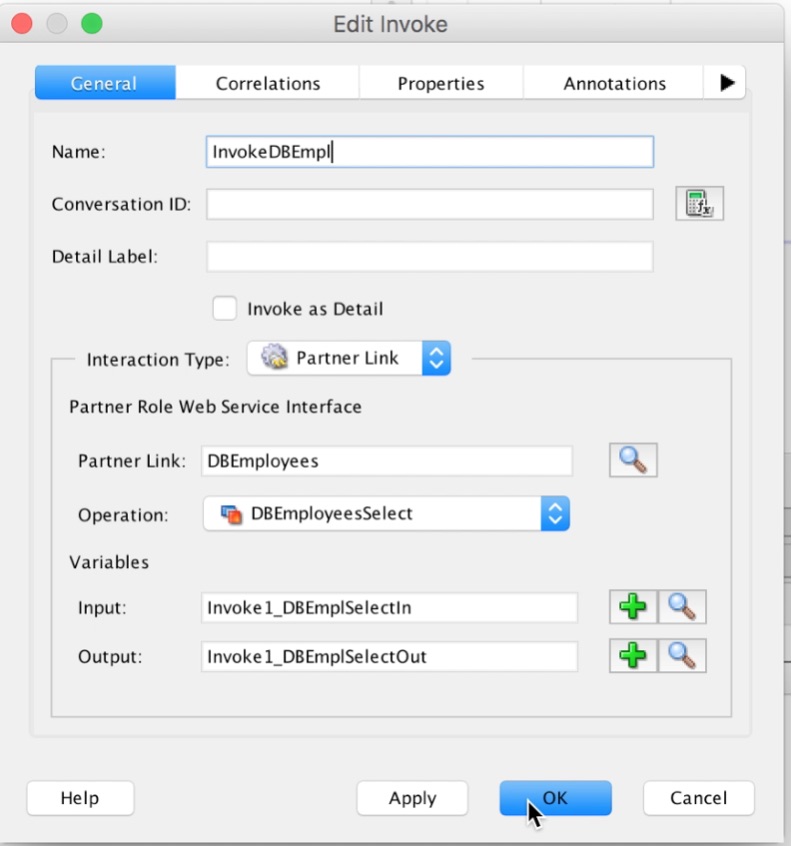
We link our invocation activity with our Partner Link:
Automatically, the configuration window appears, it should be something like this:
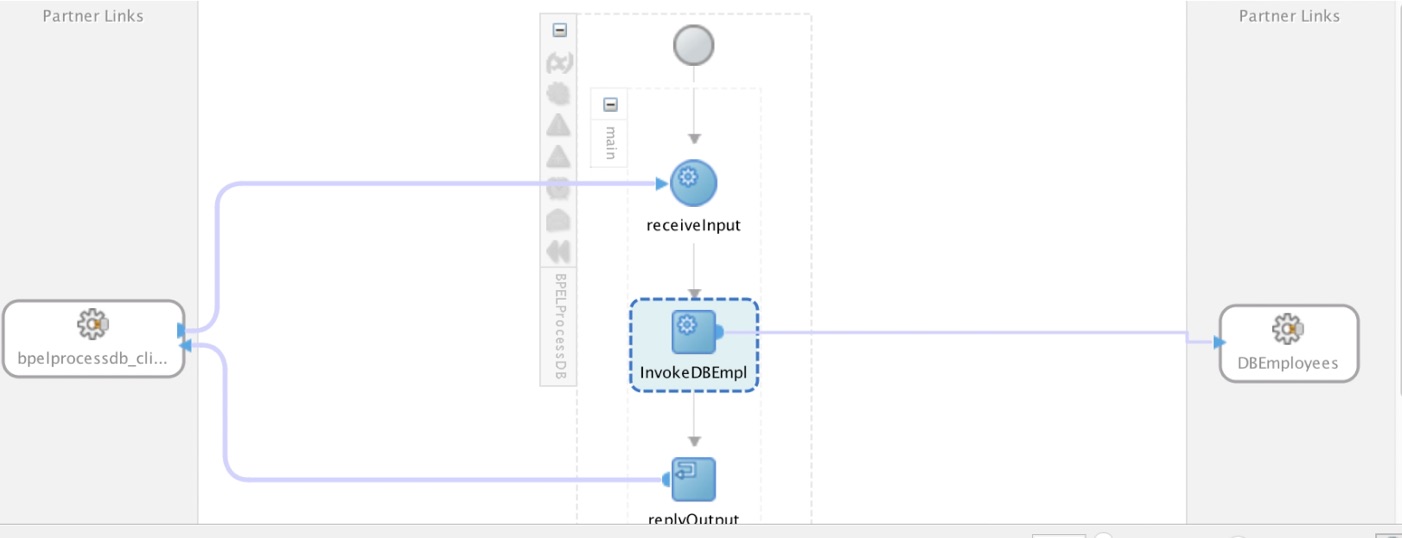
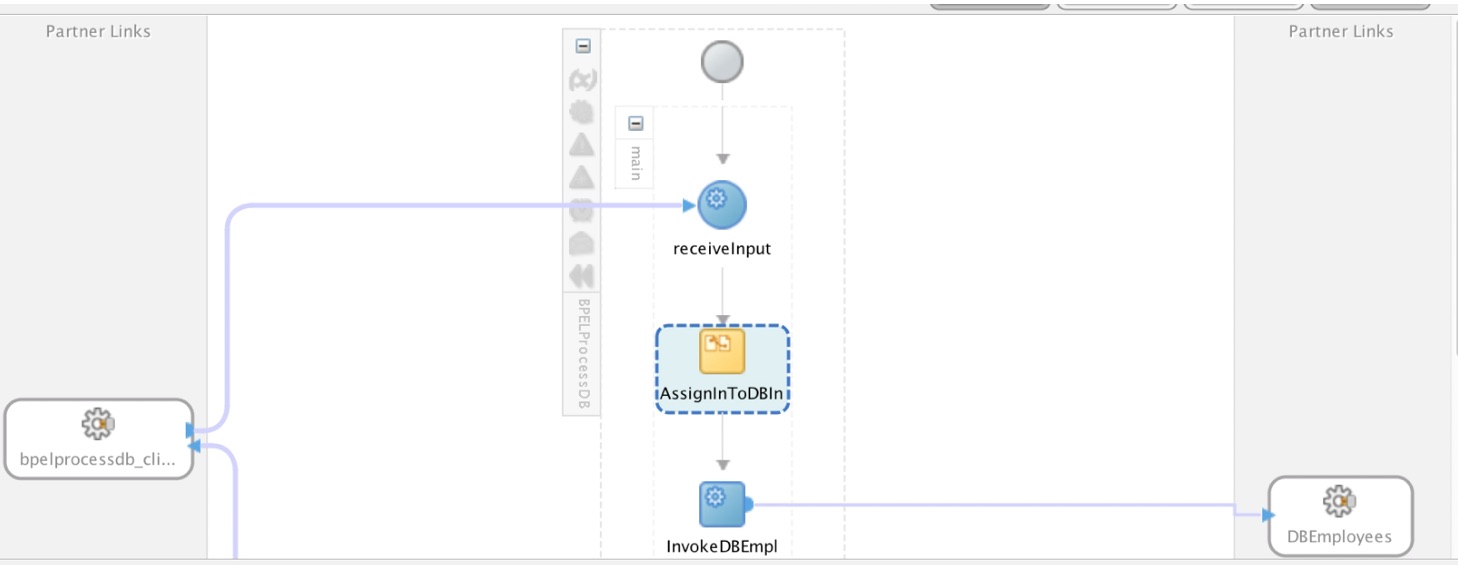
Now our BPEL has the following form:
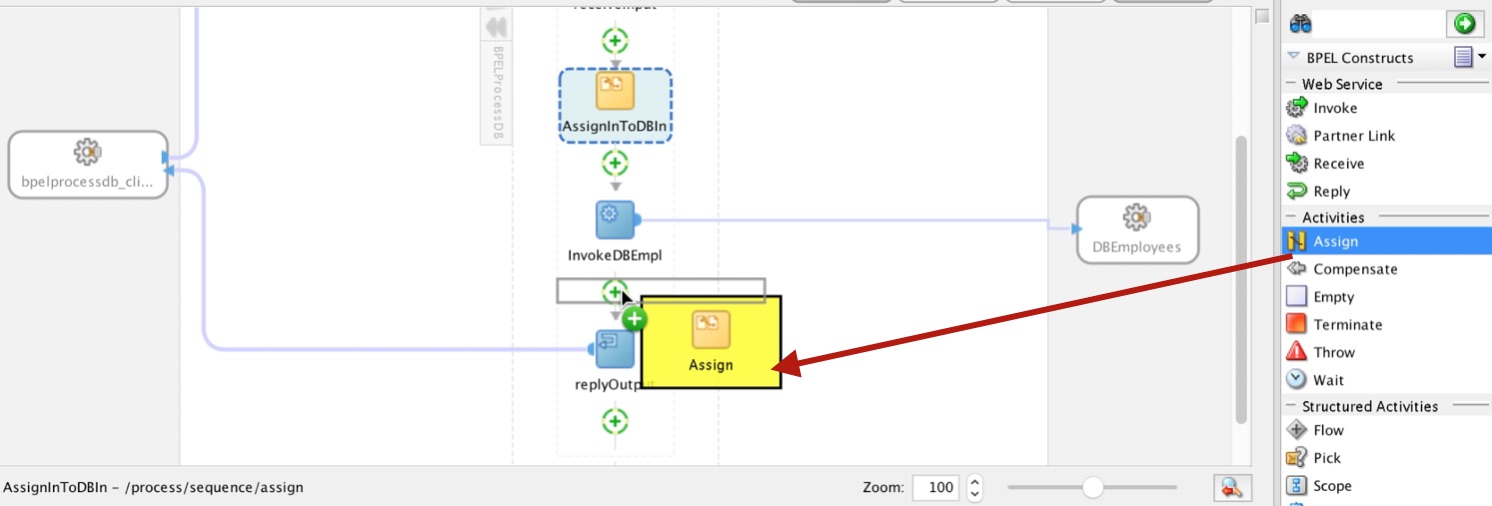
Under the same Drag and Drop concept, we drag an assignment activity:
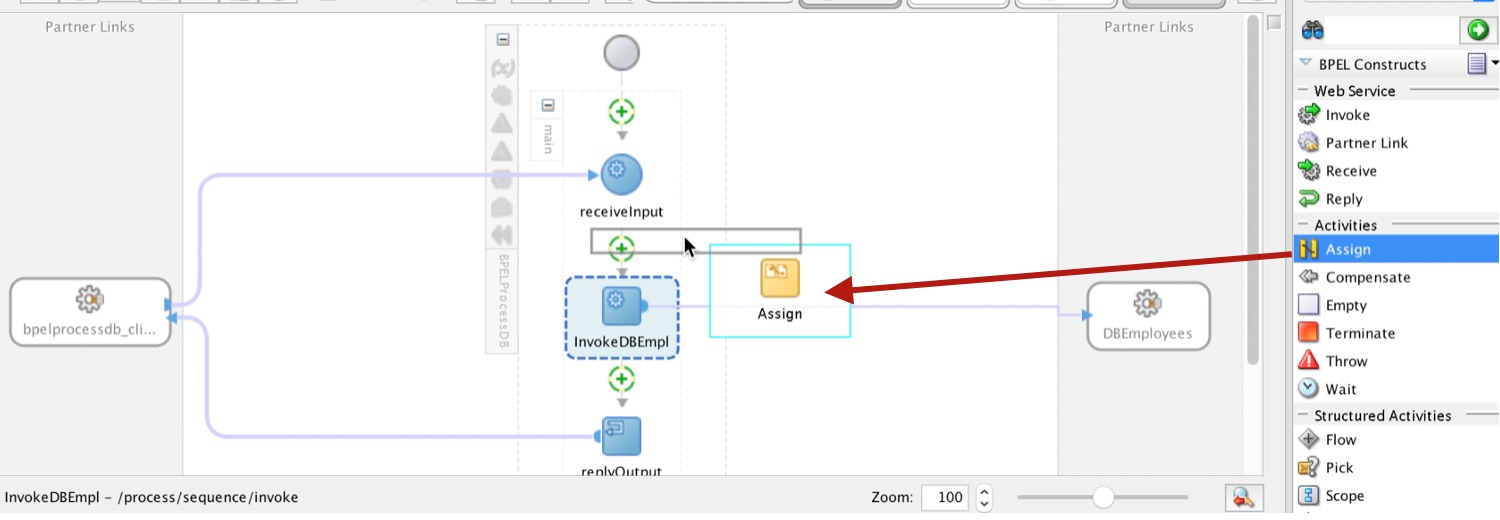
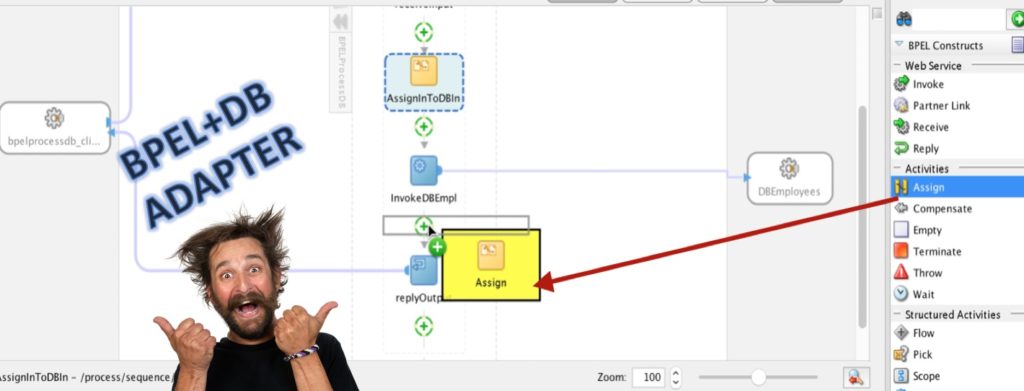
Our orchestration now looks like this:
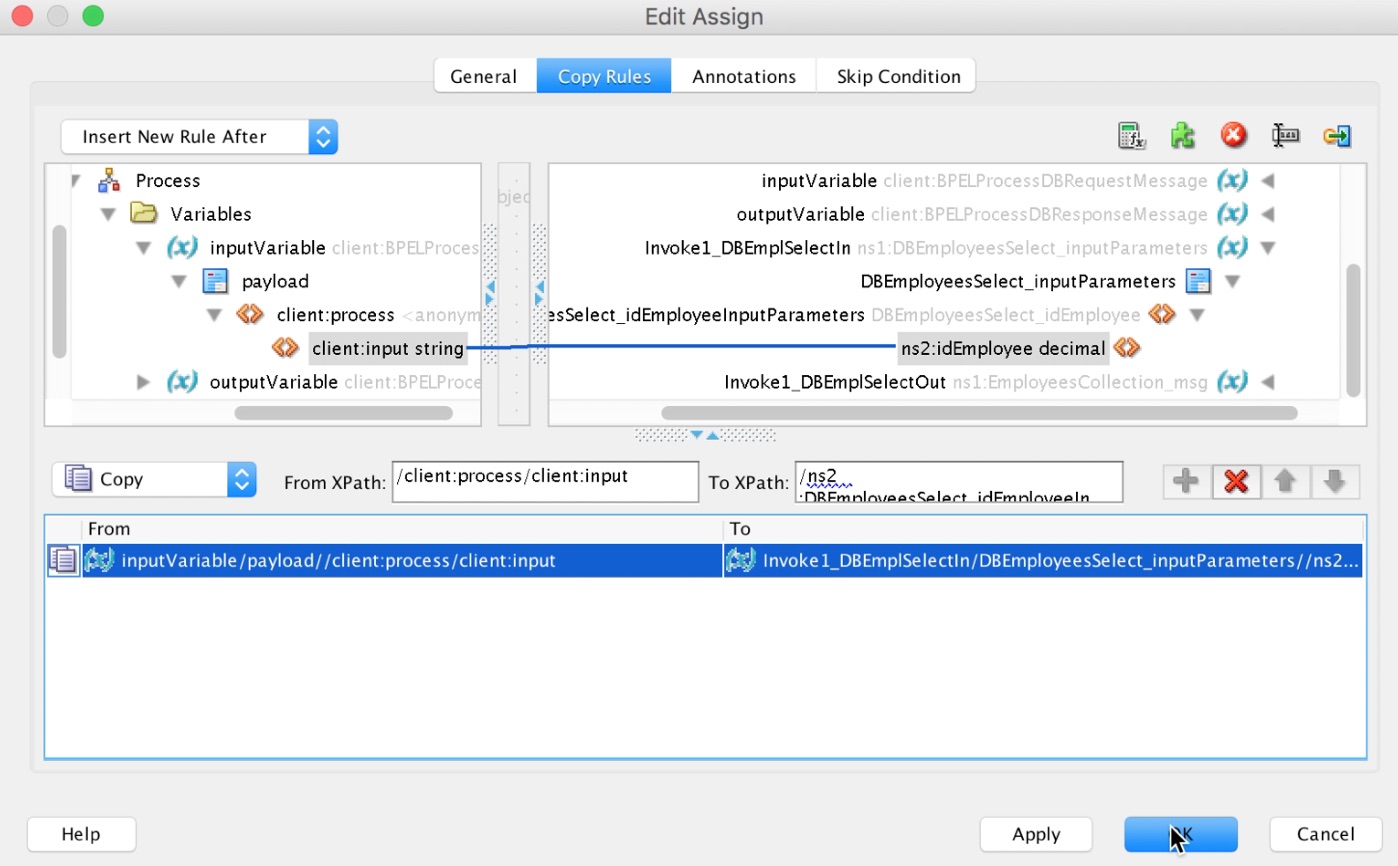
We double click on the activity, assign a name and start the mapping. It should be something like this: We are assigning the input variable of our process to the idEmployee variable created earlier during the configuration of our adapter.
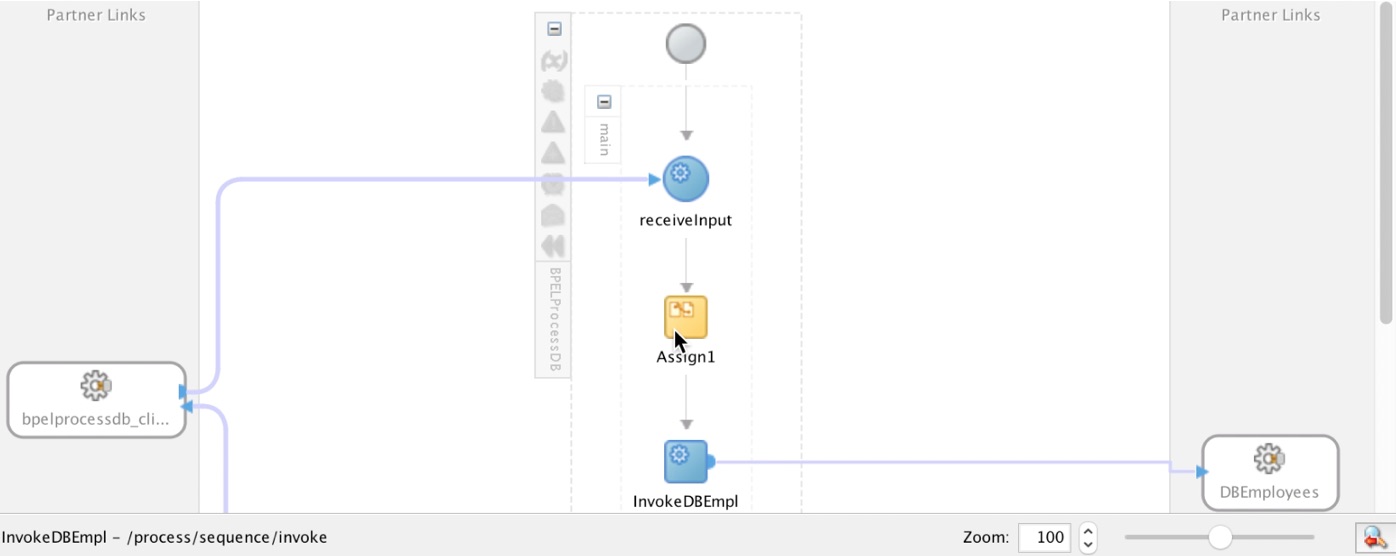
Click Ok, we have our diagram now as follows
We add a new assignment activity to our process, as we did before:
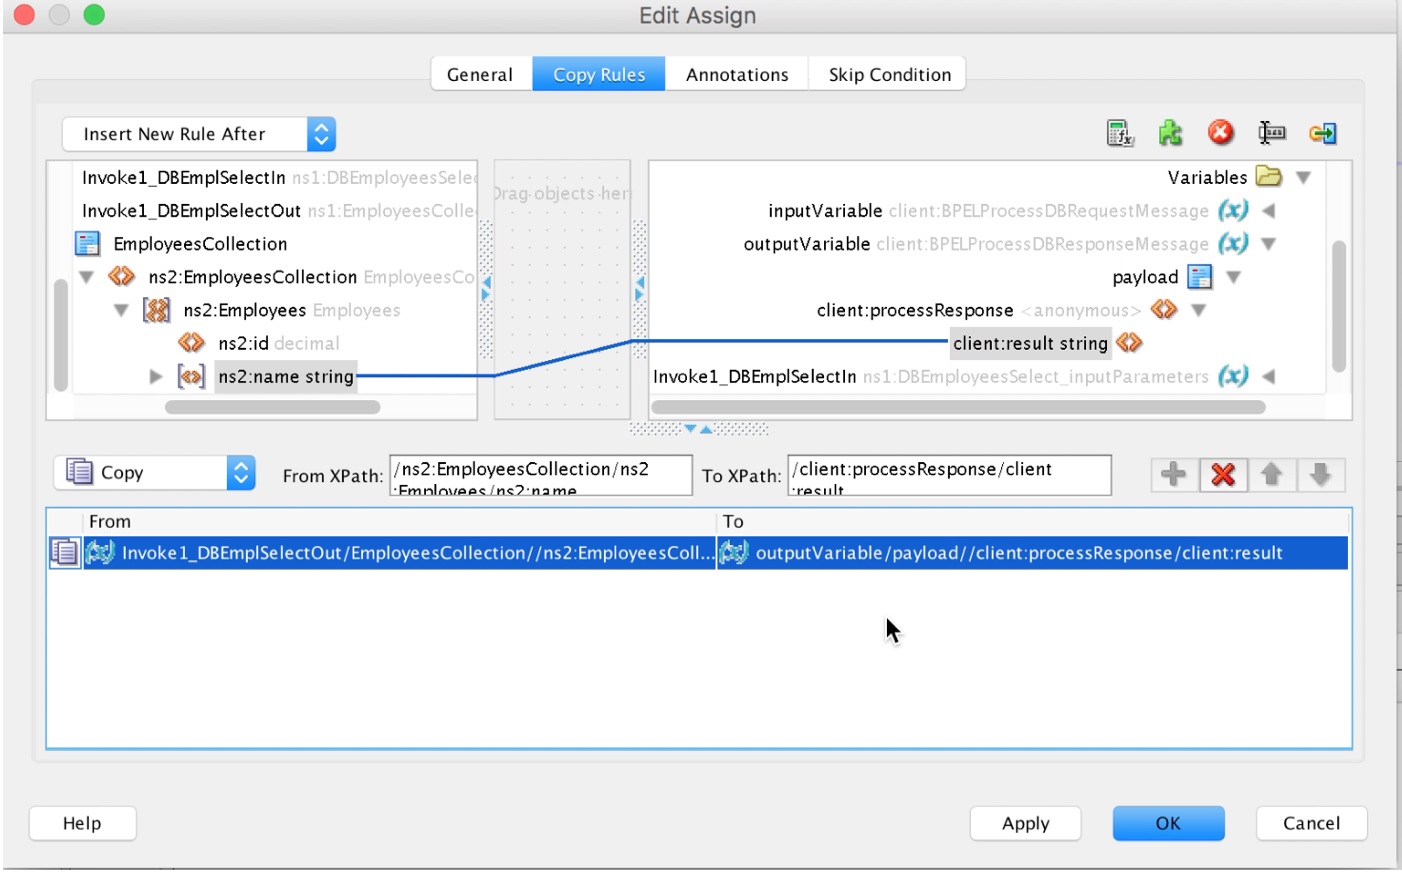
The mapping for this activity should be as follows: The result of the invocation, we assign it to the output variable of our process
Click OK Our orchestration now looks like this:
Deploying the solution
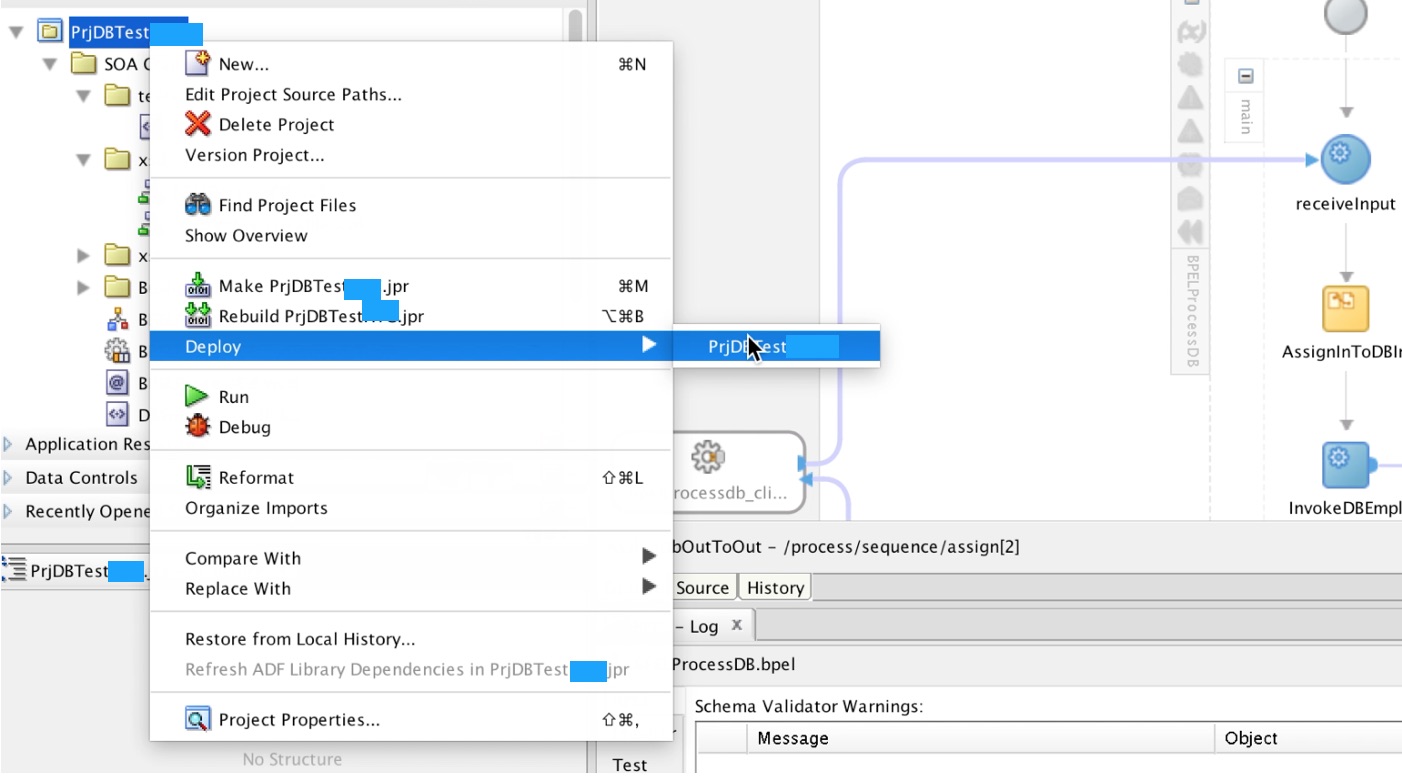
Right click on our project, we select Deploy>>Profile
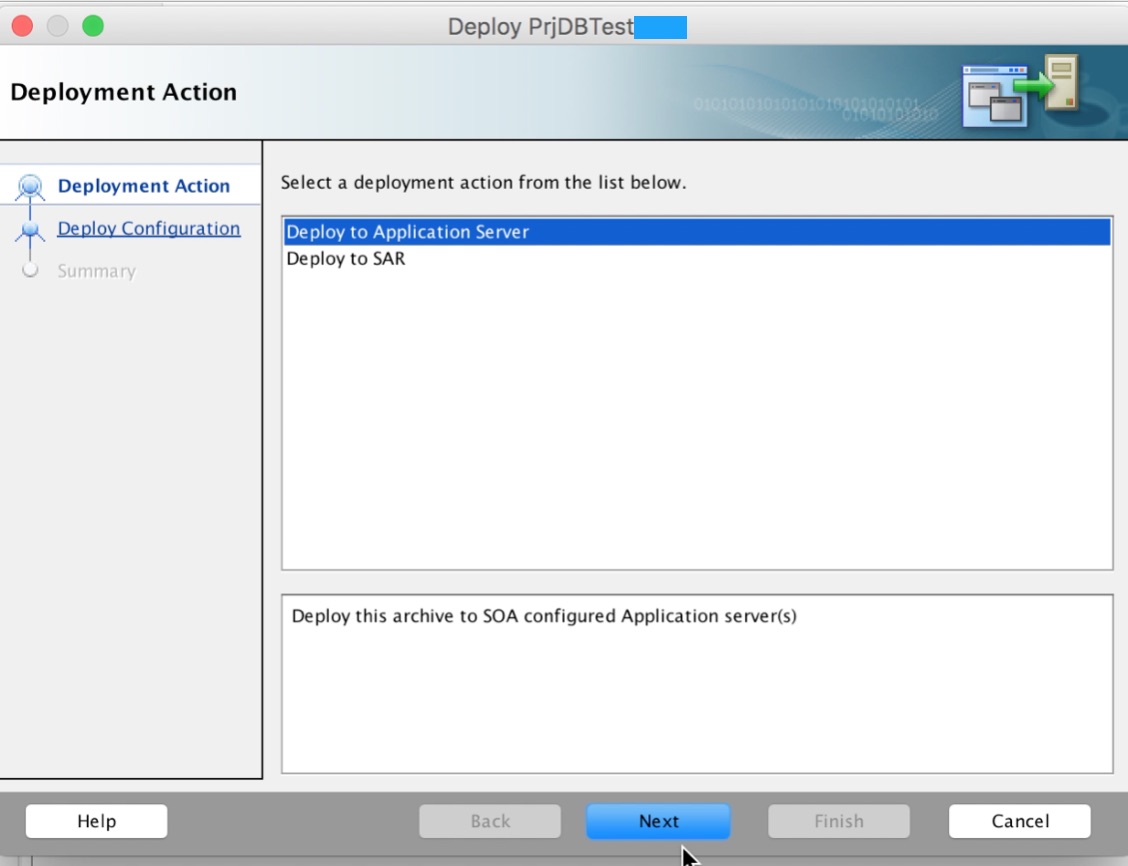
Select> Deploy to Application Server, Next
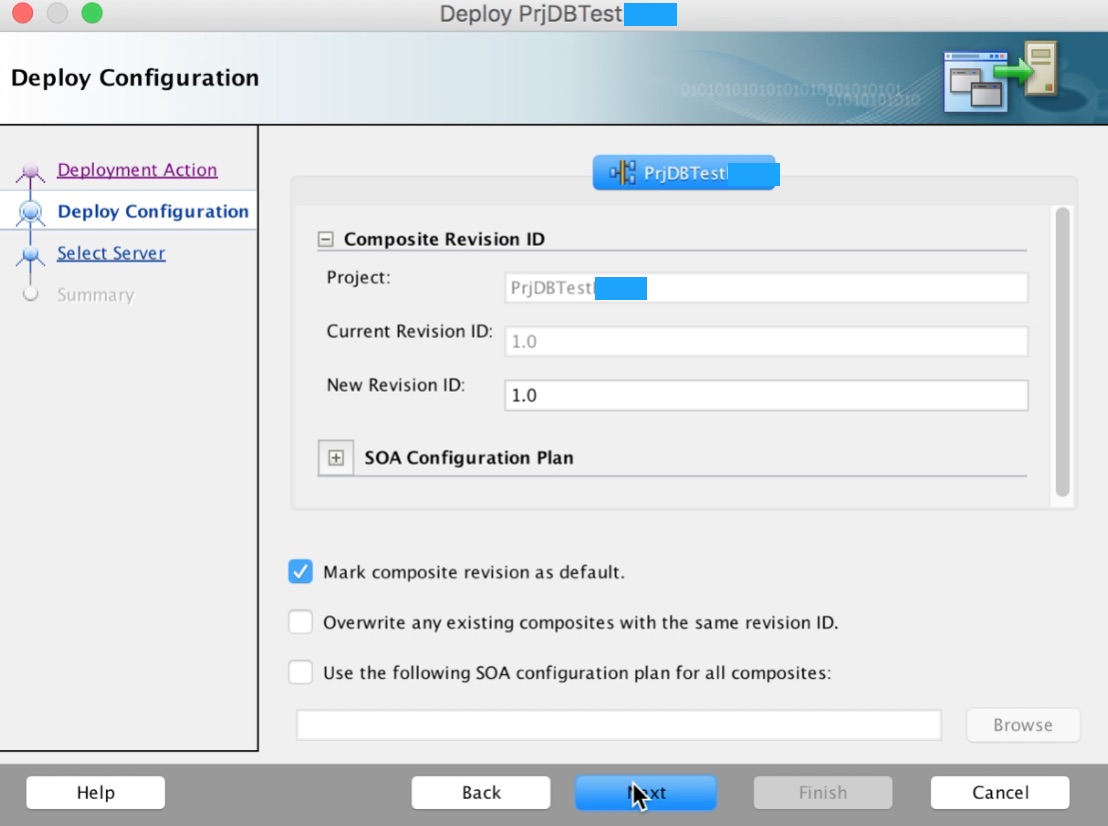
We establish version details of our deployment, click Next
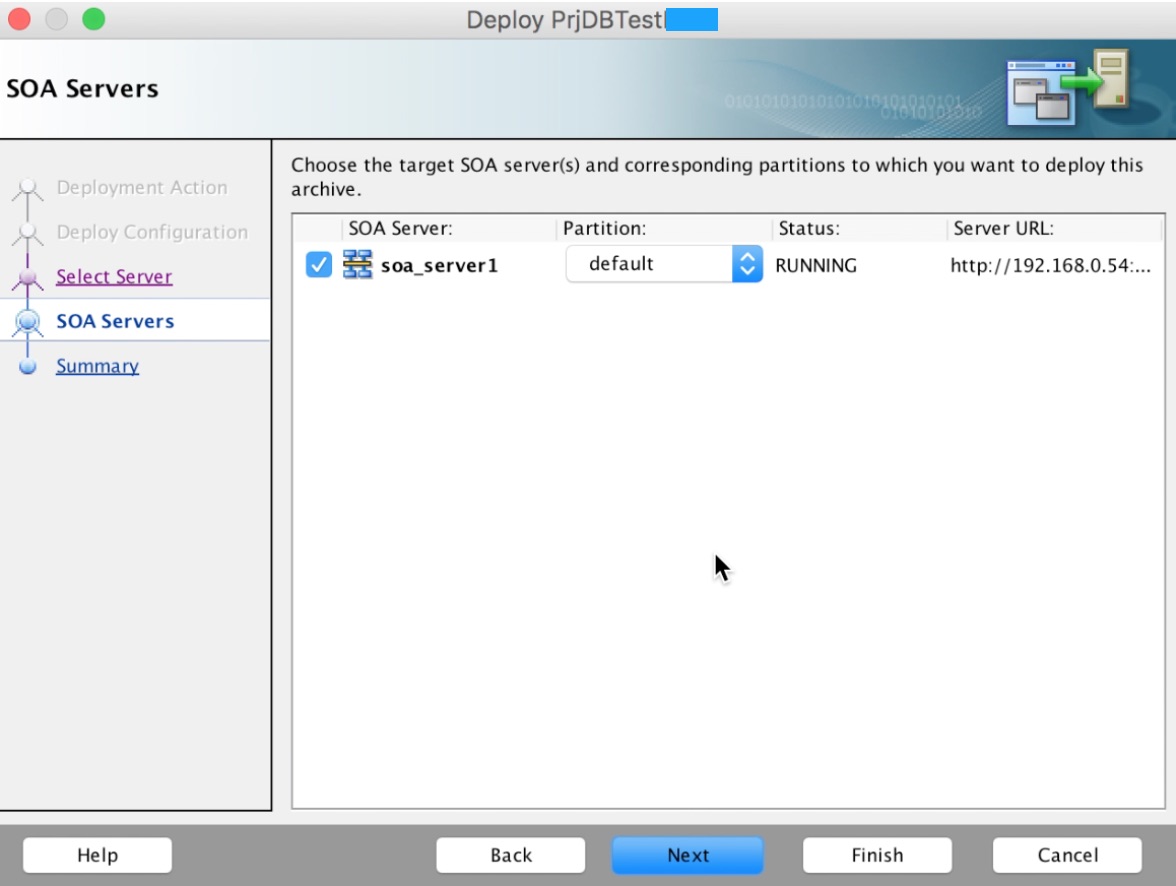
Select our application server and locate the SOA instance for deployment, Click Next
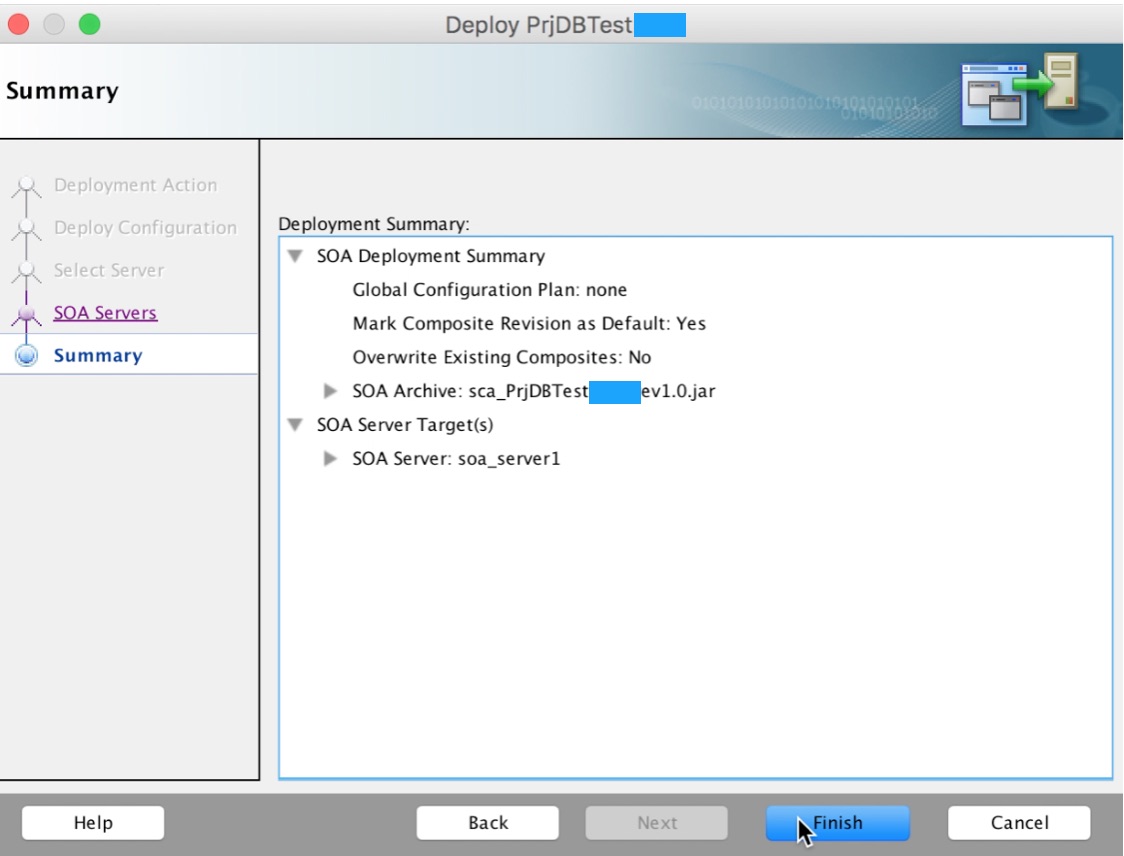
Click Finish
We will see a message like the following when the deployment is finished:

Performing execution tests from EM:
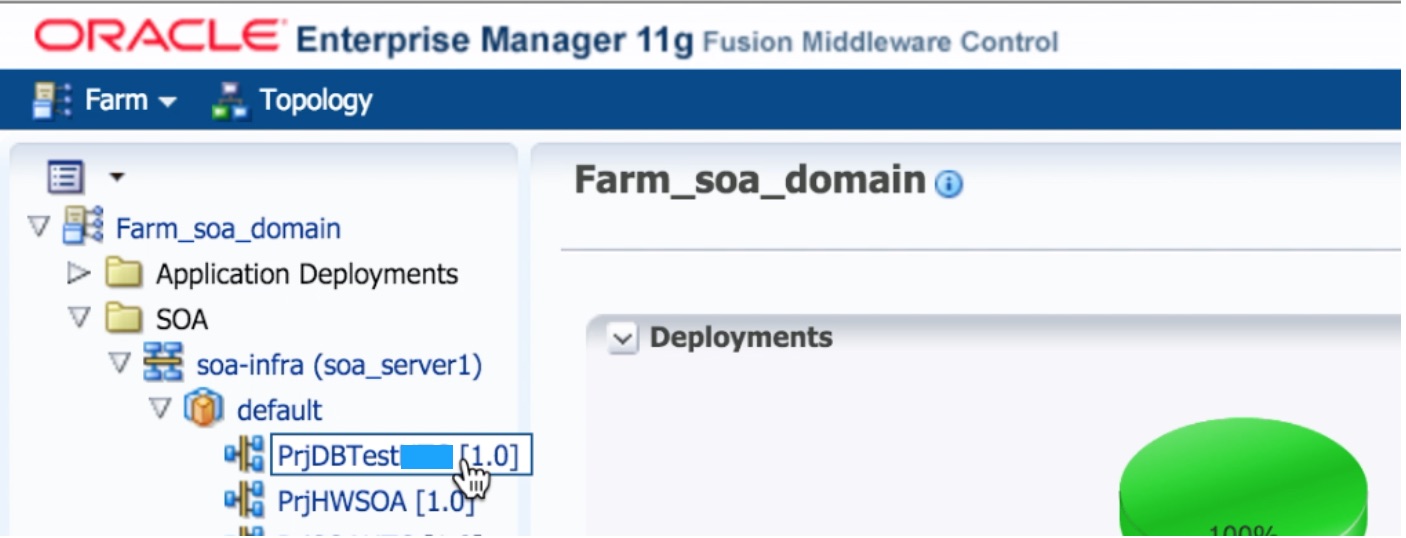
We locate the newly deployed project
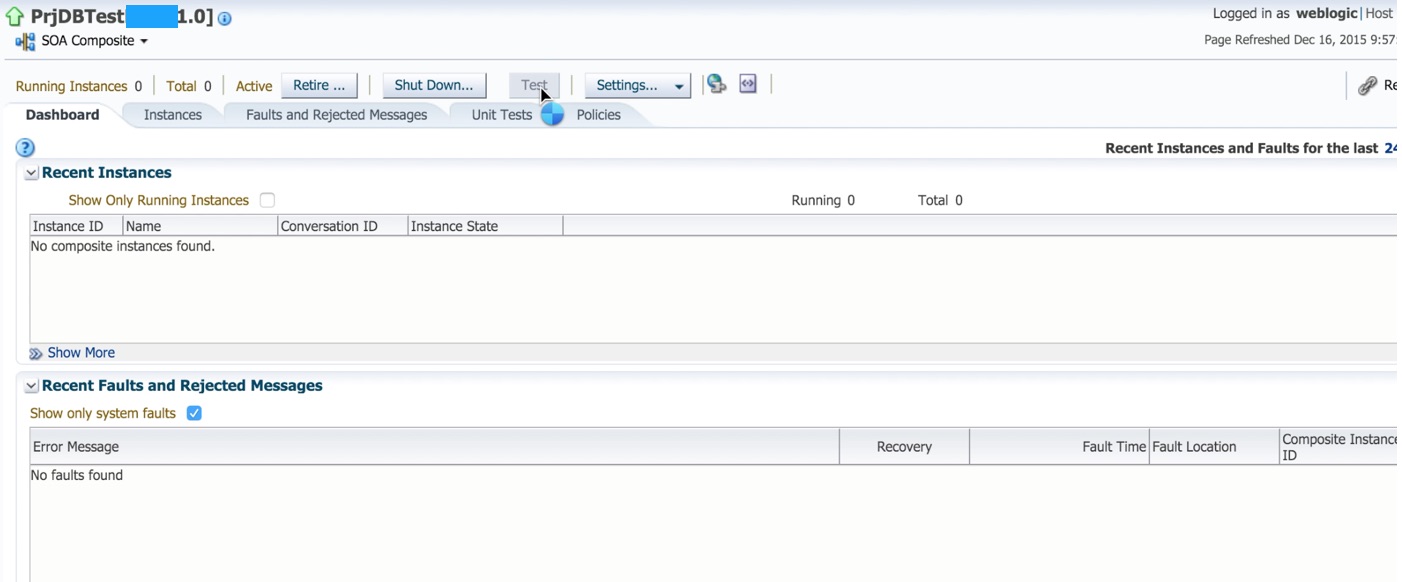
Click en Test:
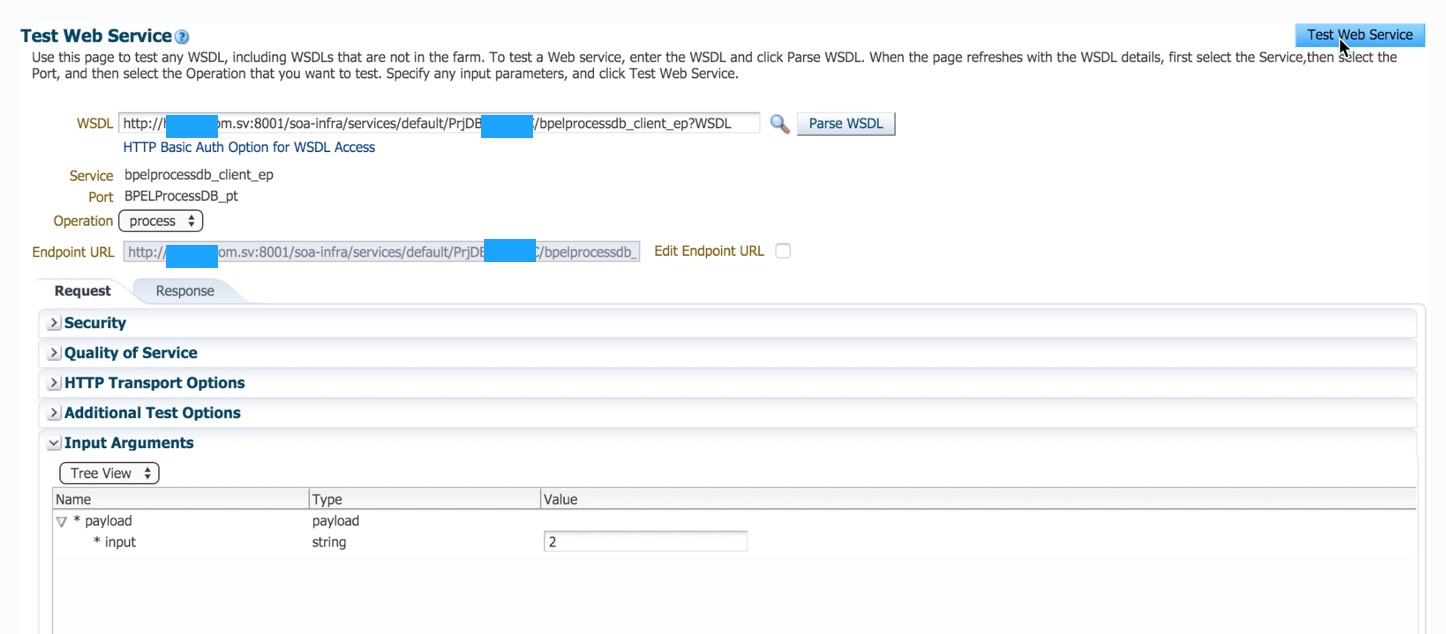
We send the parameter to start our orchestration:
Response generated:
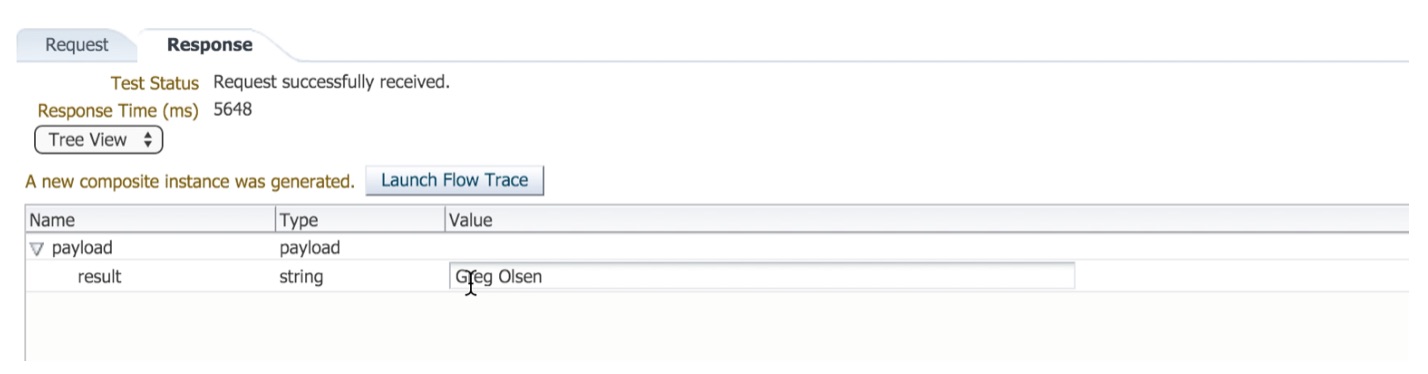
Request sent with parameter 1
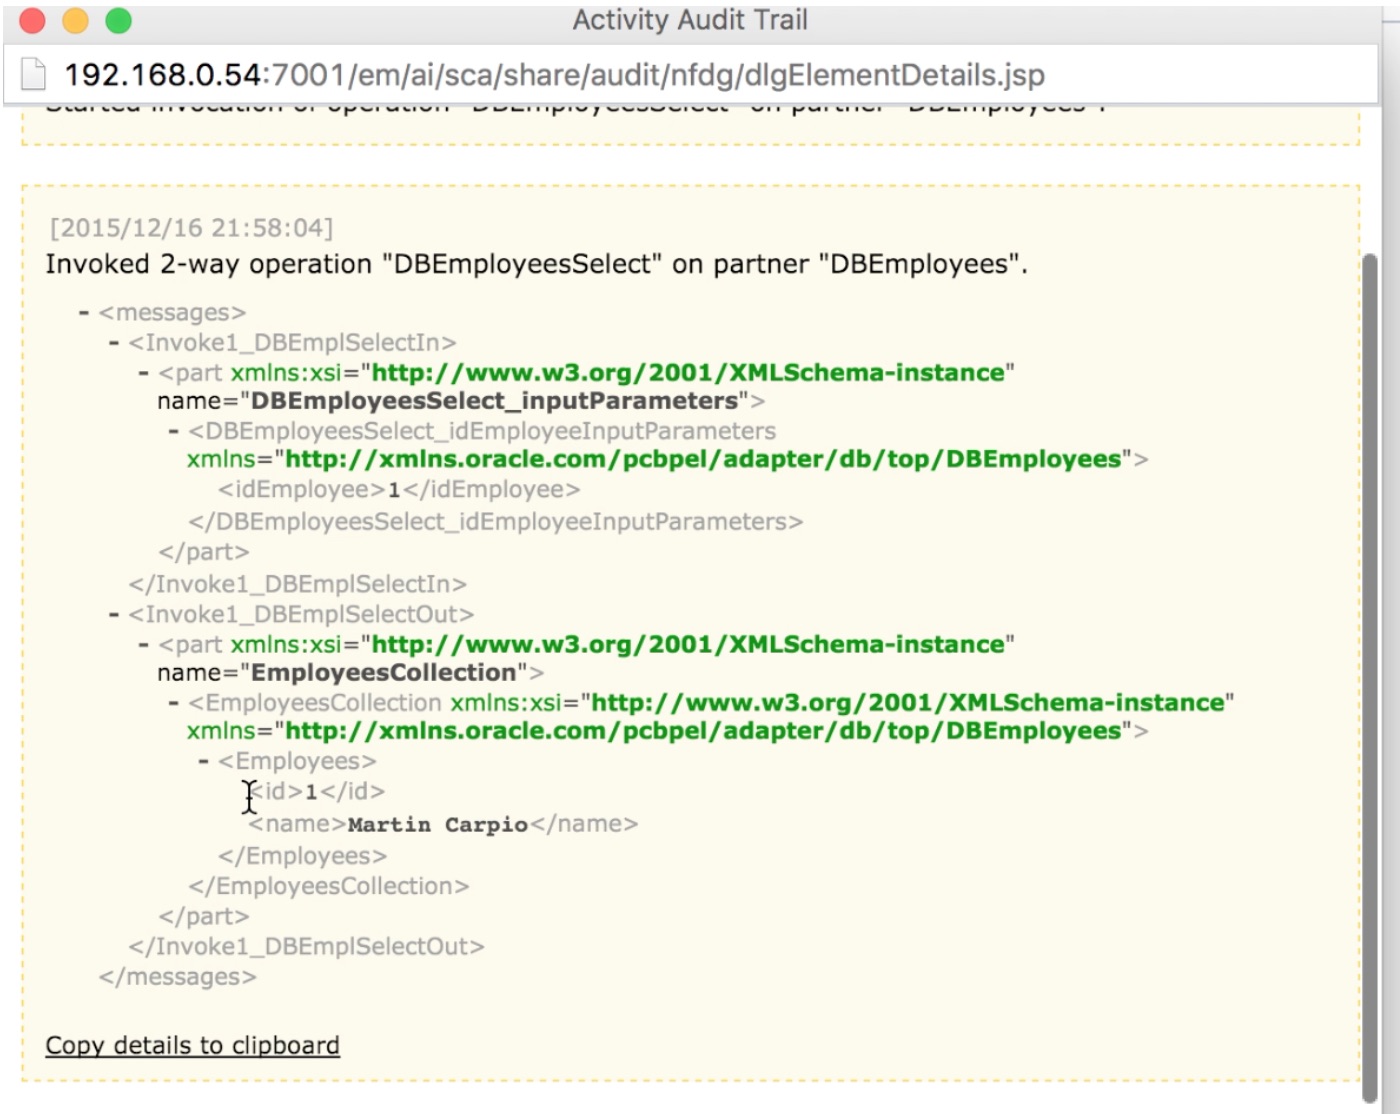
We see the audit details of the invocation:
Done!, You have already set up and implemented a compound with an orchestration and its database adapter, I hope it works for you; SUCCESS!

