Next lines are intended to show you how to install WebLogic 12c and creating your first WebLogic Cluster step by step, besides to get server ready for Java EE deployment.
Assumptions:
- JDK installed in environment with correctly PATH definition.
- Installation is performed by oracle user.
- Unix Operating System certified by vendor .
Installing WebLogic Server 12c
Let’s start with these steps:
Server 1:
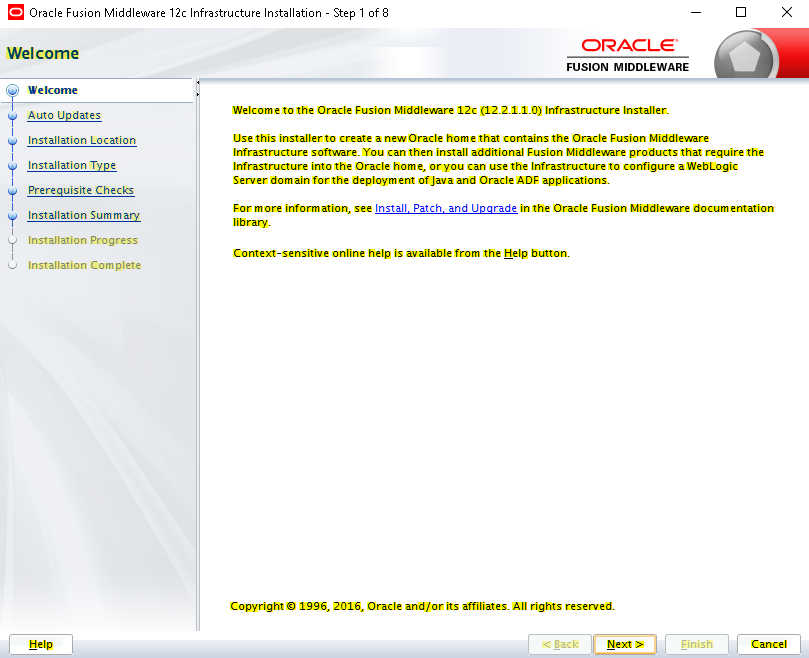
1. Start installer as shown bellow:
$ java -jar fmw_12.2.1.1.0_infrastructure.jar2. Welcome screen appears, Click Next:
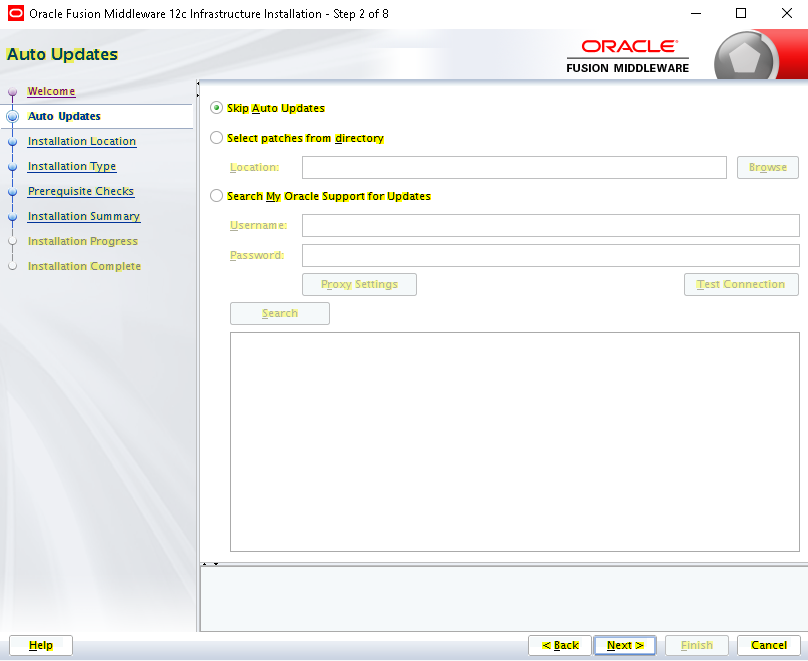
3. Skip this step, Click Next:
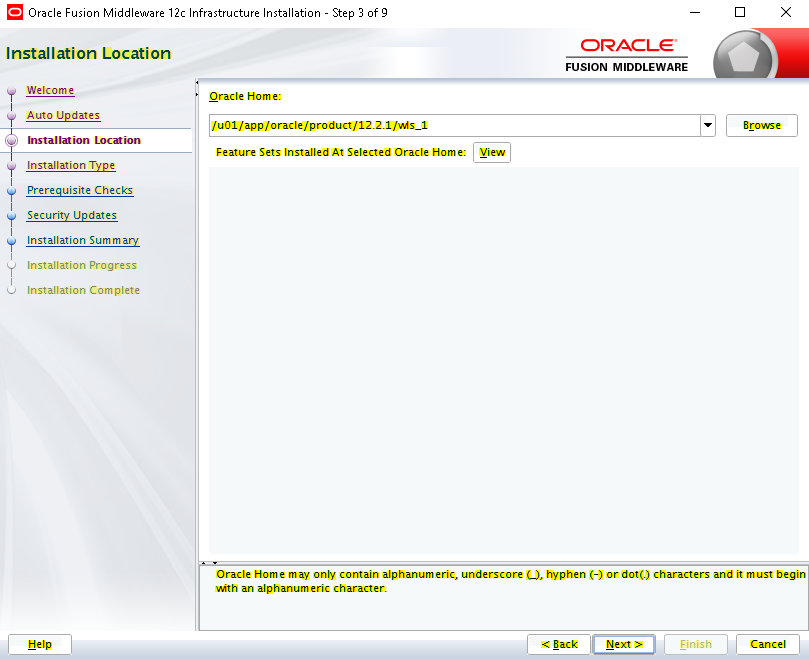
4. Specify a location for Oracle Home, this place is where the binary files will be located, click Next:
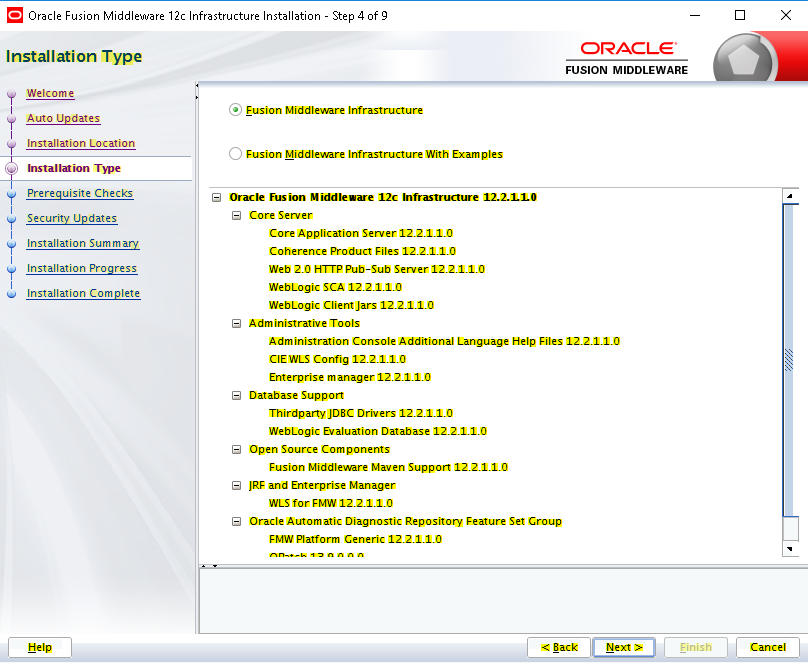
5. Choose Installation type, in this example our selection is Fusion Middleware Infrastructure without examples, click Next:
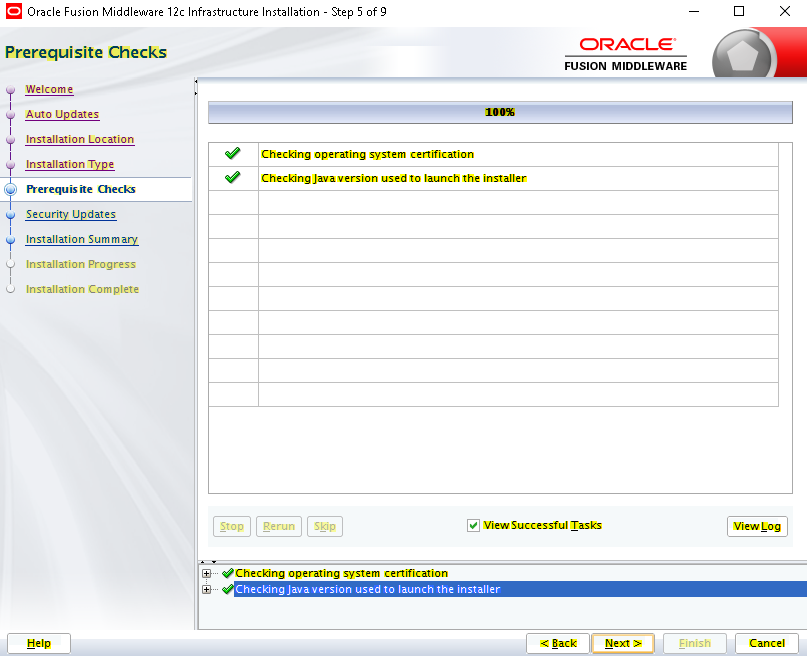
6. Once prerequisites checks are done, Click Next:
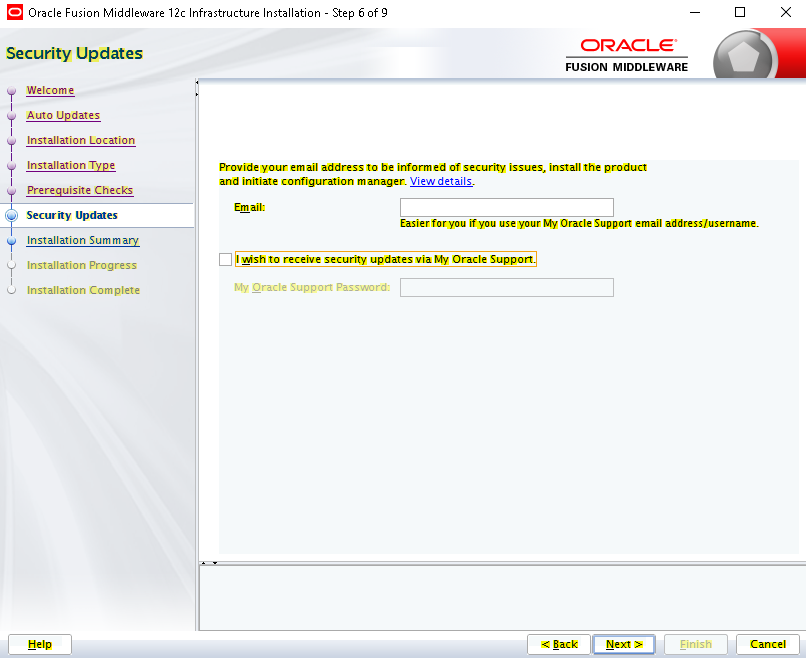
7. Skip this step, Click Next:
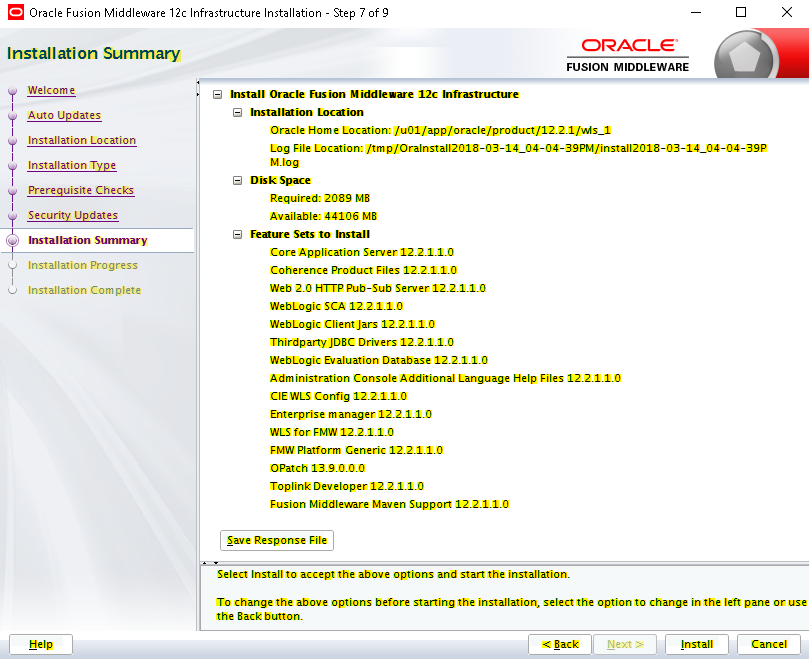
8. Double check installation summary, Click Install:
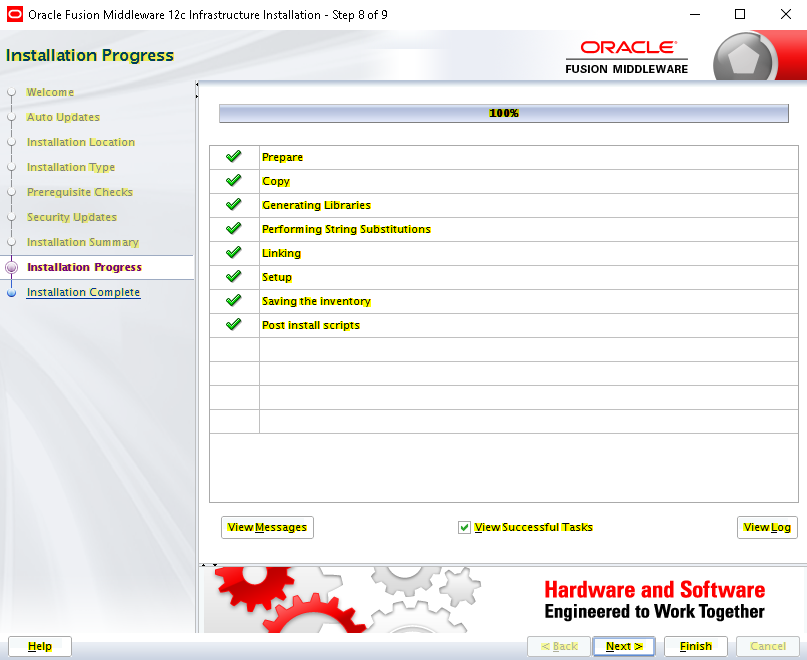
9. Once the installation is finished, Click Next:
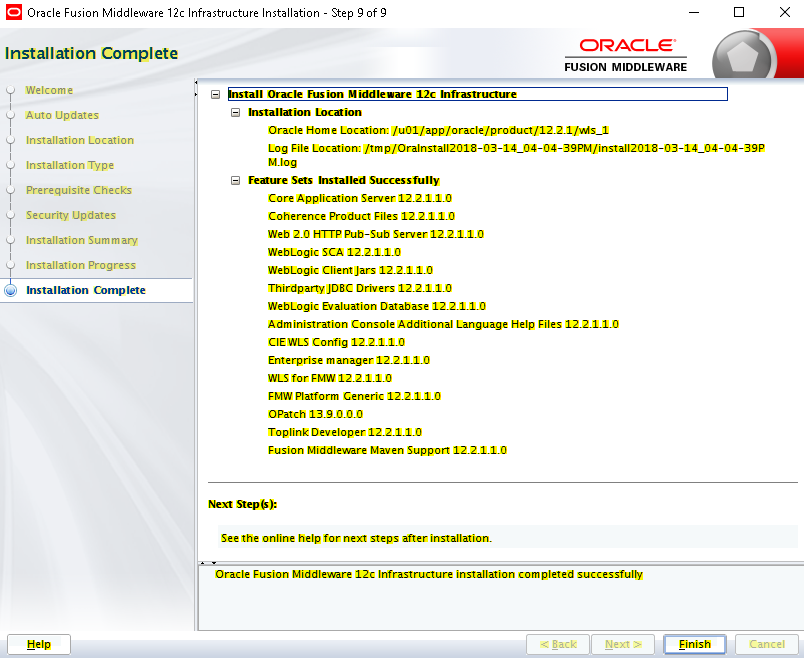
10. Here’s a installation summary, Click Finish:
Server 2:
Perform same steps as server 1.
Note: Oracle Home location where binary files will be installed must be the same as Server 1, due to pack and unpack activities that will be done later.Creating WebLogic Domain
Server 1:
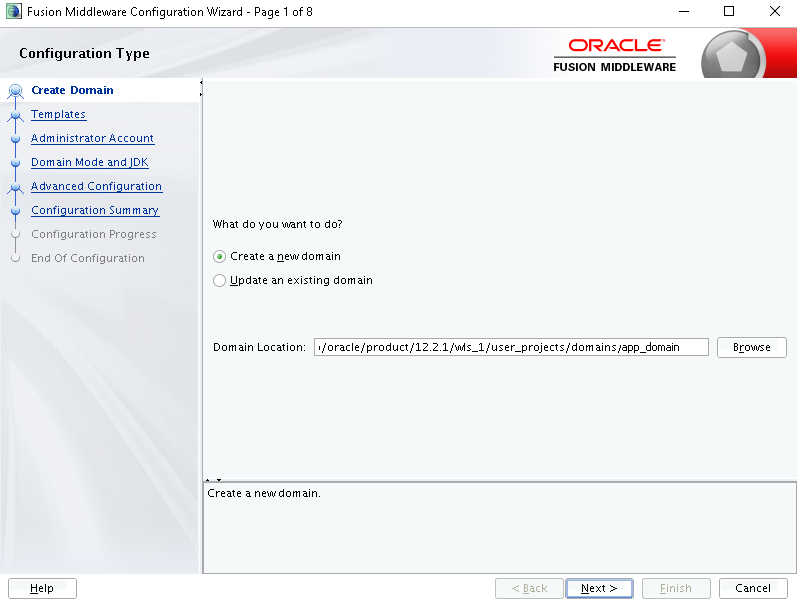
1. Execute next command to start domain creation:
$ cd /u01/app/oracle/product/12.2.1/wls_1/oracle_common/common/bin $ sh config.sh2. We are going to create a new domain, so select the first option, and then specify a domain name (app_domain for this example) as shown bellow: Click Next:
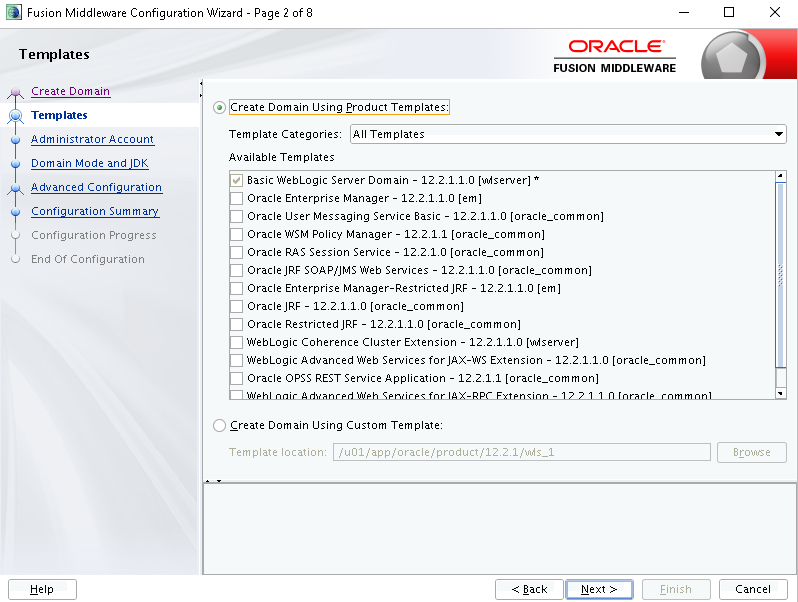
3. If required, you can select another template for creating this domain; for this example we’ll use default template, Click Next:
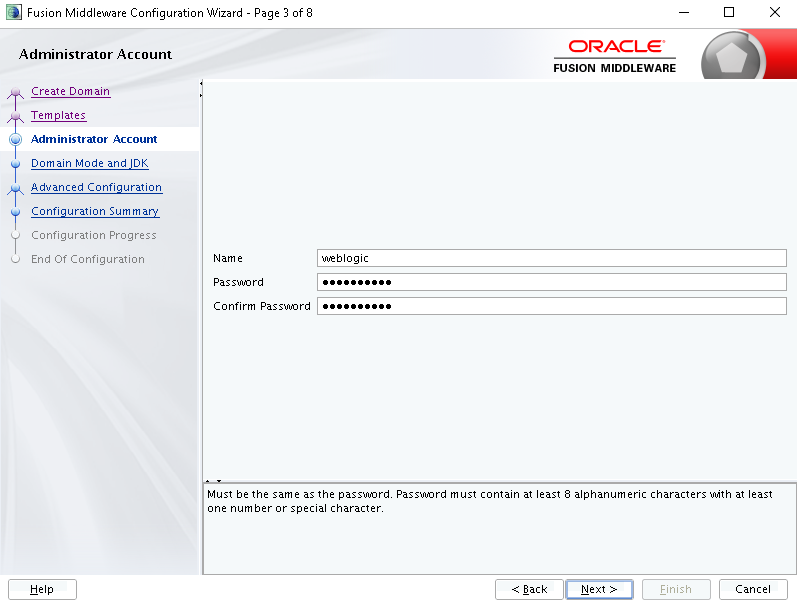
4. You must specify the name and password for administrator account. This is the super user for our entire domain, Click Next:
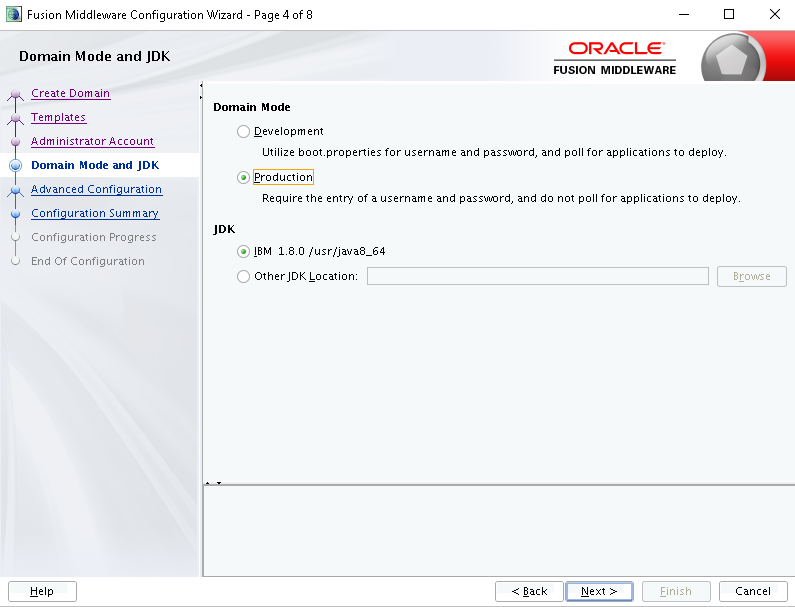
5. At this point you must select a JDK and domain Mode. For this example our domain mode will be Production, Click Next:
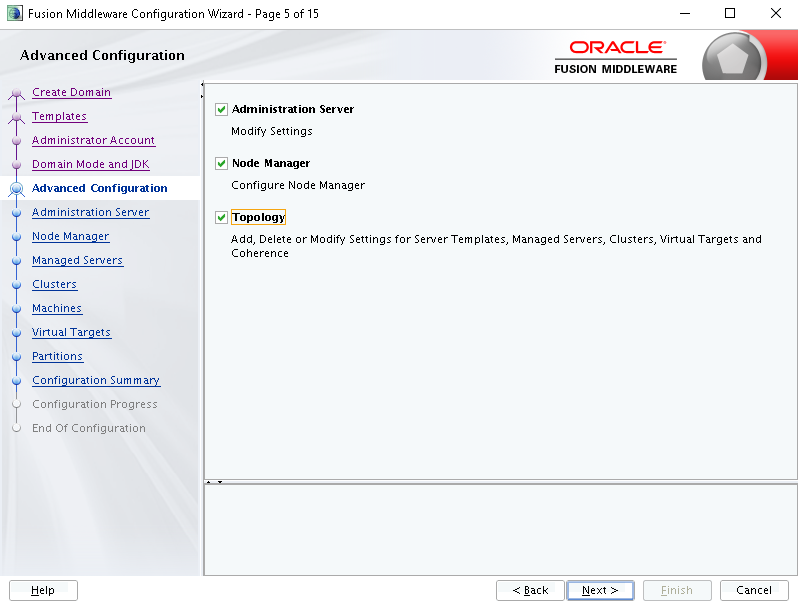
Note: If this domain is intended for development tasks, choose development mode, so you can have more log detail and low server access.6. Next step, Choose options to configure: «Administration Server», «Node Manager» and «Topology», Click Next:
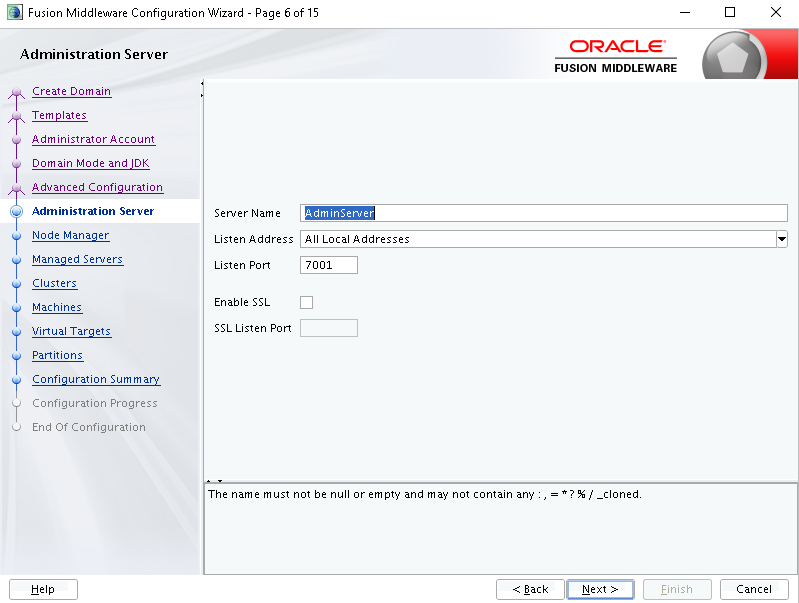
7. Now we can configure our administration server. For this example we’ll use default configuration, Click Next:
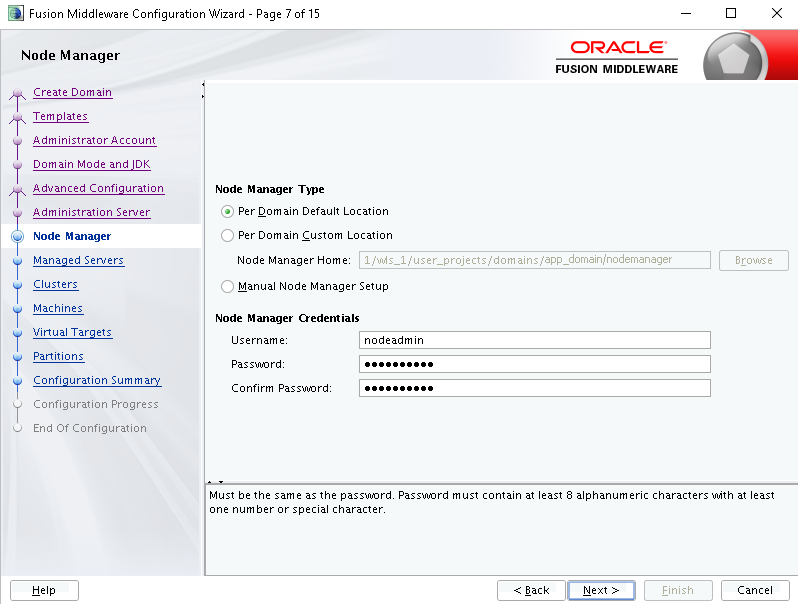
8. The Nodemanager configuration appears, select options as shown bellow for Node Manager Type and you can define username and password, Click Next:
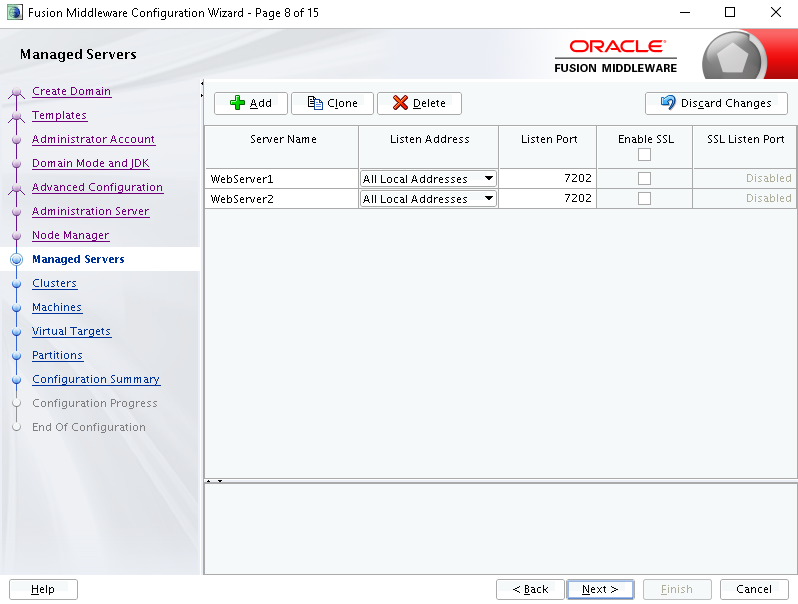
9. Add Managed Servers that will be part in the Cluster, For this example we’ll add two, one for each node, with same port:
WebServer1 -> Server1
WebServer2 -> Server2
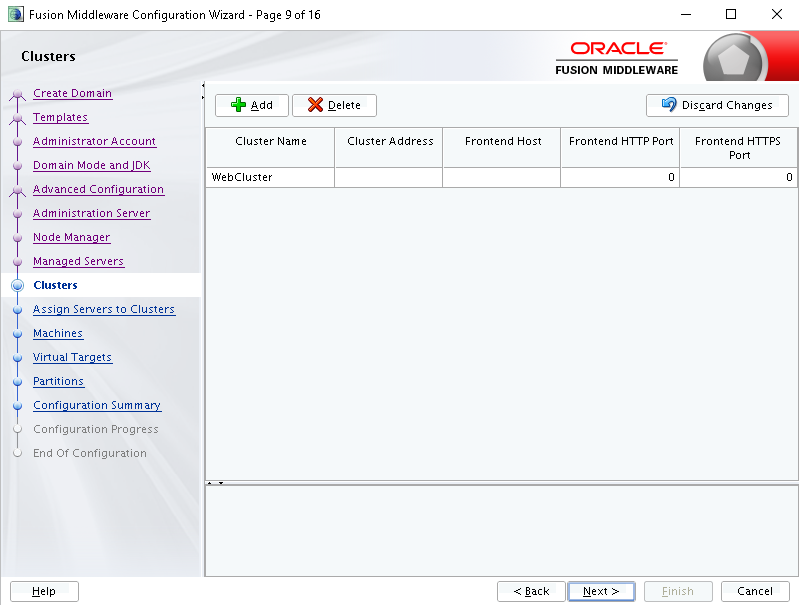
10. Add a new Cluster as shown bellow, Click Next:
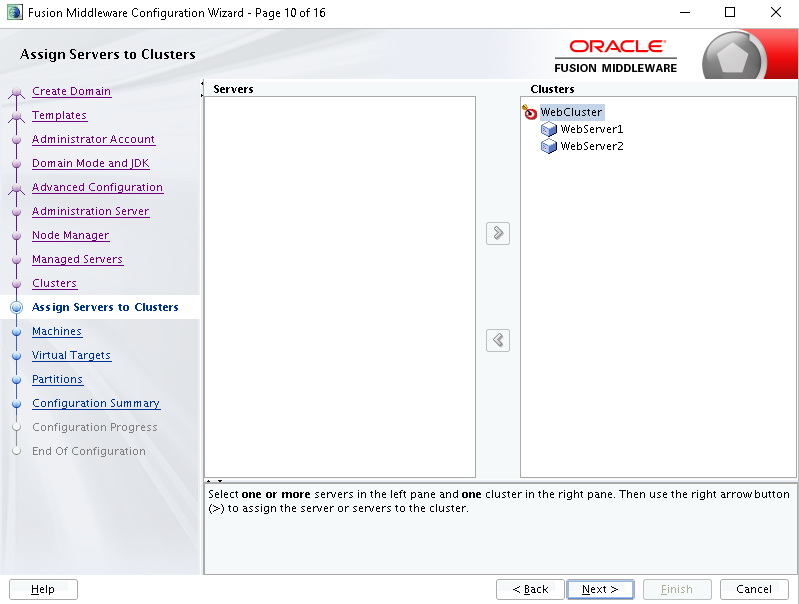
11. Next step is related to cluster members, select managed server to the left and add it to the Cluster created before, the configuration as shown bellow, Click Next:
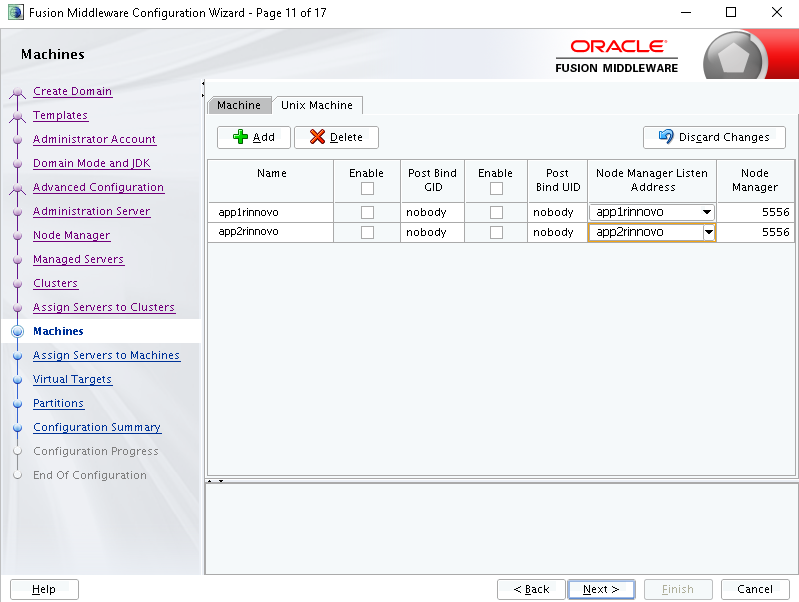
12. Let’s create two machines, which are a logical representation for a physical node, this is important for administrative tasks through nodemanager. The machine configuration must be as shown bellow, Click Next:
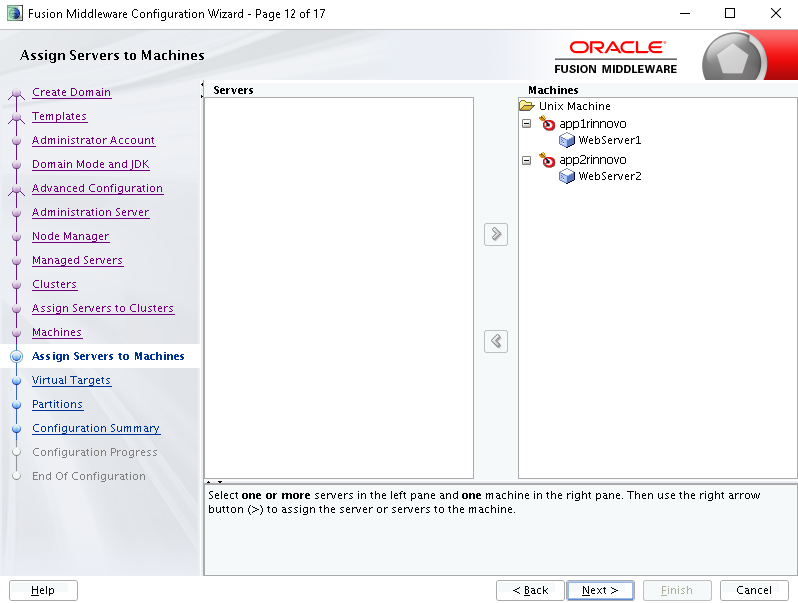
13. Let’s add managed server to each machine from the left pane to the right, the final configuration must be done as shown bellow,Click Next:
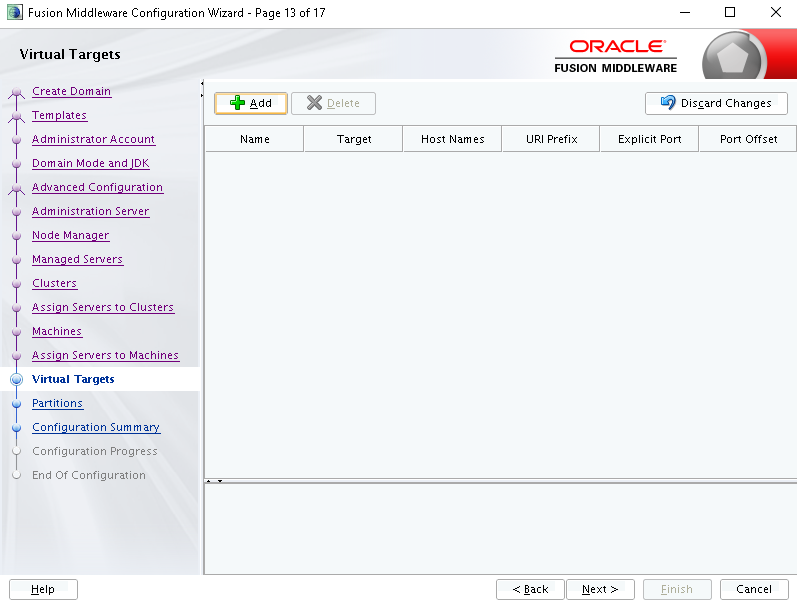
14. Skip Virtual Targets , Click Next:
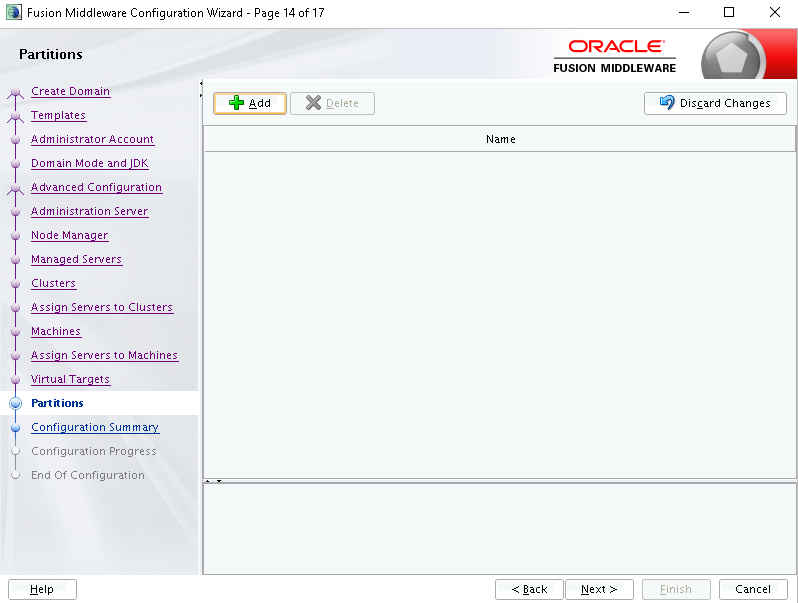
15. Skip Partitions step, Click Next:
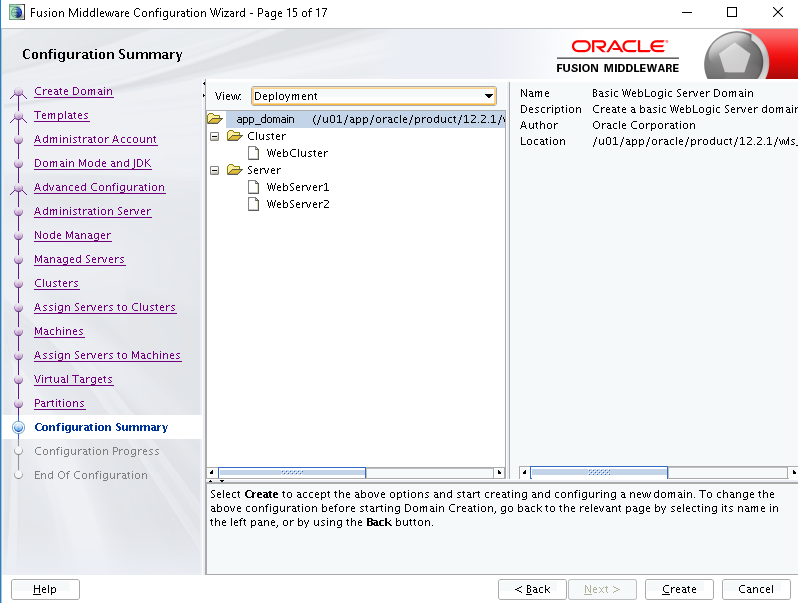
16. Double check the configuration summary for our Domain, press Create button for creating our WebLogic domain:
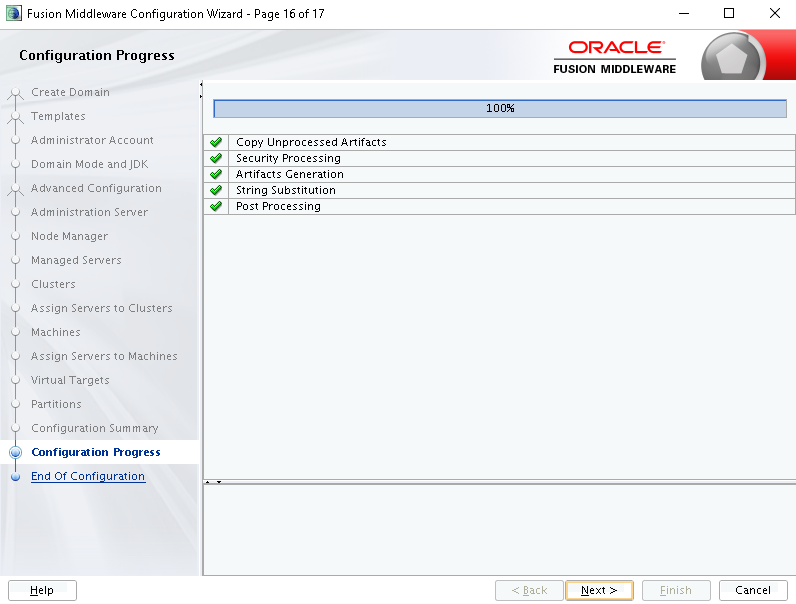
17. Once the configuration completes until 100%, Click Next:
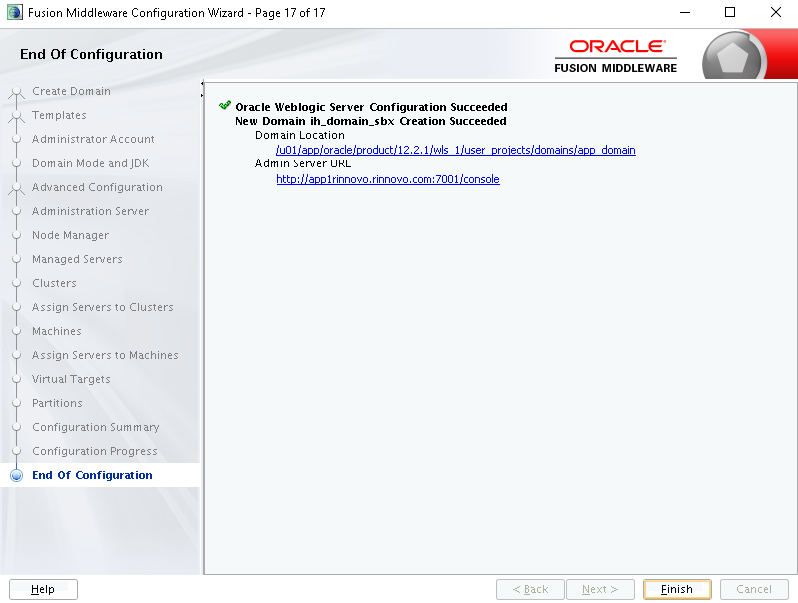
18. Finally, URL for administration console ] and Domain location are shown, Click Finish:
At this point we have performed next steps:
- Software installation for Server 1 and Server 2
- Domain Creation for Server 1
Now we must to take the domain configuration from Server 1 to Server 2, required for cluster configuration and right managed server administration.
Server 2 – Domain Configuration
We are going to use pack and unpack utilities in order to take Server 1 Domain configuration.
Server 1:
Run pack command as shown bellow:
$ cd /u01/app/oracle/product/12.2.1/wls_1/oracle_common/common/bin $ sh pack.sh -managed=true -domain=/u01/app/oracle/product/12.2.1/wls_1/user_projects/domains/app_domain -template=/u01/app/oracle/product/12.2.1/wls_1/user_projects/domains/app_domain-template.jar -template_name=appDomainTemplateWhen command completes, we see a message like this: «succeed: close template«.
JAR file is generated as result of this execution. Now, we must to transfer this Jar file to Server 2.
Server 2:
Run unpack command utility in Server 2 using transferred Jar file in previous step:
$ cd /u01/app/oracle/product/12.2.1/wls_1/oracle_common/common/bin $ sh unpack.sh -domain=/u01/app/oracle/product/12.2.1/wls_1/user_projects/domains/app_domain -template=/u01/app/app_domain-template.jarFor «-template» parameter specify the JAR file location and it’s name.
When command completes, we see a message like this: «succeed: close template«.
Starting WebLogic Server
Before the last step for this configuration, starting WebLogic Server is required, run commands bellow:
$ cd /u01/app/oracle/product/12.2.1/wls_1/user_projects/domains/app_domain/bin $ sh startWebLogic.shIf you want to run this process in background, execute nohup command like this:
$ cd /u01/app/oracle/product/12.2.1/wls_1/user_projects/domains/app_domain/bin $ nohup sh startWebLogic.sh &Let’s wait until RUNNING message appears for server state.
Server 2 – Machine configuration
Let’s enroll the machine in Server 2 with our domain, so we’ll can connect to node manager and perform remote administration for our managed servers.
Steps:
Start WLST (Weblogic Scripting Tool)
$ sh wlst.shConnecto to Admin server (which must be running, our previos step)
wls:/offline> connect('weblogic','password','t3://app1rinnovo.rinnovo.com:7001')For successful connection we received a message like this:
«Successfully connected to Admin Server «AdminServer» that belongs to domain ‘app_domain’.»
Run enroll command:
wls:/offline> nmEnroll('/u01/app/oracle/product/12.2.1/wls_1/user_projects/domains/app_domain','/u01/app/oracle/product/12.2.1/wls_1/user_projects/domains/app_domain/nodemanager')Message for successful enrollment: «Successfully enrolled this machine with the domain directory at /u01/app/oracle/product/12.2.1/wls_1/user_projects/domains/app_domain.»
Exit from WLST
wls:/offline> exit()Start Node Manager (Both servers)
In order to manage resource in our domain from Administration console, we must start Node Manager on each server, like this:
$ cd /u01/app/oracle/product/12.2.1/wls_1/user_projects/domains/app_domain/bin $ sh startNodeManager.shSending process to background with nohup:
$ cd /u01/app/oracle/product/12.2.1/wls_1/user_projects/domains/app_domain/bin $ nohup sh startNodeManager.sh > nohupNM.out &Starting Managed Servers
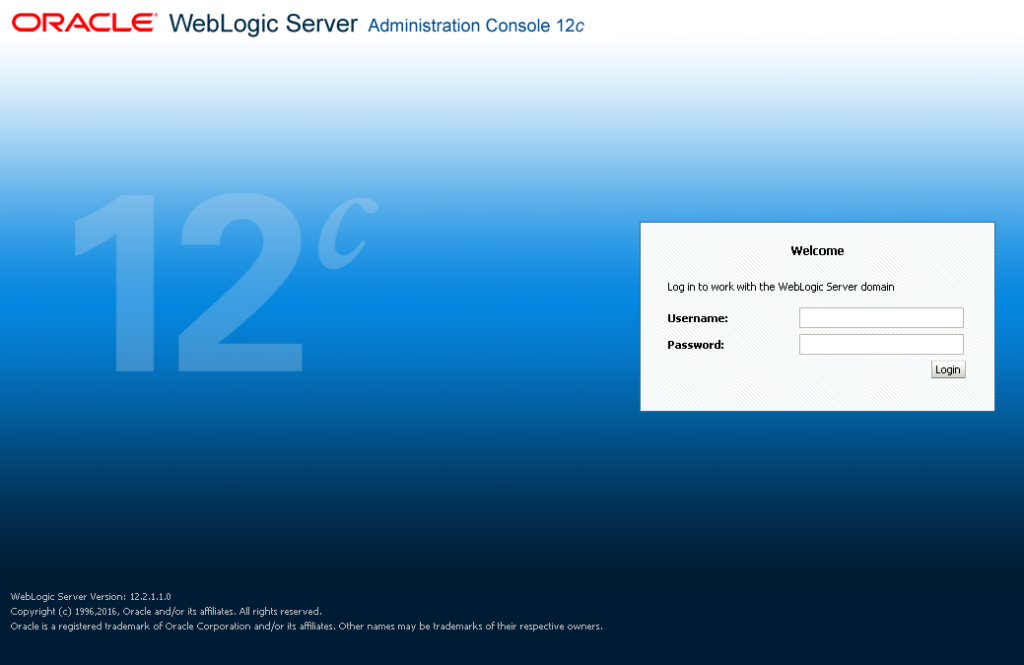
Access to Weblogic Administration console, our URL is like this:
http://app1rinnovo.rinnovo.com:7001/console
Provide your credentials:
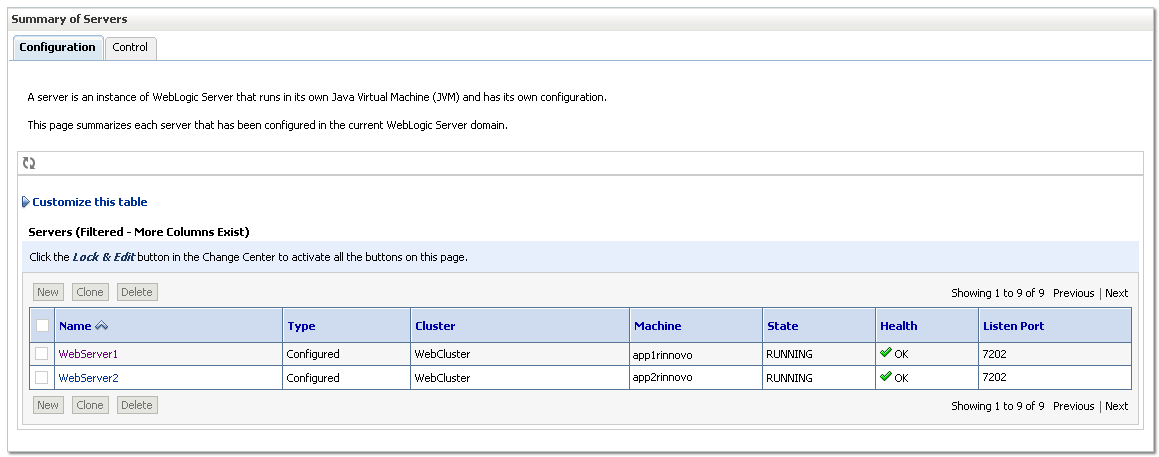
Click Environment (left pane) -> Servers -> Tab Control
Select Managed server to start, the click «Start«.
Now our servers are RUNNING :
There you go, weblogic installation and cluster configuration.


