Oracle provides 2 types of Data source for managing connections to Oracle RAC: the Multi Data Source and the most recent Active GridLink for Oracle RAC introduced since version 10.3.4 of Weblogic. Of these 2 options, GridLink stands out for administrative reasons, easy management, response to FAN events to provide Fast Connection Failover and that obtains real-time information from the RAC through ONS.
Now let’s see the steps to create a GridLink Data Source:
For this example, a 2-node RAC is assumed and the Weblogic version is 12c.
- Enter the Weblogic console and expand the Services node in the left tree and enter the Data Sources option.
- Press the New button and select from the «GridLink Datasource«list.
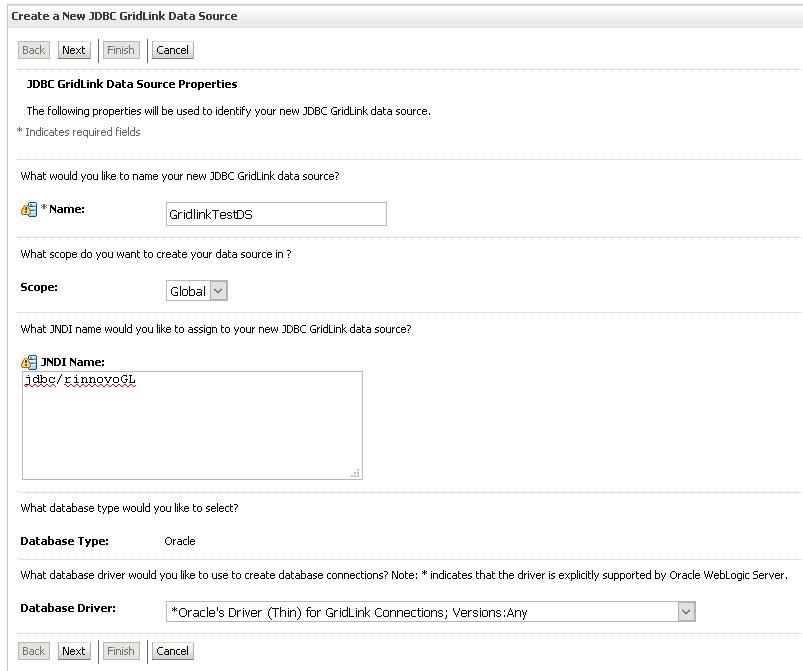
- In the window that appears below you must specify the name of the Data source, the name of JNDI, Next:
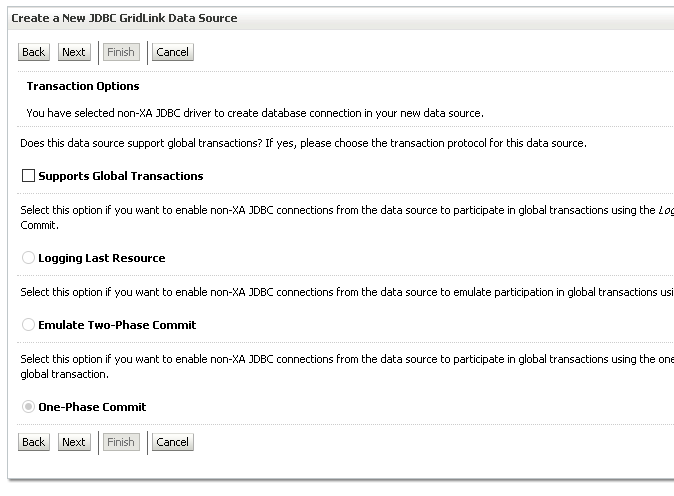
4. Uncheck the Global Transactions support option, Next:
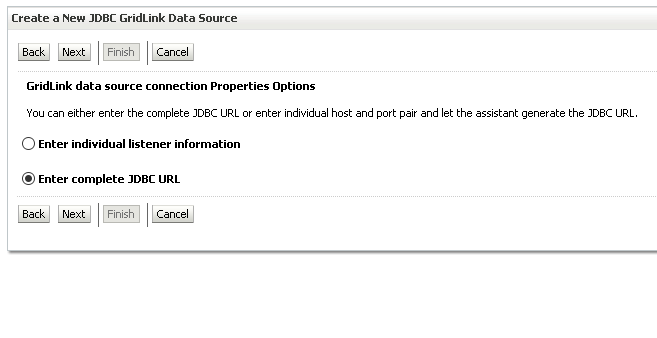
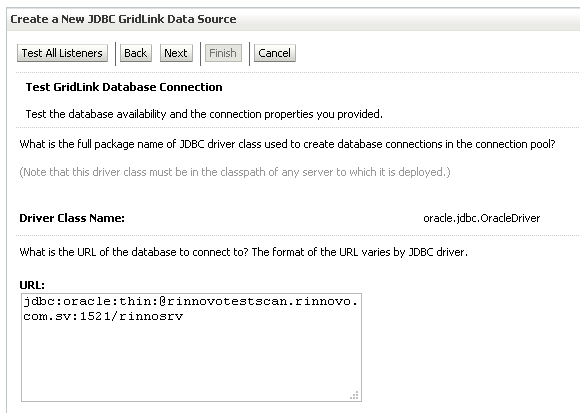
5. Select the option to fully enter the JDBC URL, Next:
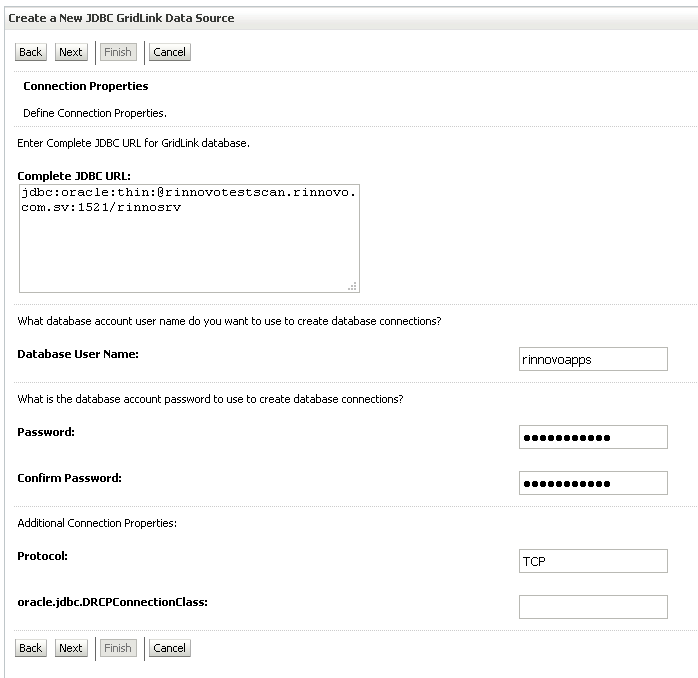
6. Then we enter the connection URL, the user and password of the scheme for which this Data Source will obtain connections.
The format of the connection URL must be:
jdbc:oracle:thin:@{scan-listener-host}:{scan-listener-port}/{service-name}
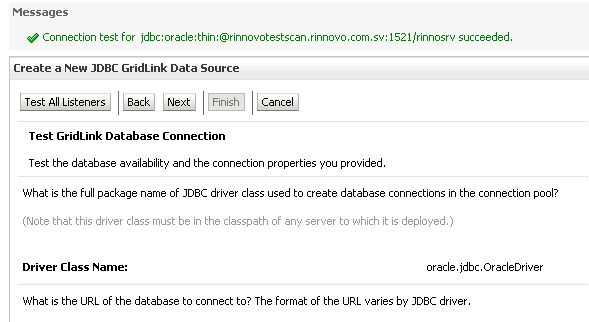
7. Then we test that the connection to the Database RAC works, Next:
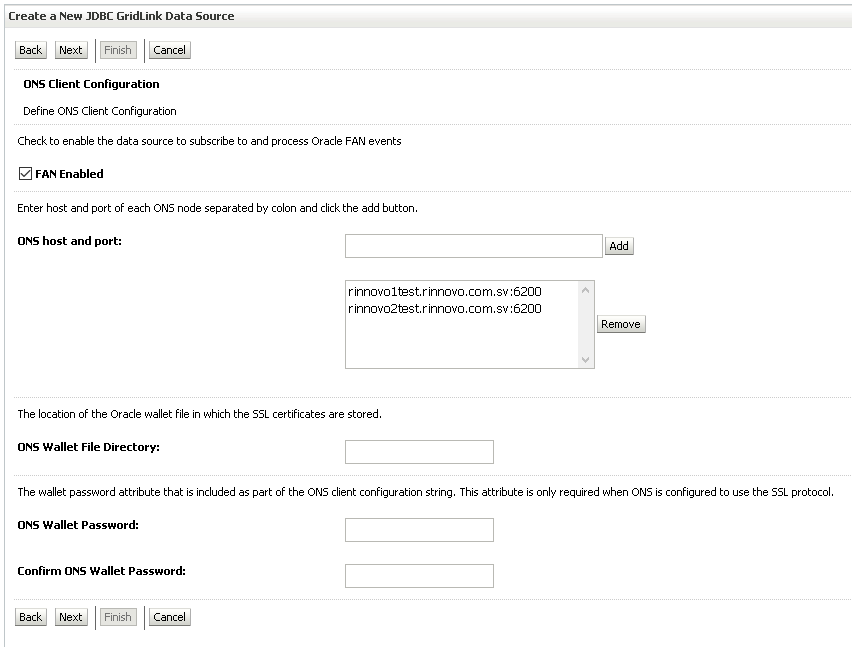
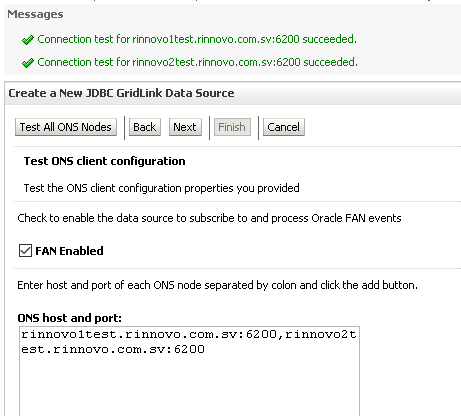
8. In the next step we mark the FAN option and add each node of the RAC and the remote ONS port, Next:
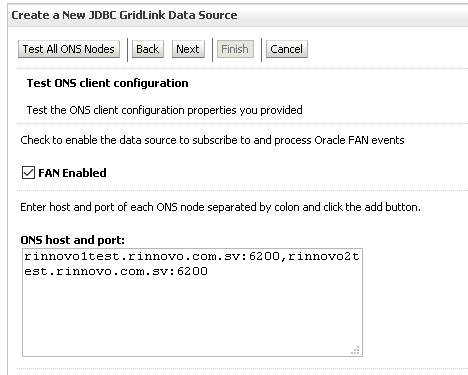
9. Now we are going to test the remote communication with the ONS ports, Next:
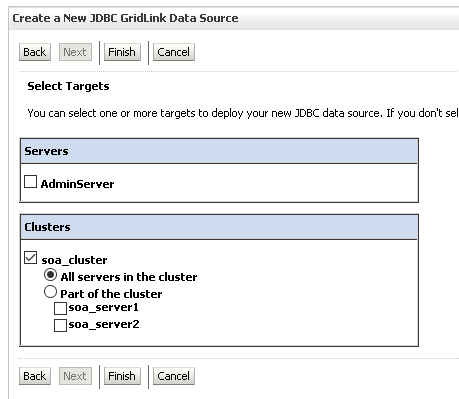
10. Finally we select the final destination of this Data Source, Finish:
And that’s how easy a Gridlink Data source is created.

